In Dynamics NAV, it is extremely easy to navigate through data, remove default filters set by the system, and set your own filters to find or analyze your own data.
You have probably seen the following Navigate button in many places in Dynamics NAV:

You can actually see it on every single page that shows posted transactions, either in Posted Documents and/or in ledger entry pages.
When you push the Navigate button, a page will be display magically showing all the related posted documents and entries to the record from where you hit the Navigate button. This means that if you are ever wondering which transactions were related to an entry, Dynamics NAV will do the hard work for you and find anything related to that particular document number.
Earlier in this chapter, we created and posted Sales Invoice. If we open Posted Sales Invoice and hit Navigate, the following navigation page will be opened:
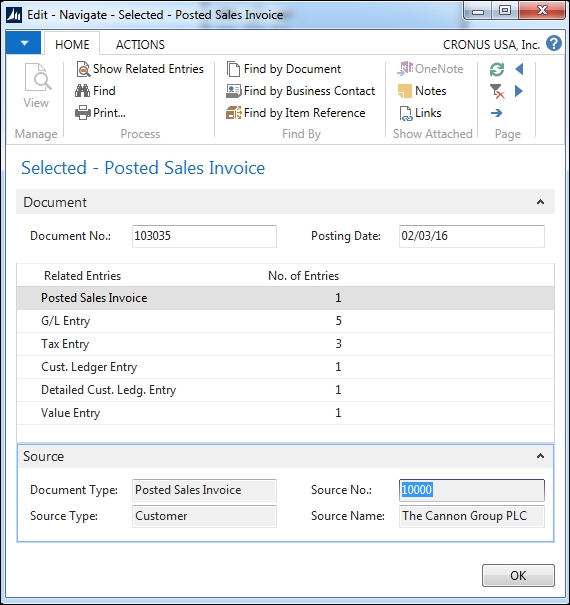
The navigation page is telling us that we can find a Posted Sales Invoice document, five G/L Entry records, three Tax Entry (VAT) records, one Cust. Ledger Entry, one Detailed Cust. Ledg. Entry, and one Value Entry table related to the Document No. field with the value of 103035 on the Posting Date field with the value of 2/03/2016.
Basically, when you posted this invoice, all these documents and entries were created.
If we want to take a look at any of the documents or entries, we have to select the information we want to look at and click on the Show button.
Note
The Navigate feature is used within Document No. and Posting Date. The Navigate feature will show all the posted documents and entries that have used the same Document No. and Posting Date. If you use the same numbering rules for, let's say, sales invoices and purchase invoices, the Navigate functionality may show you information about all the Sales Invoice and Purchase Invoice tables that have the same Document No. and Posting Date, although they may have no relation at all.
Note that there are three different ways in which you can navigate for information: Find by Document, Find by Business Contact, and Find by Item Reference. By default, the Find by Document method is used. This navigates using internal document numbers. You can use the Find by Business Contact method to navigate using External Document No. (the Customer PO number or the vendor invoice number, for example) or use the Find by Item Reference method to navigate using serial or lot numbers.
The Navigate functionality is extremely useful and is extended all over the application; it is used to drill down to detailed transactions of a specified entry. Instead of drilling down to the specific entries, sometimes, you just want to bring up a specific table related to the record you're looking at. For example, what if you want to bring up the customer card to check for some information when you're on the posted invoice document?
There is no need to close Posted Sales Invoice and exit out of whatever you're doing. The reason is because a relation exists; in the case of posted sales invoice, this is between posted sales invoice and the customer. The link is shown as a hyperlink on the page you are looking at. By clicking on the hyperlink, you will be directed to the right place.
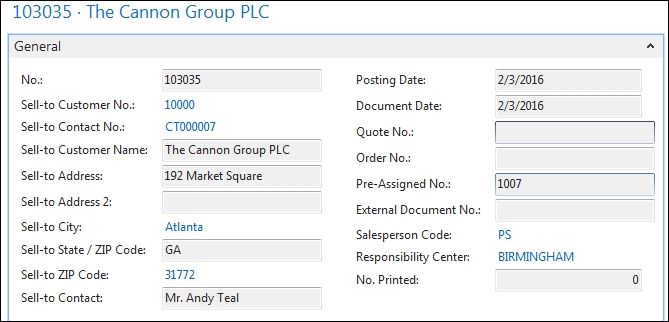
Take a look at the General fast tab of a posted sales invoice. The value of the Sell-to Customer No. field is showed as a hyperlink.
If you click on the hyperlink, a drop-down list is shown with the customer list, as follows:

Clicking on the Advanced link in the lower-right part of the drop-down list will actually take you to the Customer List page and from there you can access Customer Card. You can achieve all of this using Customer Card without having to remember or write down the Customer No. value for which you wanted to check some information.
Hyperlinks are also shown when a value in a field is the result of a calculation. In this case, clicking on the hyperlink will open a page where the records taken into account during the calculation are shown.
When you pull up a list page, you can dynamically do sorting based on any of the columns that are displayed. To sort a specific column of the list page, just click on the column header. Pull up the Customers list, and click on the No. column header:
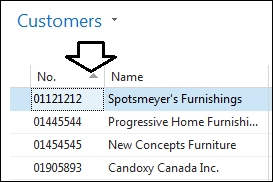
When the arrow on the column header is pointed up, it means that the list is sorted in ascending order. Now if you click on the column header again, the arrow will be pointed downwards. This means that the records are sorted in descending order.
You can click on any of the columns and the records will sort dynamically.
Sometimes you need to look for a set of information and you do not want to print it into a report. You just want to extract the data and do your own manipulations.
Fortunately, there are other ways to find data in Dynamics NAV. Applying our own filters in a page to display only the information we're looking for is a powerful tool that will save you thousands of consulting hours per year.
Imagine you're a brand new customer service representative and just want to get a list of all of the customers in your territory. You want to find all the DOMESTIC customers that are to be shipped from the YELLOW location.
You may examine all the reports that exist in Dynamics NAV and end up finding the one you need. But if you don't find it, don't worry; the following are the steps to do so:
- Open the Customer page (Departments/Sales & Marketing/Order Processing/Customers).
- Display the Advanced filter by navigating to Customer | Advanced Filter:

- Click on Add Filter to add your own filters. A Where line is shown.
- Select the field for which you want to apply a filter. In our case, we want to apply the filter on Location Code and Customer Posting Group.
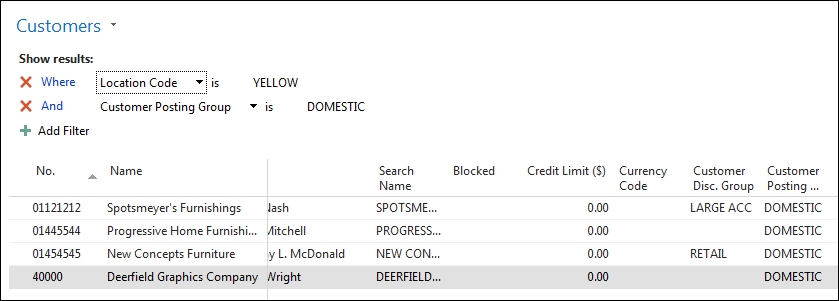
- The information we were looking for is now displayed, that is, all the customers that are to be shipped from the YELLOW location and are DOMESTIC customers.
At this point, you can copy and paste to Excel or simply click on Microsoft Excel on the ribbon and the data will be exported to Excel.
Assuming you need to frequently access the information based on the same filters that you set on the list. You can save the filters that you've set as an icon on your Home page:
- Go back to the Customer list and set the filters and display the list of information you want.
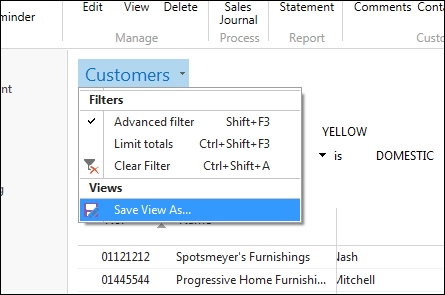
- Navigate to Customer| Save View As:
- A popup will be displayed to allow you to change the description of your View and where you want to save it to. In our case, we can just save it to the Home page:
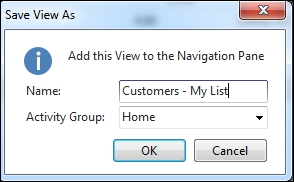
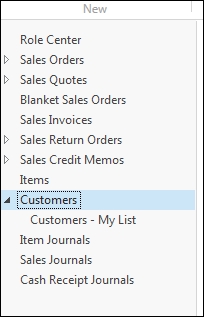
- A message will be displayed asking you to restart the application. Once restarted, Customer – My List view will be on your Home page: