Starting from Microsoft Dynamics NAV 2009, it was possible to publish page and codeunit objects as web services to allow external applications to access Dynamics NAV data and business logic. In the later releases of Microsoft Dynamics NAV, it is also possible to publish Query objects as web services.
Page and codeunit objects can be accessed through SOAP (Simple Object Access Protocol) web services. Queries can only be accessed through the OData web services protocol.
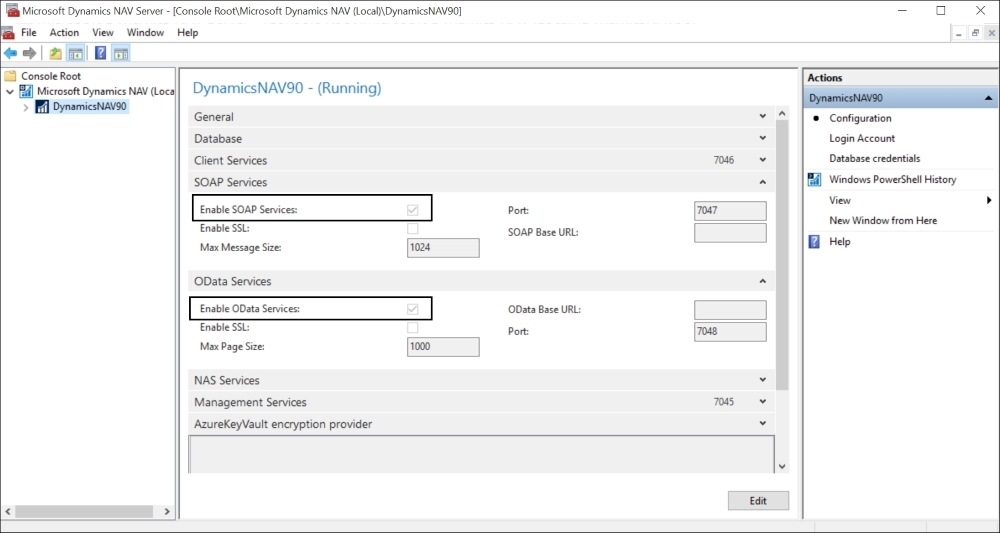
You will need to first enable the SOAP and OData services from the Dynamics NAV Administrator.
- Start the Dynamics NAV 2016 Administrator from the start menu.
- Click on the service that's running Dynamics NAV. If you did the full installation, the default service should be DynamicsNAV90.
- Select the service and click on Edit.
- Place a checkbox on the Enable SOAP Service and Enable OData Service.
- Click on Save after you're done:
To publish a query as a web service from Dynamics NAV, perform the following steps:
- Open the Windows client for Microsoft Dynamics NAV.
- Navigate to Departments | Administration | IT Administration | General.
- Select Web Services.
- Select New on the ribbon bar to publish a new web service.
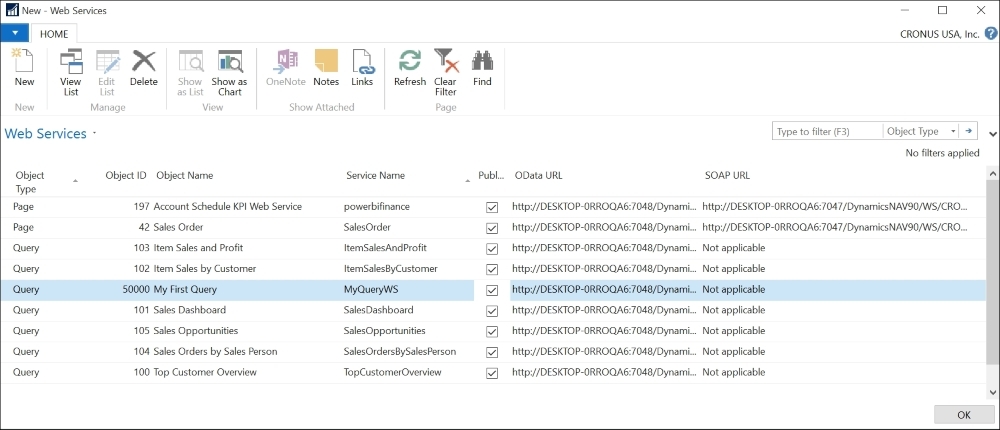
- The New-Web Services page will open.
- Select Query as Object Type.
- Enter
50000in the Object ID field. - Enter a name in the Service Name field. For example, let's use MyQueryWS as Service Name.
- Check the Published field, as shown in the following screenshot:
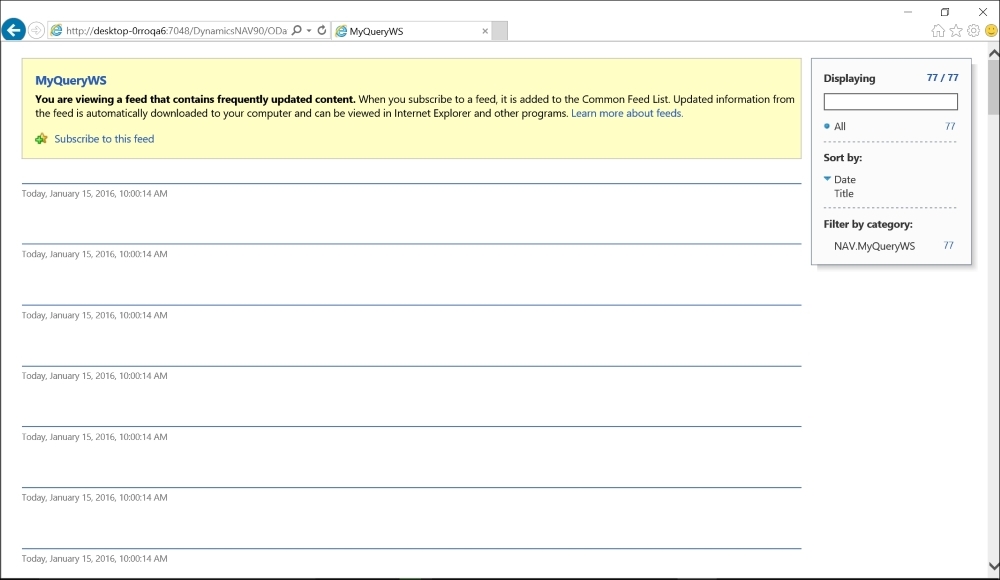
At this point, the query is already published as a web service. You can check to see if it is accessible using your browser by clicking on OData URL, and then clicking on the hyperlink symbol or copying and pasting the URL to your web browser.
Because Dynamics NAV queries can be published as web services, they can be accessed by absolutely any application that can consume OData web services. It can be an external application developed by you for the only purpose of reading Dynamics NAV data or it can be a commonly used application that supports OData web services.
If you are integrating NAV with an external app via web services, it's always recommended not to expose directly the NAV web services but use a custom WS that talks with NAV (via standard web services exposed as described) and the external system.
In this section we will see how to use Dynamics NAV queries in Microsoft Office Excel.
Among all the applications that are out there, an extensively used one is probably Microsoft Office Excel. There is a free add-in for Excel called PowerPivot that can consume OData web services.
We can do that as follows:
- If you're using Excel 2013, you can enable the PowerPivot 2013 by going to the Add-in page from the Options menu. Or you can download PowerPivot by performing a quick search on the Internet, which will lead you to the download page.
- The installation of PowerPivot will create a new tab in the ribbon bar of Microsoft Office Excel.
- Open Microsoft Excel 2013.
- On the POWERPIVOT tab, select Manage.
- Select Get External Data | From Data Service | From OData Data Feed.
- You will be asked to enter a friendly connection name and a data feed URL. Enter
NAVMyQueryWSas Friendly connection name and copy and paste the OData URL from the Dynamics NAV web service screen, or you can type in the following path as the value for Data Feed URL:http://localhost:7048/DynamicsNAV90/OData/Company('CRONUS%20USA%2C%20Inc.')/MyQueryWS
- Click on Test Connection to check if PowerPivot can access the published web service.
- Click on Next and then click on Finish.
- An import process will start. Once it is finished, click on Close.
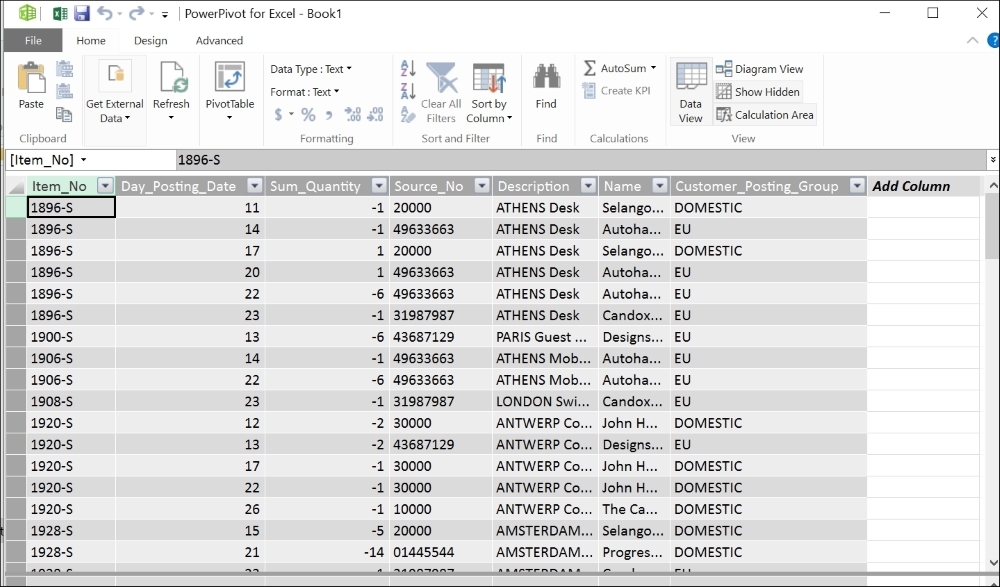
- The imported data will be displayed on the PowerPivot for Excel window.
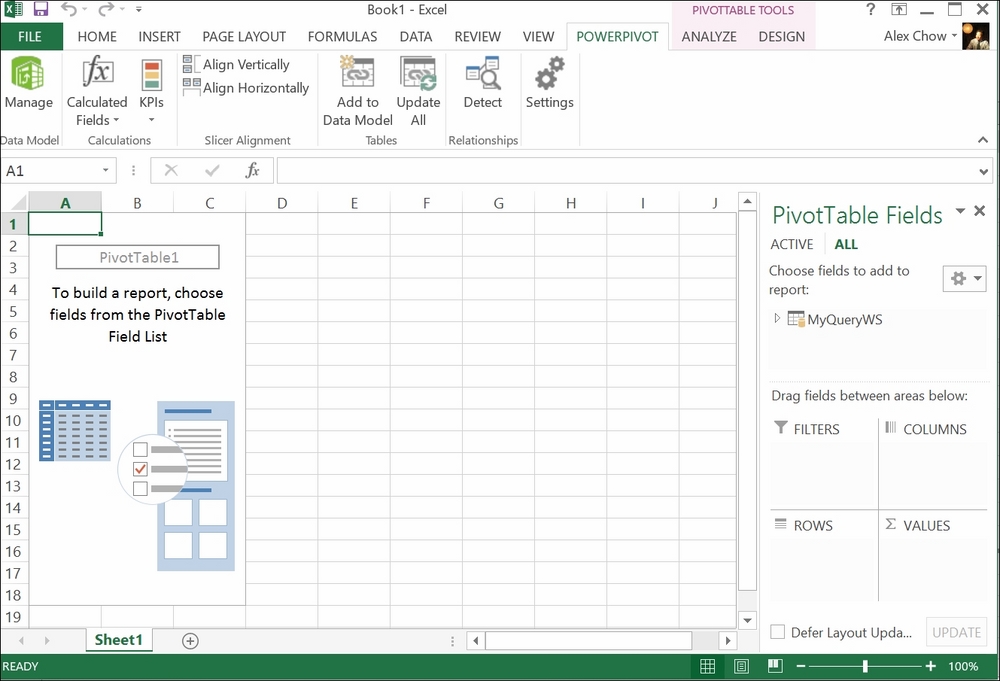
- Select PivotTable, and a PivotTable that uses data from Microsoft Dynamics NAV will be created. Select the fields that you want to see on the PivotTable.