
Resizing a Shot in the Effect Preview Monitor
If you’ve used a crop tool to cut out unwanted scenery around the edges of a photo, you’ll understand the value of resizing clips in Media Composer. The difference is that instead of cropping down a photo, you scale up a clip to fill the monitor and focus on a specific area. The result is the same: Unwanted material around the edges of a shot can be removed, focusing the attention of the viewer on the important area.
To use the Media Composer Crop tool:
1. Launch Media composer, select the RUNNING THE SAHARA project on the left side of the Open Project dialog box, and then click OPEN. The Project window opens and lists all the bins associated with this project.
2. Double-click the RTS PT2 FX SEQUENCES bin in the Project window.
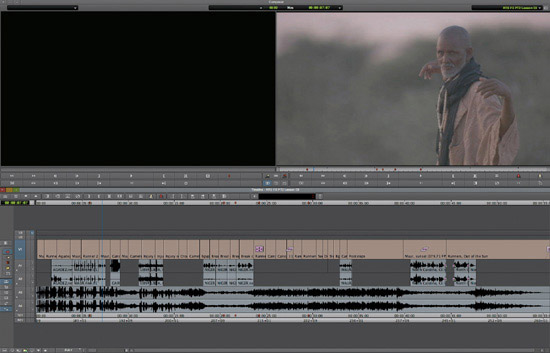
3. In the bin that opens, double-click the RTS FX PT2 LESSON 03 sequence. The sequence appears in the Record monitor, as shown in Figure 3.1. This is a different section of the Running the Sahara trailer you were working with earlier in this book.
Figure 3.1 Viewing the RTS FX PT2 Lesson 03 in the Record monitor.
4. Whenever you begin working on a project, you should always view it to know what you are dealing with, so that’s how you’ll start this exercise. Place the position indicator at the start of the project by pressing the HOME key on the keyboard. (If you are on a Mac without a Home key, press the FUNCTION+LEFT ARROW keyboard shortcut.)
5. Press the SPACE BAR to play the project until the end. As you view the sequence, you’ll see that there are a number of problems in this section of the trailer that could benefit from some corrective visual effects work. The problems are already identified using markers.
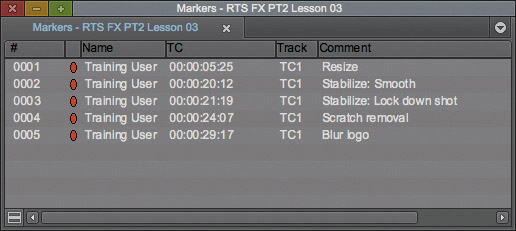
6. Choose TOOLS > MARKERS to open the Markers window shown in Figure 3.2. Each marker in the Markers window represents a location in the sequence that needs work. You can use the Markers window to jump directly to each segment you’ll work on.
Figure 3.2 The Markers window contains markers for each segment you’ll fix.
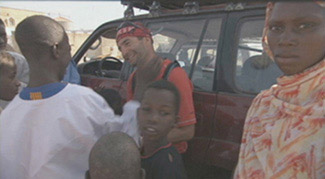
7. In the Markers window, double-click the first marker, which has the comment “Resize.” The position indicator jumps to the marker’s location in the Timeline. The shot, of one of the runners and another man greeting each other (see Figure 3.3), has a slight problem. Let’s first play it and then discuss how to fix it.
Figure 3.3 Use the Resize effect on this clip to focus the viewer’s attention.
8. Make sure only the V1 track is highlighted, and then press T to mark the clip.
9. Click the PLAY IN TO OUT button under the Record monitor or press 6 on the keyboard. As the clip plays, the focus of the viewer should be on the runner, but you just can’t help being drawn away by the woman turning and looking into the camera. To focus the audience on the runner and avoid paying royalties to the woman on the right, you’ll use the Resize effect to scale the image up until she is out of the picture.
10. Choose TOOLS > EFFECT PALETTE or press COMMAND+8 (Mac) or ALT+8 (Windows).
11. In the Effect Palette, select the IMAGE category and drag the RESIZE effect onto the highlighted segment in the Timeline, which you just played. Next, you’ll make changes to the Resize effect using Effect mode.
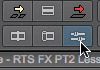
12. Click the EFFECT MODE button (shown in Figure 3.4) or choose TOOLS > EFFECT EDITOR. The Effect Editor opens with the Resize parameters displayed. When you enter Effect mode, the Record monitor becomes the Effect Preview monitor and the position bar under the Effect Preview monitor no longer represents the entire sequence but only the selected segment. In the Effect Preview monitor you can reduce the size of the frame, making it easier to work outside the boundaries of the image.
Figure 3.4 The Effect Mode button is used to open the Effect Editor and enter Effect mode.
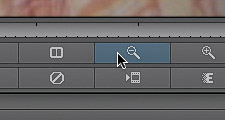
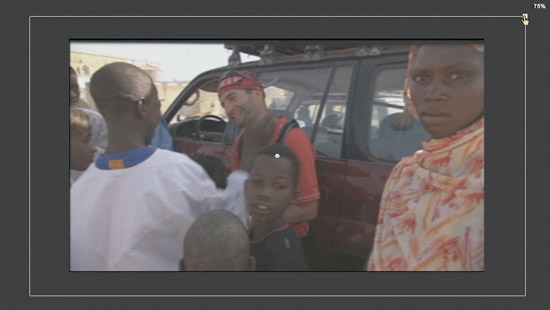
13. Click the REDUCE button under the Effect Preview monitor (see Figure 3.5). The frame is now 75% of its size. A white outline surrounds the frame. This outline allows you to directly manipulate the Resize effect in the Effect Preview monitor. But before you resize the image, it can be helpful to open the Scaling parameter group in the Effect Editor so you can see the scale values as you change them.
Figure 3.5 Use the Reduce button to zoom out on the Effect Preview monitor.
14. In the Effect Editor, click the disclosure triangle for the SCALING parameter group. Now, as you make changes in the Effect Preview monitor you’ll be able to see their accurate values. For resizing, changes can be made by dragging the white handles on the frame outline. The handle in the upper right is used to maintain the aspect ratio.
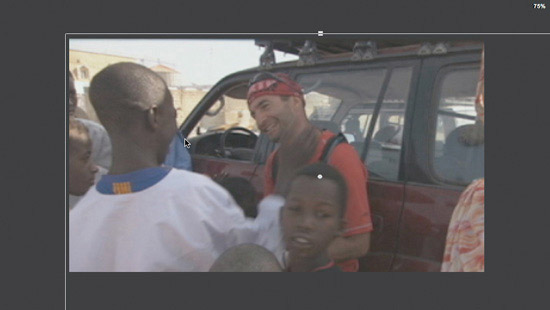
15. In the Effect Preview monitor, drag the upper-right handle out to the right until the X and Y Scaling values in the Effect Editor are set to 125, as shown in Figure 3.6. When you release the mouse, the image is scaled from the center but the woman is still slightly in the frame. You can reposition the scaled image over to the right to eliminate the remaining part of the woman that is still in the frame.
Figure 3.6 Use the handles to resize the image in the Effect Preview monitor.
16. Click anywhere within the white outline and drag it so the outline’s upper-left corner is flush with the upper-left corner of the frame, as shown in Figure 3.7.
Figure 3.7 The result of the Resize effect eliminates unwanted material around the edges.
17. Below the Effect Preview monitor click the PLAY IN TO OUT button or press the 6 key to see the results of the Resize effect play back in the monitor.
18. Click the ENLARGE button to scale the frame back up. Then close the Effect Editor to return to Source/Record mode.
You’ve successfully refocused the audience’s attention onto the runner and, in doing so, made the credits to the movie shorter by removing the unwanted cast member.