
Changing the Order of Nested Effects
Although it isn’t the case for all effect combinations, there are times when the order of the effects in the nest is important. If the effects are in the wrong order, in some cases you’ll get the wrong result. The Resize effect is one of those effects whose position in the nest can be significant.
Let’s experiment with the very last clip in the sequence and see what it would look like if presented in a “cinema widescreen” aspect ratio of 2.39:1. To do this we will add a special masking effect to mask off the portions of the frame that wouldn’t be visible in that wider aspect ratio.
To add a film widescreen mask to a shot:
1. Choose TOOLS > MARKERS to open the Markers window.
2. Double-click on the LETTERBOX marker to jump to that location in the Timeline.
3. If it isn’t already open, press CTRL+8 (Windows) or COMMAND+8 (Mac) to open the Effect Palette.
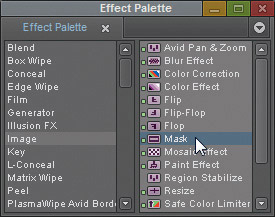
4. Click on the IMAGE effects category on the left side of the window.
5. Select the MASK effect (Figure 6.12) and drag it to the RUNNERS, OUT OF THE SUN clip at the end of the sequence.
Similar to the Color Effect, Mask has no effect by default. You can manipulate the effect parameters to mask off regions of the frame either vertically or horizontally.
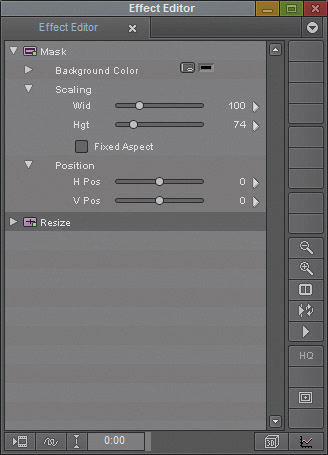
6. Click on the EFFECT MODE button in the Timeline tool palette to enter Effect mode. The parameters for the Mask effect are displayed in the Effect Editor, as shown in Figure 6.13. The Scaling parameter group is used to add a colored mask over the frame.
Figure 6.13 Mask effect parameters.
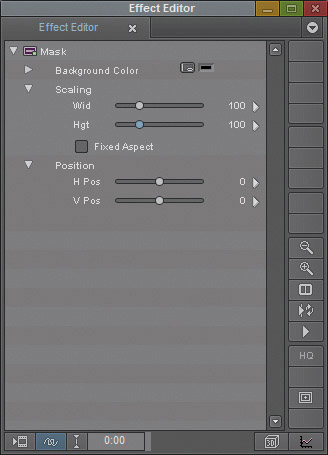
7. Set the HEIGHT parameter to 74. We’ve done the math for you, and the resulting mask provides a 2.39:1 aspect ratio within the masked area.
8. Scrub through the shot to see the results of the effect.
The shot looks good, but the producer suggests that it would look better if the runners were a bit lower in the frame. We can accomplish this using a Resize effect, which includes parameters that let us move the image within the video frame.
To move the image down in the frame:
1. Hold down the ALT (Windows) or OPTION (Mac) key down and drag the RESIZE effect (Image category) from the Effect Palette to the last clip in the Timeline. Recall that holding the Alt (Windows) or Option (Mac) key down while applying an effect will Autonest that effect on top of the existing effect rather than replacing it.
2. If necessary, re-enter Effect mode.
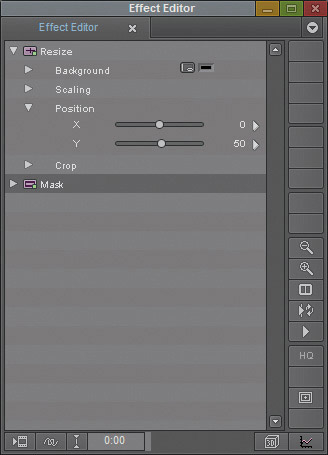
3. Open the POSITION parameter group in the Effect Editor (see Figure 6.14).
Figure 6.14 Resize effect, Position parameter.
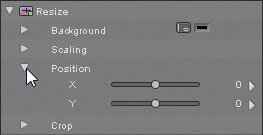
4. Set the Y parameter in the POSITION group to 50 to move the runners down in the frame.
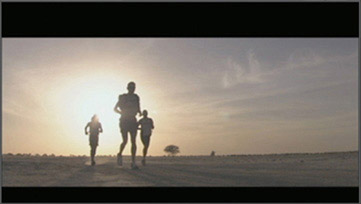
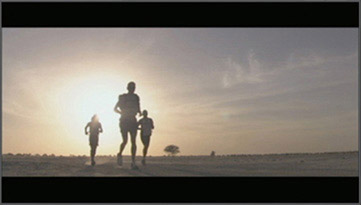
Wait a moment. Take a look at the result of that parameter change. Though the runners are now positioned lower in the frame, the mask moved downward as well. (See Figure 6.15.) Why did that happen?
When more than one effect is applied to a clip, the effects are processed one at a time, from the bottom of the nest to the top. Not only that, but for basic effects, the composited result of each effect is fed up to the next effect in the nest. In this effect nest, that means that the Mask effect is applied to the original clip, and then the mask plus the clip (the result of the applied effect) is passed to the Resize effect for processing.
As you can tell, this isn’t what we want. We want the mask to stay in the position we gave it and the shot to move inside the mask. To accomplish this, we need the Resize effect to be applied before the Mask effect. Fortunately this is very easy to accomplish in the Effect Editor.
To reorder effects in a nest:
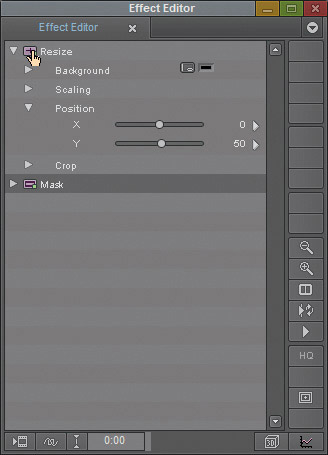
1. If necessary, park on the last clip in the sequence and enter Effect mode. The Effect Editor appears, as shown in Figure 6.16.
Figure 6.16 Effect Editor showing the nested effects.
Recall that both of the effects in the nest are visible in the Effect Editor. The Resize effect is displayed first, then the Mask effect below it. This is always the case with nested effects. The bottom-most effect in the Effect Editor is at the bottom of the nest, and then all other effects are listed, traveling upward, in the order they are applied. To reorder effects in the nest, we simply drag and drop the effects to change their position in the nest.
2. Click on the RESIZE effect icon in the Effect Editor and drag it downward until it is below the Mask effect, then release the mouse button. (See Figure 6.17.) Remember that an effect’s icon is always just to the left of the effect name.
Figure 6.17 Resize effect icon in the Effect Editor.
The effects are reordered in the Effect Editor, as shown in Figure 6.18, and the result is now correct, with the Resize effect being applied only to the shot and not to the shot and the mask. (See Figure 6.19.)
Figure 6.18 Effects reordered in the Effect Editor.
For the most part, effects that can be nested can also be reordered. There are some exceptions to this, and the system will display a dialog box explaining why when you encounter an exception.
Review/Discussion Questions
1. How do you add an effect to a clip in the Timeline on top of an existing effect?
2. What is that procedure called?
3. What are the two different methods you can use to view the effects inside of a nest?
4. What is an advantage of simple nesting?
5. What is an advantage of expanded nesting?
6. How do you change the order of effects within a nest?
7. What effect can be used to letterbox a clip?
Lesson 6 Keyboard Shortcut Key Shortcut
