
Smoothing Shaky Camera Movement
Another common problem you are sure to encounter as an editor is unstable camera work. In a documentary, it’s not always possible to be on a tripod; and sometimes that slowly roaming camera work is desirable, but you just want it toned down. Media Composer has a flexible stabilization effect that can either lock an unstable shot down, removing all movement, or eliminate any erratic bumps and jitters but keep the general camera movement. The beauty of this effect is that it is almost totally automatic.
To fix an unstable shot:
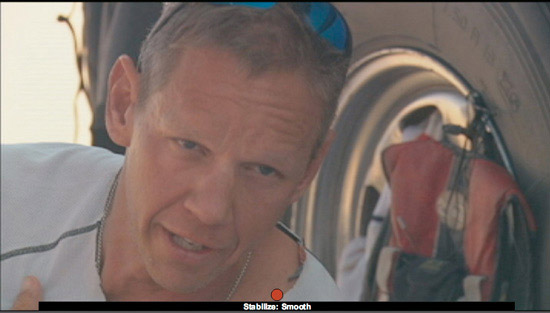
1. From the Markers window, double-click the second marker, with the comment “Stabilize: Smooth” (see Figure 3.8). After you double-click the marker, the position indicator jumps to the marker’s location in the Timeline. Let’s play before adding any effects.
Figure 3.8 The second marker identifies a clip that needs to be smoothed.
2. Make sure only the V1 track is highlighted then press T to mark the clip.
3. Click the PLAY IN TO OUT button under the Record monitor or press 6 on the keyboard. This shot, shown in Figure 3.8, has a little camera move going on, which gives it that nice documentary feel, but there are a few bumps that make it jarring. The Stabilize effect begins working immediately after you apply it to a segment in the Timeline. It analyzes the clip frame by frame in order to extract motion data. Then it inverts the motion data and applies it to the clip. Then, when the camera moves down to the left, the motion data offsets it by repositioning the frame up to the right. The result is a clip that appears static because it moves in opposite directions by the same amount.
Note: Media Composer includes three effects that can stabilize a shot:
![]() Stabilize. In general, the Stabilize effect should be your first choice. It is the most flexible choice and usually does a good job automatically. If necessary, you can also try it in Manual mode to take more control over the process.
Stabilize. In general, the Stabilize effect should be your first choice. It is the most flexible choice and usually does a good job automatically. If necessary, you can also try it in Manual mode to take more control over the process.
![]() Regional Stabilize. This effect is “old school.” It does not have an automatic mode, so it’s up to you to select a region to stabilize. It is also not a real-time effect, so it must be rendered. It does, however, provide a Progressive Source option, so you can use it on progressive material in an interlaced project.
Regional Stabilize. This effect is “old school.” It does not have an automatic mode, so it’s up to you to select a region to stabilize. It is also not a real-time effect, so it must be rendered. It does, however, provide a Progressive Source option, so you can use it on progressive material in an interlaced project.
![]() 3D Warp. The 3D Warp effect has the Stabilize effect built into it, so you can stabilize a segment with all the other features included in the 3D Warp feature. Nice, but overkill if you just need to stabilize a shot.
3D Warp. The 3D Warp effect has the Stabilize effect built into it, so you can stabilize a segment with all the other features included in the 3D Warp feature. Nice, but overkill if you just need to stabilize a shot.
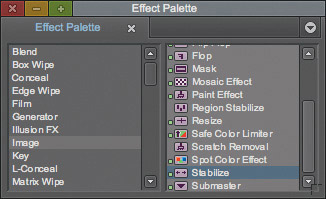
4. From the Effect Palette, drag the STABILIZE effect, shown in Figure 3.9, onto the highlighted clip in the Timeline. Almost immediately after you apply the effect, the Tracking window opens, and tracking points appear in the Effect Preview monitor as the clip steps forward frame by frame. You can review the results by playing the clip.
Figure 3.9 The Stabilize effect is found in the Image category of the Effect Palette.
5. Click PLAY IN TO OUT under the Effect Preview monitor or press the 6 key. The Effect Editor includes blue highlighted enable buttons for active parameters. You can disable the Stabilize effect by disabling the active parameters in the Effect Editor.
6. In the Effect Editor, click the enable buttons for SCALING and POSITION, as shown in Figure 3.10. Disabling parameter groups in the Effect Editor is a good way to compare the results with the original video. The parameter group’s settings are still retained, so they can be enabled again at any time.
Figure 3.10 Disable Effect Editor parameters to compare the shot with and without the effect.

7. Click PLAY IN TO OUT under the Effect Preview monitor or press the 6 key to play the segment without the Stabilize effect enabled.
8. In the Effect Editor, click the enable buttons for SCALING and POSITION to reapply the Stabilize results. Then close the Effect Editor.
The result is a smoother camera move that still retains the overall documentary feel. That is just one method to apply the Stabilize effect. You can also use it to lock down a shot to completely remove the camera movement. In the next section, you’ll learn how to modify some of the Tracking window options to get a lockdown result.