
Creating Freeze Frames
A freeze frame displays a single frame from a clip on the screen for a duration you choose. As with Motion effects, these effects are generated from the Source monitor and treated as a new source to be edited into your sequence.
To get started:
1. If the Running the Sahara project is not open from the last lesson, open Media Composer, select the RUNNING THE SAHARA project on the left side of the Open Project dialog box, and click the OPEN button.
2. The Project window opens and lists all the bins associated with this project. The bin you’ll use in this lesson is the RTS PT2 FX Sequences bin, which contains a number of sequences you’ll use throughout this book. Double-click the RTS PT2 FX SEQUENCES bin in the Project window to open it.
3. We’d like to create a freeze frame of a clip already edited into the sequence, and fortunately that’s very easy to do. In the RTS PT2 FX Sequences bin window, double-click the RTS FX PT2 LESSON 04 sequence. The sequence appears in the Record monitor.
Let’s move to the correct area of the Timeline from which we wish to generate our freeze frame. To help you quickly jump to the right location, we have set a marker for you.
To move to the desired location in the Timeline:
1. Choose TOOLS > MARKERS to open the Markers window.
2. Double-click the marker named FREEZE FRAME to jump to that location in the Timeline. We’d like to replace the clip at this point with a freeze frame.
To locate the shot you want to use for the freeze frame:
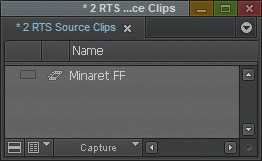
1. From the Project window, open the 2 RTS SOURCE CLIPS bin.
2. Double-click the MINARET clip to load it into the Source monitor. The frame we wish to use is marked with a marker.
3. Click the marker in the Source monitor to jump to the correct frame.
Setting the Freeze Frame Render Type
Because the clip from which we are generating the freeze frame is from a full-resolution clip, we must tell Media Composer how we want it generated. The system can generate freeze frames using three different rendering techniques.
![]() Duplicated Field. The default choice, but not recommended. This option reduces the vertical resolution by half because it drops one field of the image, resulting in a lower-quality image.
Duplicated Field. The default choice, but not recommended. This option reduces the vertical resolution by half because it drops one field of the image, resulting in a lower-quality image.
![]() Both Fields. Uses both fields. Good for shots without interfield motion or progressive media. Shots with interfield motion will show noticeable jitter due to the temporal differences between the two fields.
Both Fields. Uses both fields. Good for shots without interfield motion or progressive media. Shots with interfield motion will show noticeable jitter due to the temporal differences between the two fields.
![]() Interpolated Field. Good for shots with interfield motion because it deletes field 2 and uses adjacent field 1 to calculate new field 2 data.
Interpolated Field. Good for shots with interfield motion because it deletes field 2 and uses adjacent field 1 to calculate new field 2 data.
You should follow these general rules when selecting the render type:
![]() Use Interpolated Field when working with NTSC 29.97i, PAL 25i, or 1080i media.
Use Interpolated Field when working with NTSC 29.97i, PAL 25i, or 1080i media.
![]() Use Both Fields when working with NTSC 24p/23.976p, PAL 25p/24p, 720p, or 1080p media.
Use Both Fields when working with NTSC 24p/23.976p, PAL 25p/24p, 720p, or 1080p media.
Tip: Although using Interpolated Field with progressive media will not necessarily get you into trouble—but could result in a slightly softer image—using Both Fields in an interlaced project will almost always get you into trouble due to interfield motion that is present (if not noticeable) prior to creating the freeze frame. A good example of this is the blinking of an eye. A blink will appear as a visible flutter in a freeze frame created from interlaced media using Both Fields.
Understanding Fields and Frames
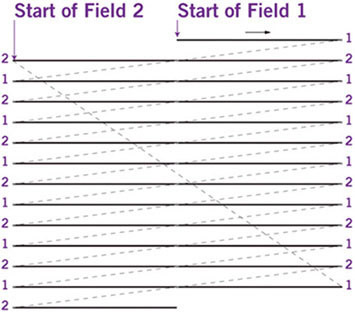
Back when television was being invented, the goal was to draw the entire picture, one line at a time, from top to bottom. Unfortunately, the technology of the time wouldn’t allow that quickly enough to prevent unacceptable motion artifacts. So what they did instead was to draw half of the frame at once, skipping every other line, then draw the second half of the frame, filling in the skipped lines. This is known as interlacing, as the frame is made of two interwoven—or interlaced—parts. These two parts are known as fields. Figure 4.1 shows the interlacing order for high definition video, with the fields numbered. (Even though interlacing could have been bypassed when high-definition video was created, it was kept for backward compatibility.)
Figure 4.1 Field ordering for 1080i HD video.
The NTSC, PAL, and 1080-line interlaced (often written as 1080i) formats use interlaced fields. 720-line HD is always progressive, and there are progressive versions of 1080-line HD as well.
Creating the Freeze Frame
Now let’s make our freeze frame. The duration isn’t that significant as we can always trim the clip after editing it, but it is generally a good idea to make these longer than we think we’ll need so they’re easier to edit into the sequence.
To create a freeze frame:
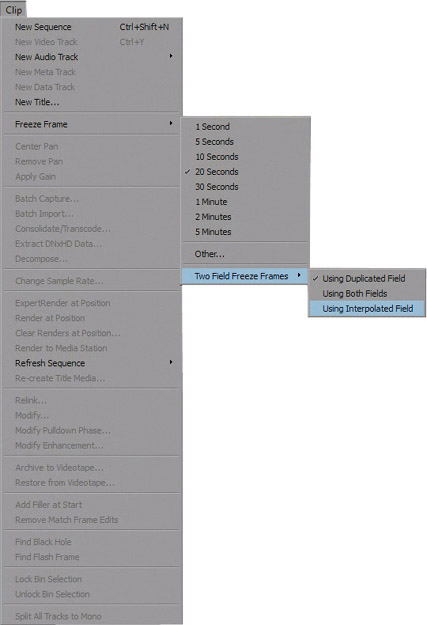
1. Choose CLIP > FREEZE FRAME > TWO FIELD FREEZE FRAMES > USING INTERPOLATED FIELD to set the render type for the freeze frame, as shown in Figure 4.2.
Figure 4.2 The freeze frame render options.
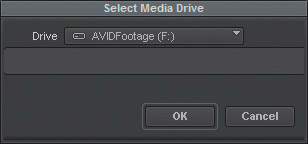
2. Choose CLIP > FREEZE FRAME > 20 SECONDS. As creating a freeze frame by default involves creating media, Media Composer displays a dialog box asking where to store the media. (See Figure 4.3.)
Figure 4.3 Render drive selection.
3. It is generally a good idea to store the rendered media on the same drive as the rest of your media. There are some exceptions to this rule, particularly when working with shared storage, but unless you are using this book in a classroom and your instructor tells you otherwise, select the drive that contains the course media and click OK to create the freeze frame.
Tip: To make it easier to create freeze frames, you may want to map the menu option to create a freeze frame of a specific length to the keyboard or the Source-side Composer window buttons.
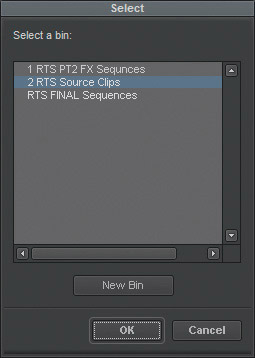
4. Since you have more than one bin open, Media Composer next asks where to store the freeze frame clip. (See Figure 4.4.) Select the bin to save to and click OK.
Look at the bin you selected. Freeze frame clips have a special clip icon so that they are easily distinguishable from regular clips. (See Figure 4.5.) To make it easy to work with, the freeze frame we just created has been automatically loaded into the Source monitor.
Figure 4.5 Freeze frame in bin.
Making the Edit
Finally, let’s edit the freeze frame into our Timeline, replacing the clip we are currently parked on.
To edit the freeze frame into the sequence:
1. Click the Program monitor in the Composer window to make the sequence active.
2. Turn on V1 if it isn’t already active, and turn off all audio and other video tracks.
3. Click the MARK CLIP button (see Figure 4.6) at the top of the Timeline or press T on the keyboard to mark the video clip.

4. Move the play bar to the center of the freeze frame in the Source monitor. This step isn’t absolutely necessary, but it does make it easier to trim the clip later on.
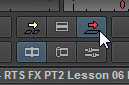
5. Click the OVERWRITE EDIT button (see Figure 4.7) in the Composer window between the two monitors or press the B key on the keyboard to replace the shot.
Figure 4.7 Overwrite Edit button.
6. Take a look at the clip on the Timeline. Notice that FF has been appended to the name of the clip but that the freeze frame clip does not have any effect icon. Play through this portion of the sequence to see the freeze frame in context with the material around it.