Applying Effects to Tracks
In addition to applying effects to clips, we can also apply them directly to tracks. Though this isn’t useful for most effects, there are several types of clips for which this is extremely useful. One of these is the Safe Color Limiter, which we mentioned in Lesson 5, “Color Treating and Correcting.” Applying effects to empty video tracks, known as applying effects to filler, is a unique feature to Avid editing systems and can be quite powerful.
Using the Safe Color Limiter
The limiter is most commonly applied to an upper-level video track so that it limits the entire Timeline. Alternatively, it can be applied only to selected regions of the Timeline using the Add Edit command to create edits in the filler track.
Let’s apply the Safe Color Limiter effect to the filler region above the last clip in the Timeline.
To apply the Safe Color Limiter:
1. Park on the last clip in the Timeline. This clip has the night vision look we created in Lesson 5.
2. Open the Effect Palette and select the IMAGE category.
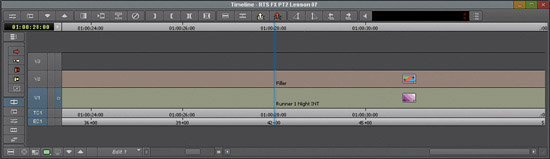
3. Select the SAFE COLOR LIMITER effect and drag to the V2 track region directly above the RUNNER 1 NIGHT INT clip, as shown in Figure 7.26.
Figure 7.26 The Safe Color Limiter effect applied to the V2 filler above the clip.
Once applied, the limiter immediately restricts the signal output of everything beneath it. Let’s compare the unlimited and limited versions of the Color Effect.
4. Move the cursor to the Track monitor region of the Timeline and click on the V2 monitor to move the monitor up to see the composite result of tracks V1 and V2. We are now looking at the limited output. Let’s see what the limiter did.
5. Focus your attention on the campfire region of the frame and toggle the monitor between V1 and V2.
Do you see how the fire’s green is slightly muted by the limiter? That’s because it has determined that the green output was too high and wasn’t acceptable for broadcast. Nothing else in the scene is limited, as it is all within the acceptable signal boundaries.
The Safe Color Limiter effect can be applied as necessary to individual effects or multilayer effects in the Timeline, or it can be applied to an empty track above the entire sequence. When you apply it to the entire sequence, it means that everything in the sequence will be limited, but depending on the performance of your computer, this may not be the best approach. To learn more about managing your system’s performance, see Appendix B, “Performance and Rendering.”
Using the Pan and Scan Effect
The Pan and Scan effect is another type of effect that is usually applied to a filler track rather than an individual clip. These effects are used when delivering alternate aspect ratio versions of a program. For example, you may be editing a program shot in 16:9 but be required to deliver a 4:3 version.
Since the program we are working in is formatted as 16:9, let’s generate a 4:3 version. This is typically done by creating a duplicate version of the sequence with the Reformat effect applied.
To make at 4:3 version of a 16:9 sequence:
1. Choose WINDOWS > 1 RTS PT2 FX SEQUENCES.
2. In the RTS PT2 FX Sequences bin window, double-click the RTS FX PT2 LESSON 07B sequence. The sequence appears in the Record monitor. This is our duplicate sequence.
3. Press CTRL+8 (Windows) or COMMAND+8 (Mac) to open the Effect Palette.
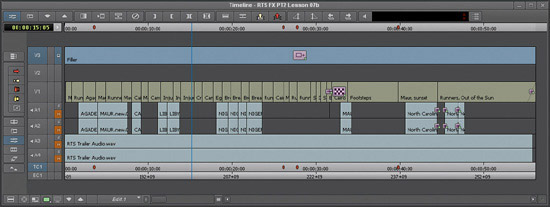
4. Choose the REFORMAT effects category then drag the PAN AND SCAN effect to V3 in the Timeline. Your sequence should look like that in Figure 7.27.
Figure 7.27 Pan and Scan effect applied to V3.
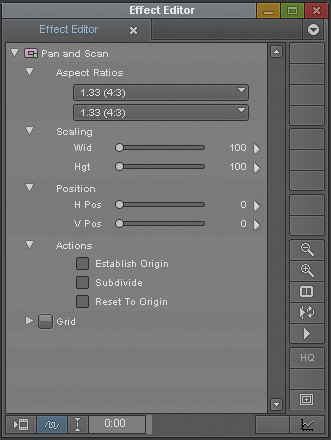
5. Enter Effect mode and click on the newly applied clip to see its parameters in the Effect Editor. (See Figure 7.28.)
The Aspect Ratios parameter group is the key set of parameters for this effect. You use them to tell the system the sequence’s current aspect ratio and choose the desired output aspect ratio.
Figure 7.28 Pan and Scan effect parameters.
6. Choose 16:9 ANAMORPHIC from the upper pop-up menu. The other 16:9 option, 1.78 (16:9), is to be used only for 16:9 letterboxed material, not full-screen 16:9.
7. A box appears in the Effect preview in the Record monitor, showing you the 16:9 region that will be extracted. (See Figure 7.29.) By default, the center of the 16:9 frame is extracted to 4:3.
Figure 7.29 4:3 extraction region.
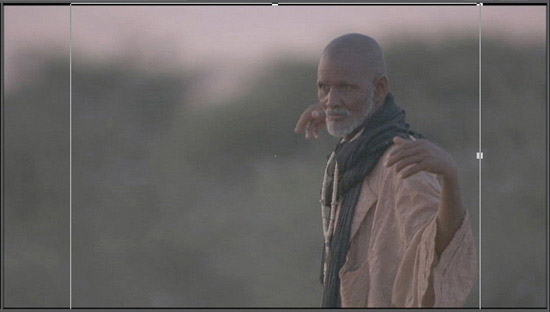
8. Exit Effect mode. The extracted region is resized to take up the full frame. To see the final 4:3 version correctly, you should change the Composer window’s aspect ratio.
Tip: Sometimes a simple center extraction is not appropriate for every shot in the sequence. The Pan and Scan effect includes an enable button, Subdivide Effect, that allows you to automatically break the Pan and Scan effect up into multiple effects—one for every edit on a given track. Simply enable the video track you wish to base your subdivision on and then select the Subdivide enable button. You can then make adjustments to the position of the extraction for every clip in your edit.
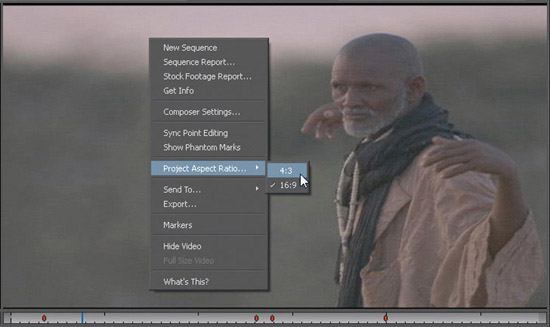
9. Right-click on the Composer window and choose PROJECT ASPECT RATIO > 4:3. (See Figure 7.30.) The Composer window switches to 4:3, and the extraction is properly displayed.
Figure 7.30 Project Aspect Ratio options.
10. Toggle the video monitor between V3 and V2 to switch between the original 16:9 version and the reformatted 4:3 version. You can use a single sequence for both outputs as long as you remember to set the video monitor to the proper track. That said, it is recommended that you make a duplicate sequence version and properly name it so you do not output the wrong version.
11. In the RTS PT2 FX Sequences bin window, click the RTS FX PT2 LESSON 07B sequence’s name and append 4X3 VERSION to the end.
Review/Discussion Questions
1. How is a Picture-in-Picture effect different from other effects we’ve worked with so far, such as the Resize effect?
2. Why should you crop blanking out of the frame?
3. How else can cropping be used?
4. Why are keyframes required at the beginning and end of an animation?
5. What does the Reverse Animation parameter do?
6. What keys must you hold down on the keyboard to make sure that a segment move only moves a clip vertically and does not shift its position in time?
7. If you add a keyframe via the Record monitor, what parameters are keyframed?
8. Why might you want to use the Remove Redundant Keyframes command?
9. What happens to the animation if you switch keyframes from linear to spline interpolation?
10. How do nests of effects like PIP differ from those of other effects?
11. What can you change within a title nest?
12. When should you nest rather than layer?
13. When should you layer rather than nest?
14. What is the Pan and Scan effect used for?
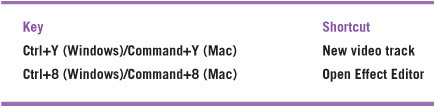
Lesson 7 Keyboard Shortcuts Key Shortcut