
Before we can use the built-in admin application, we will need to enable it. This involves adding the admin application to the project, sync'ing the database, telling the admin application about our database objects, and adding the admin URLs to our urls.py file. Let's work through each of these in turn:
- Add the admin application to the project.
Edit your
settings.pyfile and uncomment the 'django.contrib.admin' line within theINSTALLED_APPSlist:INSTALLED_APPS = ( 'django.contrib.auth', 'django.contrib.contenttypes', 'django.contrib.sessions', 'django.contrib.sites', 'django.contrib.messages', # Uncomment the next line to enable the admin: 'django.contrib.admin', 'django.contrib.gis', 'shapeEditor' ) - Re-synchronize the database.
From the command line,
cdinto yourgeodjangoproject directory and type:python manage.py syncdb
This will add the admin application's tables to your database.
- Add our database objects to the admin interface.
We next need to tell the admin interface about the various database object we want to work with. To do this, create a new file in the
shapeEditordirectory named admin.py, and enter the following into this file:from django.contrib.gis import admin from models import Shapefile, Feature, Attribute, AttributeValue admin.site.register(Shapefile, admin.ModelAdmin) admin.site.register(Feature, admin.GeoModelAdmin) admin.site.register(Attribute, admin.ModelAdmin) admin.site.register(AttributeValue, admin.ModelAdmin)This tells Django how to display the various objects in the admin interface. If you want, you can subclass
admin.ModelAdmin(or admin.GeoModelAdmin) and customize how it works. For now, we'll just accept the defaults. - Add the admin URLs to the project.
Edit the
urls.pyfile (in the maingeodjangodirectory) and uncomment the three lines that refer to the admin application. Then, change thefrom django.contrib import adminline to read:from django.contrib.gis import admin
The following listing shows how this file should end up, with the three lines you need to change highlighted:
from django.conf.urls.defaults import *

# Uncomment the next two lines to enable the admin:
from django.contrib.gis import admin
admin.autodiscover()

urlpatterns = patterns('',
    # Example:
    # (r'^geodjango/', include('geodjango.foo.urls')),

    # Uncomment the admin/doc line below and add 'django.contrib.admindocs'
    # to INSTALLED_APPS to enable admin documentation:
    # (r'^admin/doc/', include('django.contrib.admindocs.urls')),

    # Uncomment the next line to enable the admin:
    (r'^admin/', include(admin.site.urls)),
)
When this is done, it is time to run the application. cd into the main geodjango project directory and type:
python manage.py runserver
This will start up the Django server for your project. Open a web browser and navigate to the following URL:
http://127.0.0.1:8000/admin/shapeEditor
You should see the Django administration login page:

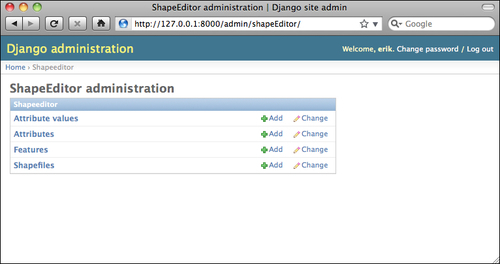
Enter the username and password for the superuser you created earlier, and you will see the main admin interface for the ShapeEditor application:
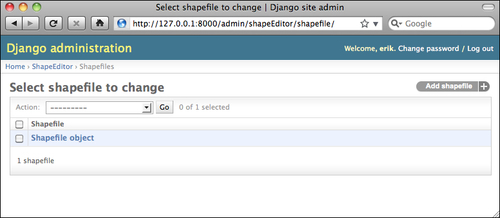
Let's use this admin interface to create a dummy Shapefile. Click on the Add link on the Shapefiles row, and you will be presented with a basic input screen for entering a new Shapefile:

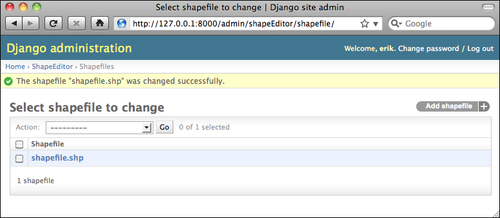
Enter some dummy values into the various fields (it doesn't matter what you enter), and click on the Save button to save the new Shapefile object into the database. A list of the Shapefiles in the database will be shown, at the moment just showing the shapefile you created:
As you can see, the new Shapefile object has been given a rather unhelpful label: Shapefile object. This is because we haven't yet told Django what textual label to use for a Shapefile (or any of our other database objects). To fix this, edit the models.py file and add the following method onto the end of the Shapefile class definition:
def __unicode__(self):
    return self.filename
The __unicode__ method returns a human-readable summary of the Shapefile object's contents. In this case, we are showing the filename associated with the Shapefile. If you then reload the web page, you can see that the Shapefile now has a useful label:
Go ahead and add __unicode__ methods to the other model objects as well:
class Attribute(models.Model):
    ...
    def __unicode__(self):
        return self.name

class Feature(models.Model):
    ...
    def __unicode__(self):
        return str(self.id)

class AttributeValue(models.Model):
    ...
    def __unicode__(self):
        return self.value
While this may seem like busy work, it's actually quite useful to have your database objects able to describe themselves. If you wanted to, you could further customize the admin interface, for example by showing the attributes and features associated with the selected Shapefile. For now, though, let's take a look at GeoDjango's built-in geometry editors.
Go back to the ShapeEditor administration page (by clicking on the ShapeEditor hyperlink near the top of the window), and click on the Add button in the Features row. As with the Shapefile, you will be asked to enter the details for a new Feature. This time, however, the admin interface will use a slippy map to enter each of the different geometry types supported by the Feature object:
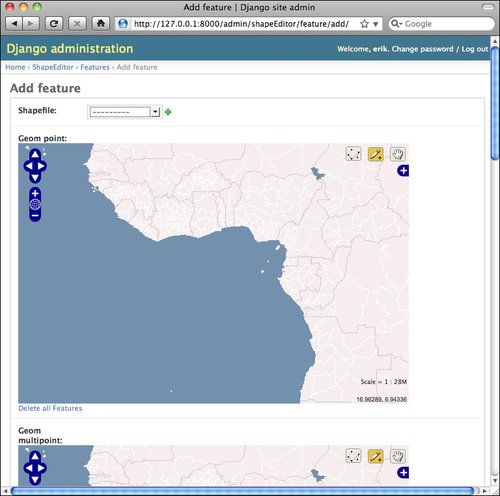
Obviously, having multiple slippy maps like this isn't quite what we want, and if we wanted to we could set up a custom GeoModelAdmin subclass to avoid this, but that's not important right now. Instead, try selecting the Shapefile to associate this feature with by choosing your Shapefile from the pop up menu, and then scroll down to the Geom Multipolygon field and try adding a couple of polygons to the map. Then, use the Edit Polygon tool (![]() ) to make changes to the polygons; the interface should be fairly obvious once you play with it for a minute or two.
) to make changes to the polygons; the interface should be fairly obvious once you play with it for a minute or two.
When you're done, click on Save to save your new feature. If you edit it again, you'll see your saved geometry (or geometries) once again on the slippy maps.
That completes our tour of the admin interface. We won't be using this for end users as we don't want to require users to log in before making changes to the Shapefile data. We will, however, be borrowing some code from the admin application so that end users can edit their Shapefile features using a slippy map.