
Chapter 2. Exploring the Welcome Center
In This Chapter:
- See the best place to begin using Windows Vista
- Improve your computer’s performance
- Locate hardware devices not yet set up
- View the Control Panel
- Preview Windows basics
- Transfer Windows settings from one PC to another
- Register Windows
- View your computer’s details
This chapter continues your introduction to Windows Vista. In Chapter 1, “Welcome to Windows Vista,” you learned how Vista is a completely redesigned Windows operating system that focuses on a graphical interface. With tools such as Vista’s integrated search feature that permeates almost every Windows program, and improved security that lets you work with more confidence in a less than safe connected world, Vista is an operating system worthy of respect.
The best place to begin when learning to use Windows Vista is the new Welcome Center window. Microsoft designed the Welcome Center window to give new Vista users the most common tools and features they would need to get Windows up and running.
After you finish this chapter’s continued introduction to Vista, you’ll be ready to tackle some of the more specific Windows Vista tools.
The Welcome Center: Vista’s Welcome Wagon
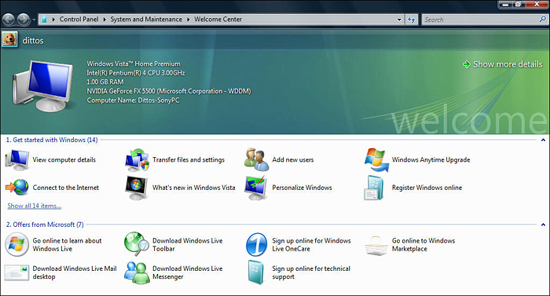
When you log in to a Vista-based computer, you will see the Welcome Center window, like the one shown in Figure 2.1. The Welcome Center window is a great place to get used to Windows Vista and learn about its features.
Figure 2.1. The Welcome Center window introduces the newcomer to the operating system.
By the Way
Depending on who used your computer in the past and the settings they changed, you might not see the Welcome Center when you start your Vista-based computer. If the Welcome Center window doesn’t appear, you can start the Welcome Center from the Windows Accessories menu or open your Control Panel from your Windows menu and select the System and Maintenance option. Select the Welcome Center option to view the Welcome Center window.
Highlights of the Welcome Center
The top of the Welcome Center contains information about your computer. Suppose that you upgrade to Windows Vista and your computer runs sluggishly. The Welcome Center displays information about your computer hardware at the top. If your computer is getting outdated (which in today’s terms means it’s a couple of years old or more), it might be your hardware and not your Vista installation causing the sluggishness.
To some computer users, knowing the processor model, computer speed, and memory size of their computers is second nature and not something they ever have to look up. To most of us, those facts get fairly hazy after we buy the computer because we’re busy just trying to use it, and learn all we need to know to stay on top of the latest programs and updates.
In previous versions of Windows, locating the list of hardware features and speed required opening the Control Panel and then opening the System resources window. The Welcome Center puts much of that information at the top of its window so that it’s easy to find. If you cannot get Vista’s Aero Glass feature to work, for example, look at the top of your Welcome Center to see what graphics adapter your computer uses. You then can go to your graphics card’s website and see if the manufacturer has updated drivers that might allow your graphics card to work with the Aero Glass feature.
Did you Know?
Speaking of the Control Panel’s System window, clicking the Welcome Center’s Show More Details link opens a Control Panel window that shows even more specific information about your computer’s hardware, as detailed in the next section.
Improving Your Performance
Vista is a powerful operating system. But to get that power, your hardware must be robust. You’ll see that the computer used for Figure 2.2 has a Windows System Performance Rating of only 2.6, whereas 3 is considered the bottom of the adequate range (if you want to run with all of Vista’s features enabled). The higher the performance rating, the smoother your Vista experience will be. The owner of Figure 2.2’s computer is either going to have some sluggish computing ahead or he might have to disable some of Vista’s glitzier options, such as the Aero Glass user interface. He can either upgrade the computer in an attempt to get the rating higher, switch to a newer and faster computer, or live with substandard performance.
Figure 2.2. The Welcome Center can give you more detail by automatically opening the Control Panel’s System window.

When you click the Windows Experience Index link next to the rating, Vista analyzes your computer and makes suggestions as to things you can do to improve Vista’s performance. Figure 2.3 shows a number of suggestions that appear on the computer rated as a 2.6. A few performance issues stand out as low and they relate to the graphics adapter bring used. A sluggish graphics adapter will make your Vista experience sluggish especially if you run Aero Glass mode. The graphics problems rate between 2.6 and 2.9 and are significant given that the CPU, memory, and hard disk all rate a 4.2 or higher. The numerous graphics problems bring the rating down to the 2.6 level, which is considered unacceptable; workable, but unacceptable.
Figure 2.3. This computer’s graphics adapter needs to be replaced before its 2.6 rating will go any higher.

Watch Out!
Because Vista is the foundation of all you do, you need Vista to run smoothly and quickly or your applications will dramatically slow down and otherwise perform erratically.
It’s not the purpose of this Welcome Center overview to go into detail on how to fix every problem because each subrated computer offers unique challenges. As a rule, however, if your problems lie primarily in your hardware, you need to replace it because there is little you can do to speed up the hardware you have. If your problem lies in drivers, the problems are often easily fixed. Click the Learn How You Can Improve Your Computer’s Performance link to get help on ways to improve your machine’s performance.
The Get Started Items
In the center of your Welcome Center window are the Get Started items. These options give you links to common Vista options and settings that a new Vista user might want to adjust. Several show by default (refer to Figure 2.1), and you may see more or fewer depending on your Vista version and release. You can click the Show All Items link to see all the options the Welcome Center makes available; the ones that show initially are default options and are the most common that a new Vista user may need.
Did you Know?
Clicking each option causes the top of the Welcome Center window to change to describe that option. For example if you click to highlight the Add New Users option the top green area of your Welcome Screen changes to describe what you can do if you select that option.
Double-click an option to select it. Double-clicking some of these options might cause Vista to display a User Account Control dialog box that asks for an authorized user to confirm or permit the action (which is to say, those users with Administrative access). This confirmation dialog box appears even if you logged in as an administrator on your computer. If you did not log in as an administrator, you’ll have to provide an administrator password to continue.
The following sections explain some of the more critical Get Started options and describe why you might want to review them before learning more about Windows Vista.
View Computer Details
By selecting the View Computer Details, Vista shows you the same Vista Basic Information About Your Computer window that you saw when you clicked the Welcome Screen’s Show More Details link (refer to Figure 2.2). Vista has a lot of redundancy as you’ll see when you learn more but at the same time this redundancy means that you can locate what you need when you need it.
Transfer Windows Settings from One Computer to Another
Changing computers has long been a chore computer users dread, and for good reason. Getting all your programs and settings onto the new computer is daunting and time-consuming. Programs exist that transfer some programs, but no application transfers everything. You want to transfer not only your programs to the new machine; you want to transfer your Windows settings and folder structure, too.
Although Windows XP included a way to transfer some system settings, Windows Vista has been able to take things a step further. Click the Welcome Center’s Transfer File and Settings link to open the Windows Easy Transfer screen shown in Figure 2.4. Windows Easy Transfer cannot transfer your applications, such as Microsoft Office, but Easy Transfer can quickly make your new computer behave a lot like your old one by transferring user accounts, data files and folders, some program settings, your Internet settings (such as your Favorites links), email account settings, contacts, and messages within programs such as Outlook.
Figure 2.4. Transfer your previous Windows settings and folder structure to your Vista-based machine.

As you click Next to walk through the process, Vista tells you when to make the connection between the two machines and steps you through the process of making the transfer.
Watch Out!
Windows Easy Transfer requires that you close all open programs before you begin the transfer.
Easy Transfer uses one of six methods to transfer depending on your current computer setup:
- CDs
- DVDs
- A USB flash drive
- A local area network (LAN)
- An external hard disk, such as a FireWire- or USB-connected disk drive
- A USB Easy Transfer cable (available at your local computer store)
The method you use depends on your older machine’s hardware setup. For example, if the older computer has no way to write to DVDs, that option is out for you. The simplest is to use a network connection but both computers must be attached to the network (and be able to recognize each other). The fastest transfer occurs with the USB Easy Transfer cable, but it requires you to have and connect the cable before you can begin, not to mention have the computers close enough together to make the connection.
The transfer process can take as long as a couple of hours or more to complete depending on the method you choose for the transfer and the number of settings that you must transfer. Still, the automated transfer is much simpler than users had just a few years ago when they had to transfer everything by disk and manually adjust all settings on the new machine.
Learn What’s New in Vista
Although you’d be hard-pressed to get better information than you get from the book you’re currently holding, the entry in your Welcome Center labeled What’s New in Windows Vista opens the Windows help window and displays a list of text and links describing your Vista version’s primary features. Figure 2.5 shows one such window that appears if you use Windows Vista Home Premium.
Figure 2.5. Let Vista tell you about its new features.

Add New Users to Your Computer
When you want to set up a new user on your computer, you can access the User Accounts and Family Safety window shown in Figure 2.6 by selecting the Welcome Screen’s Add New Users link. Not only can you add new users but you can change the settings for current users (as long as you do so from an Administrator’s account). For example, you can change the picture associated with your user’s account by selecting a user and clicking the Change Your Account Picture link.
Figure 2.6. Add and edit user accounts on your shared Windows Vista computer.

Chapter 26, “Separating Users Gives Each the Access They Need,” explains how to set up new users and modify user accounts.
Watch Out!
Some items on the Welcome Screen are not necessarily for novice users. For example, you must have an Administrator’s account when setting up new users, and you must understand something about a computer’s hardware to raise your computer’s performance rating as discussed earlier in the chapter in the “Improving Your Performance” section.
The Welcome Screen isn’t designed for novice users necessarily but newcomers to Windows and Vista can do a lot with the Welcome Center without having any in-depth knowledge. Microsoft’s choice of items for the Welcome Screen lay more with choices that users of a new Vista installation might require regardless of whether they are newcomers or experts.
The bottom line is this: Use the Welcome Screen window as much as you want, but don’t feel obligated to go through every option and adjust something. If Vista works well for you, why change anything? However, when you do need to set up something new or modify the way Vista behaves, the Welcome Center might be the best place to start.
Personalize Windows
If you’re new to Windows, and even if you are experienced with Windows but new to Vista, you might want to wait before making any personalization changes to your Windows interface. Vista’s interface differs quite a bit from Windows XP and Windows 2000. Give yourself some time to become acquainted with Vista before you make any changes.
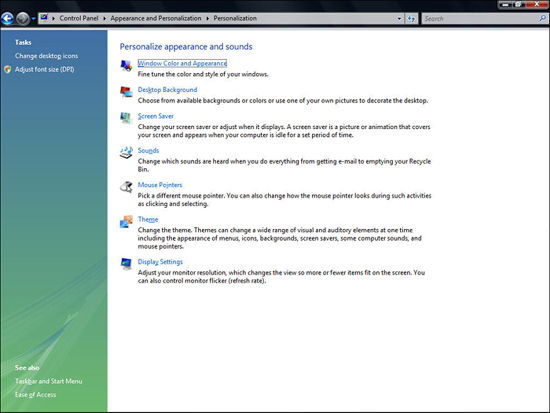
When you select the Welcome Center’s Personalize Windows, you’re greeted with the Control Panel’s Personalize Appearance and Sounds window shown in Figure 2.7. Here you change the visual appearance, sound effects, and behavior of Windows Vista.
Figure 2.7. When you explore Windows Vista, you’ll probably have to adjust Vista’s appearance and behavior using the Control Panel’s Personalize Appearance and Sounds window.
Did you Know?
If you set up multiple user accounts on your Vista computer, each user can personalize Vista to his or her liking. Upon logging on to their own account, each user works in his or her own personalized environment and that environment doesn’t affect the environment of other users on the computer.
Chapters 7, “Changing Windows Vista’s Look” discusses ways to use these personalized settings to make Vista behave the way you want.
Connect to the Internet
When the Internet was still an infant, connecting to it often posed challenges. But today, with more standard DSL, cable modem, and dial-up connections, you rarely have to do much to make the connection other than connect cables and plug the power into your modem and possibly your router if you use one.
The Welcome Screen’s Connect to the Internet option appears in case you opted not to connect to the Internet when you installed or upgraded to Vista. During the installation or update, Vista asks whether it can attempt to locate your Internet connection. This is important because Vista registers itself and downloads needed updates during the installation. You can install Vista if you don’t connect to the Internet at that time, but soon after you’ll have to connect if you want to do much with your computer.
By the Way
If you purchased a new computer with Vista preinstalled, an installation routine ran that asked about an Internet connection when you first turned on the system. Assuming that you opted to connect then, you already have Internet access just as you would if you upgraded an older PC to Vista and connected during Vista’s upgrade.
If you set up your Internet connection during Vista’s installation but still choose the Welcome Center’s Connect to the Internet link, Vista displays a dialog box that tells you the connection already exists and gives you the chance to browse the Internet. If you haven’t connected to the Internet before, the Connect to the Internet Wizard walks you through the process, asking for the type of connection (such as DSL, cable modem, or dial-up modem), analyzing the connection, and getting you online.
Registering Windows
When you select the Register Windows Online link, the Welcome Center opens Internet Explorer and displays the Windows Vista registration page. You’ll need to sign into the Vista registration page with your Windows Live ID name and password. This can be your MSN email address and password, your Hotmail email address and password, your Microsoft Passport name and password, or your Windows Live ID name and password. (Basically, they’re all now different names for the same thing.) If you have none of those, you must click the Sign Up Now button to register for a Windows Live ID name and password before you can log in and register your Windows Vista operating system.
Watch Out!
Depending on your Internet browser’s settings, you might get a warning before the registration page displays. Microsoft must install an ActiveX control onto your computer for the registration process to complete. It’s fine to accept this control when presented with a choice. If you see a yellow bar across the top of your Internet Explorer browser, you have to click that yellow bar and select Install ActiveX Control to complete the process.
After you sign in, the Vista product registration asks for your name and address information. Microsoft usually knows this information and fills it in for you from your Windows Live ID. You also have to enter a product ID, which you can get by pressing Alt+H and selecting About Internet Explorer. Write down the product ID, close the Help dialog box, and type your product ID into the box at the bottom of the screen.
When you click the Register button, the Thank You screen appears and you can close your web browser. You only need to register Windows Vista once unless you have to restore your computer back to its factory-original state using a disc that came with your computer. You’ll only do this if you have a problem and your Windows system disk gets damaged, a far less likely occurrence than before Windows Vista’s safer computing environment arrived on the scene.
Previewing Windows Basics
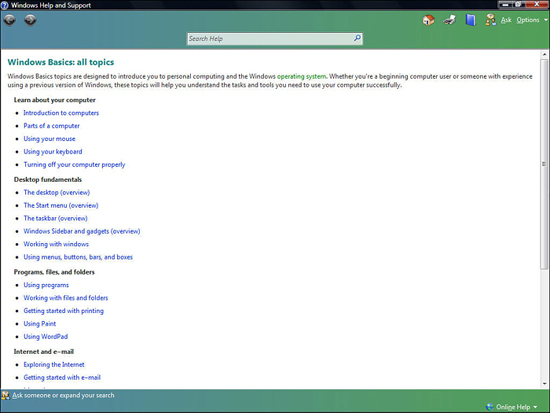
The Welcome Center’s Windows Basics link opens the Windows Help and Support window that contains link after link of introductory topics. (As with all the Welcome Screen options described in this chapter, if you don’t see one, click the Show All Items link to display all your Welcome Center options.) Figure 2.8 shows this window. Ranging from using a keyboard to working with digital pictures, these help-related links walk you through many of Vista’s major components. If you don’t see the Windows Basics option, click your Welcome Center’s Show All Items link to display all Welcome Center items not displayed by default when you first view the Welcome Center screen.
Figure 2.8. Scan the list of Windows Vista topics to locate a subject you want to know more about.
Unless you’re brand new to the Windows environment, you won’t need to worry about many of these. People who have used Windows in the past almost surely will bypass these as quickly as most of us bypass manuals when we get a new camera and want to start using it right away.
Did you Know?
If you’re not new to Windows but you also don’t consider yourself a Windows guru, you should browse through the topics that appear and click some that interest you. You’ll get an introduction to what Windows Vista offers. This text goes into far more detail about how to maximize Vista’s features, but this Windows basics overview will whet your appetite to learn more.
Watching a Windows Vista Demo
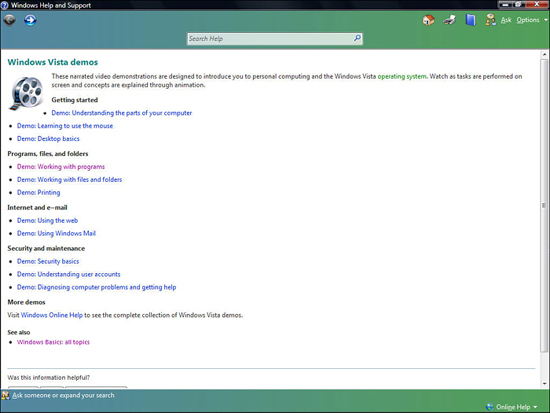
Selecting Windows Vista Demos from the Welcome Center’s options opens the Windows Help and Support Vista Demos window shown in Figure 2.9. Here you can watch various video tutorials and demos that walk you through common Windows tasks such as using your desktop and mouse as well as understanding parts of your computer.
Figure 2.9. View any demo that might give you insight into Windows that you didn’t know before.
Viewing the Control Panel
Chapter 24, “Controlling Windows Vista,” teaches you the most important aspects of your computer’s Control Panel window (see Figure 2.10). The Control Panel is available from your Windows Start menu, but you can also get to the Control Panel from the Welcome Screen by selecting the Control Panel link.
Figure 2.10. The Control Panel gives you access to your computer’s hardware and system settings.

The Control Panel isn’t as difficult to use or understand as it was in the earlier days of Windows. Nevertheless, the very nature of hardware and system settings can still pose a challenge at times. Much of the Control Panel, such as the Personalize Appearance and Sounds window that appears when you click the Control Panel’s Appearance and Personalization link, requires no hardware or system knowledge to use. The link simply offers new ways to personalize the way Windows Vista looks and behaves. (As you may recall from earlier in this chapter, the Welcome Center’s Personalize Windows link opens the Control Panel’s Personalize Appearance and Sounds window too.)
Even if you’re new to some aspects of Windows, such as adding new accounts for family users, Vista’s geared to helping you get through the previously ambiguous screens so that you can set up family members and co-workers without knowing a lot about networking or the internals of user accounts. The Control Panel’s User Accounts and Family Safety link is where you set up new accounts. In addition, you can access user accounts by selecting the Welcome Screen’s Add New Users link.
Did you Know?
If you are the only one who uses your computer, you will be the Administrator and might never need an account other than Administrator to do what you want to do with Windows. Windows Vista allows only Administrator accounts to change a setting. Chapter 27, “Managing Your Windows Security,” explains more about user accounts and security.
Although Vista makes using much of the Control Panel easier than ever before, certain parts of the Control Panel can still be tricky. For example, make sure that you understand what’s taking place when you access the System and Maintenance window because you can change some memory or system driver settings that freeze your computer. If you’re unsure, contact a computer professional when you experience a problem and are unsure how to fix it.
By the Way
Fortunately, Windows Vista is more stable than previous versions of Windows. Reboots due to problems will be infrequent, if they occur at all. Microsoft separated many parts of the operating system from the internal system core, such as sound drivers, so if you have a problem with one aspect of your computer that problem rarely if ever brings down your entire system, as it would in Windows XP and older versions.
The Offers Section
In the Welcome Center’s Offers From Microsoft section you’ll see options you can order online, some of which are free and others cost money. You can download Microsoft’s instant messaging tool named Windows Live Messenger (Messenger does not come with Windows Vista as it did in previous versions of Windows) and you can sign up for a Windows Live OneCare account, Microsoft’s online security and protection tool to keep your computing safe and secure.
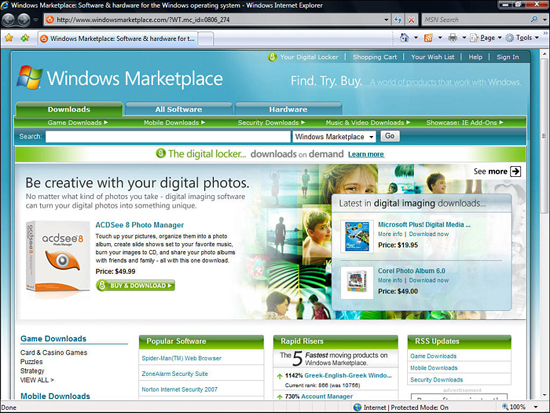
The Windows Marketplace opens an Internet window where you’ll find many of Microsoft’s products for sale (see Figure 2.11 for a sample) as well as other vendors’ products that you may be in the market for. You’ll find freeware that you don’t ever have to pay for (such as the Spider-Man Web browser for kids) but most of the site is obviously designed to promote software for sale.
Figure 2.11. The Windows Marketplace is Microsoft’s software web site where you can purchase and download programs such as games and utility applications.
Chapter Wrap-Up
The Welcome Center is the first window that most new Vista users will see. Spending an early chapter discussing the Welcome Center is critical because the Welcome Center window holds many links to tasks you’re most likely to perform when you begin using Vista.
Now that you’ve read a couple of chapters that discussed Vista’s capabilities, you’re ready to tackle the specifics. The next chapter, “Clicking Your Start Button,” begins your hands-on Windows Vista training.