Resizing Just Parts of Your Image Using the Recompose Tool
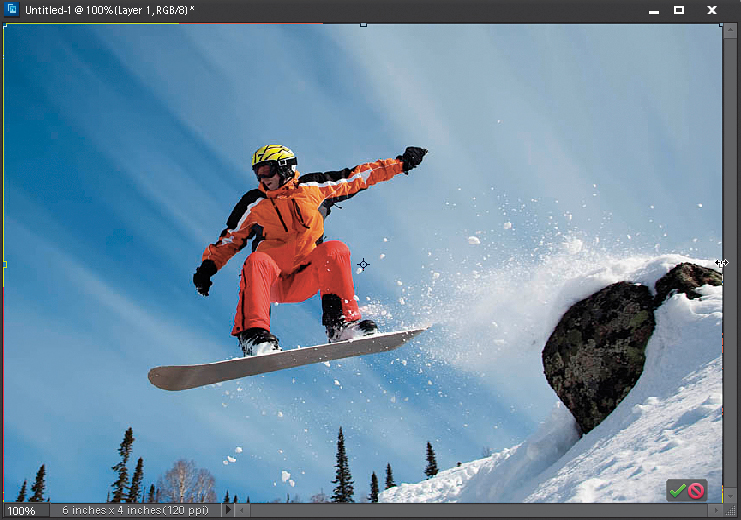
You really have to see this feature in action but, in a nutshell, you can resize one part of your image, while the important parts stay intact. For example, let’s say you took a photo of a snowboarder that you want to print out as a 6x4. But when you go to print it, you realize you’re going to have to crop it (since the 6x4 aspect ratio is not what your camera shoots in) and cut out a key part of the photo. With the Recompose tool, you can resize the background, without resizing the snowboarder. Like I said, you gotta see it in action.
Step One:
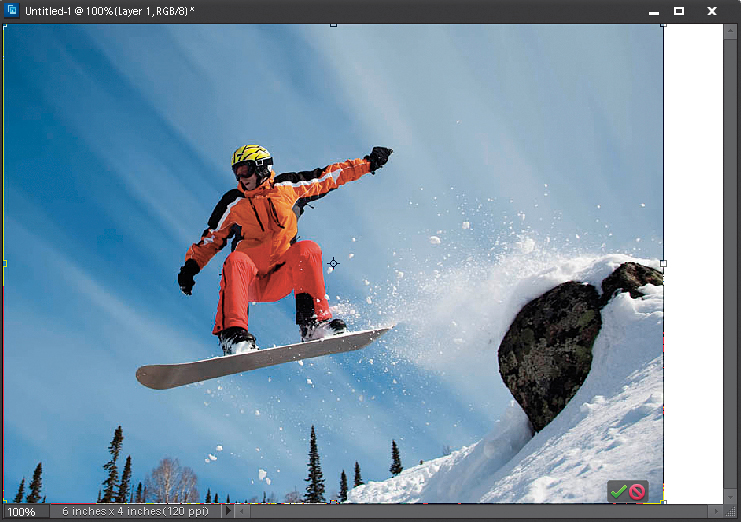
One of the things I use the Recompose tool for most is making digital camera images fit in traditional photography sizes (like 8x10″, 5x7″, 4x6″, etc.). You always have to crop the image, or leave white space, when resizing it to fit in one of these standard sizes (as shown here, where I dragged a digital camera image into a 6x4” document and then used Free Transform [Ctrl-T; Mac: Command-T] to position it). When you position it so you see the full image, it leaves a huge gap on the right.
©FOTOLIA/ALEKSEY IPATOV
Step Two:
Rather than leaving the gap, most folks try to just resize the photo (again, using Free Transform), so it fills the full 6x4″ area, but you can see what happens when you do that—you no longer see the full image as you composed it. In our case—worse yet—it clips off part of the trees at the bottom.
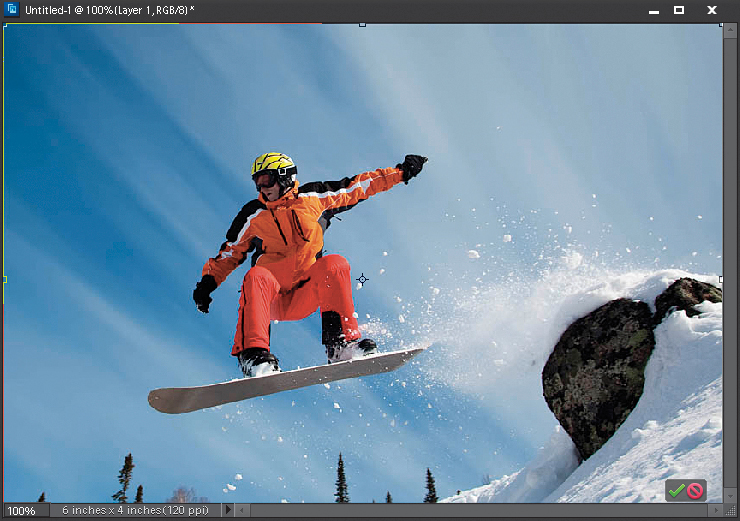
Since the resizing from Step Two doesn’t work, we’ll go back to what we did in Step One, which at least gives you the full image, as you shot it. You could try just stretching the image by, again, using Free Transform—when the resizing handles appear, grab the right-side handle and drag to the right, as shown here—but that distorts everything and now you have a stretched-looking snow-boarder, so this really isn’t an option either for most images.
Step Four:
This is where the Recompose tool comes in handy. Select the Recompose tool from the Toolbox (it’s nested with the Crop tool, or just press C until you have it). The way the tool works is you tell Elements which areas of the photo you want to make sure it preserves and which areas of the photo are okay to remove/squish/expand/get rid of. This is all done using the four tools at the left end of the Options Bar.


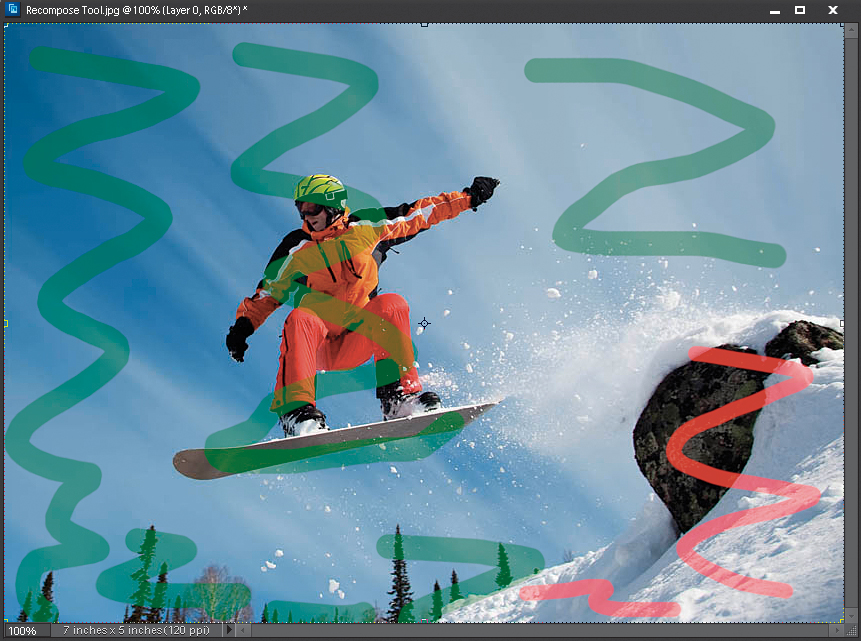
First, switch back over to your original image, then click on the Mark for Protection tool (the first icon on the left), and paint some loose squiggly lines over the areas of the photo you want to make sure Elements protects. These are the important areas that you don’t want to see transformed in any way (here I painted over the clouds, the snowboarder, and the trees at the bottom). If you make a mistake and paint on something you didn’t want to, just use the tool’s corresponding Erase tool to the right of the Mark for Protection tool.

Step Six:
Now you have to tell Elements what parts of the photo are okay to get rid of. Click on the Mark for Removal tool in the Options Bar (the third icon from the left) and paint some lines over the non-essential areas of the photo. No need to go crazy here, a couple of quick brush strokes does just fine.
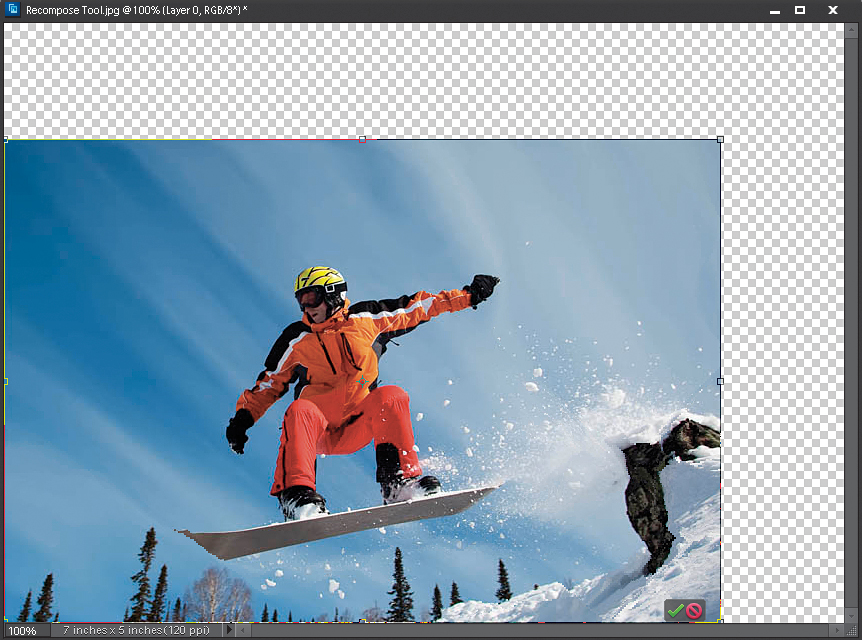
Click on the right-middle handle and drag inward, until the Width setting in the top Options Bar reads 6 inches. You’ll notice that it changes the appearance of the rock on the right, but not in a way that makes it look unnatural. Now, if you keep dragging inward (beyond what we’ve dragged here), it will start distorting other parts of the photo, so you can’t just drag forever. Luckily, you see a live onscreen preview as you’re dragging, so you’ll know right away how far you can drag. Next, drag the top-middle handle downward until the Height setting in the Options Bar reads 4 inches. When you’ve dragged far enough, press the Enter (Mac: Return) key to lock in your change and you’ve got your 6x4. Now, let’s look at another way to use the Recompose tool.

Tip: Use the Preset Pop-Up Menu
The Recompose tool has a Preset pop-up menu in the Options Bar with some common print sizes, so when you select one of them, it automatically recomposes your photo to that specific size.

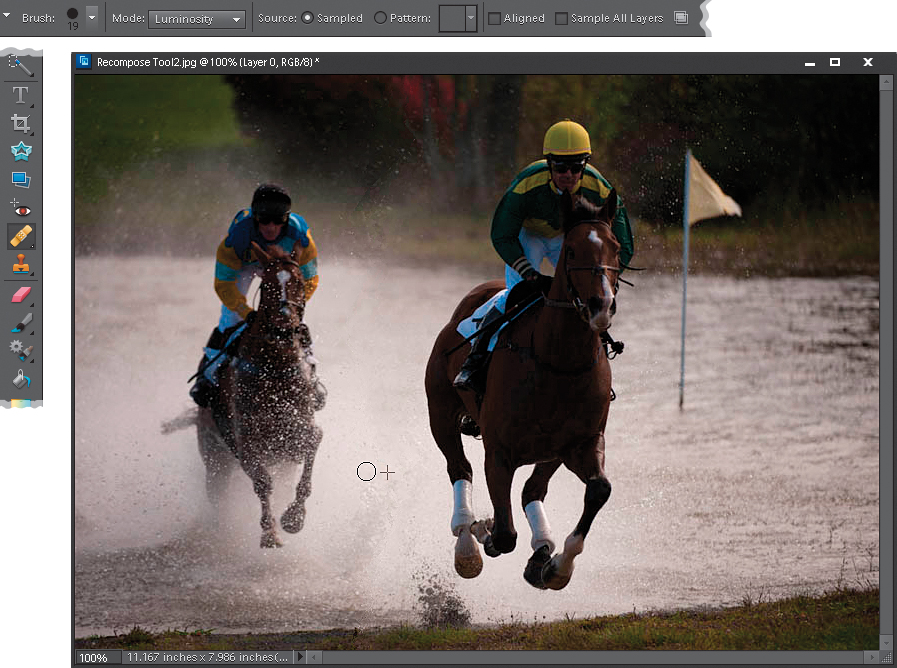
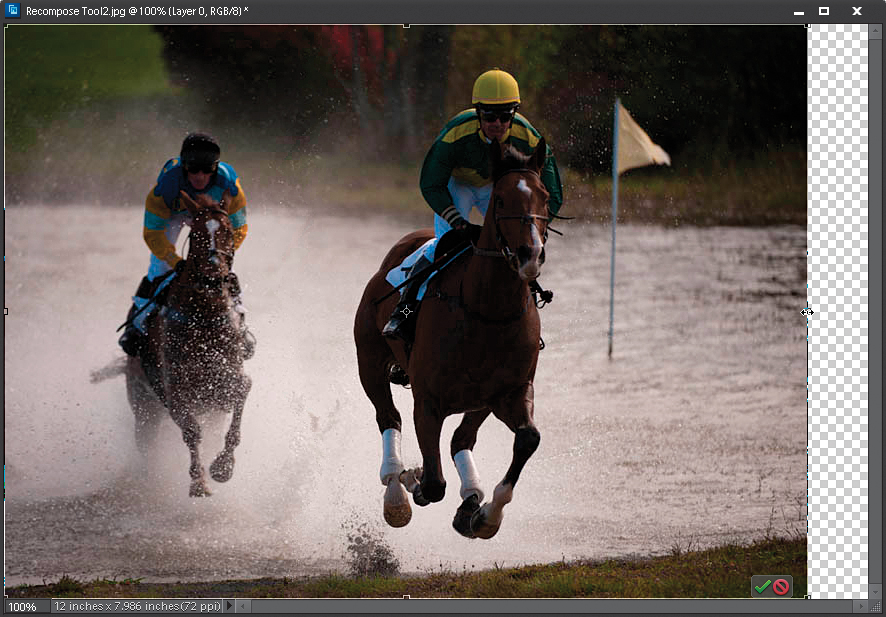
Since you can make the Recompose tool aware of your subject, you can use it in other ways. For example, let’s say you wanted these horses and jockeys to be closer together (this could be for artistic reasons, or maybe you have a photo book or some other layout that needs a smaller image. Choose the Mask for Protection tool in the Options Bar, and paint over the horses and jockeys. Then choose the Mark for Removal tool and paint between them.
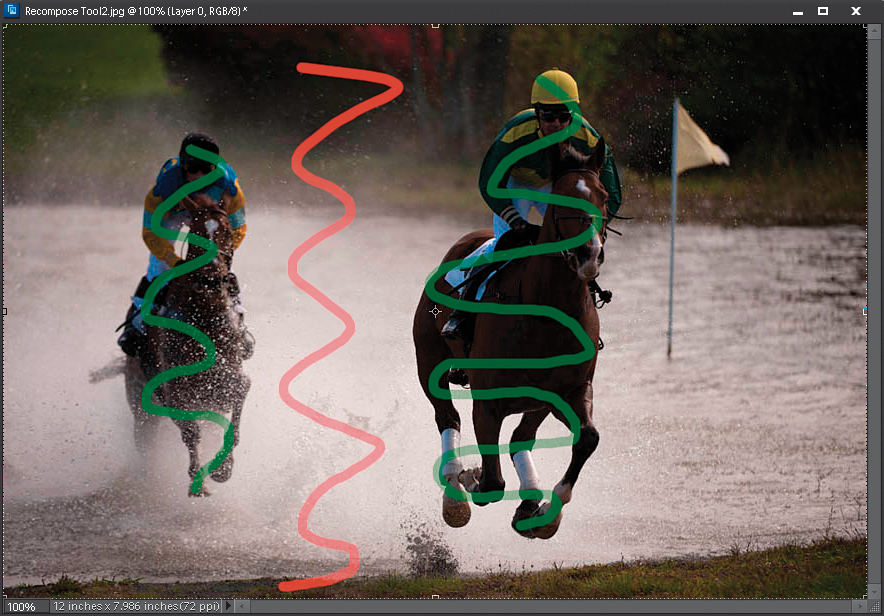
SCOTT KELBY
Step Nine:
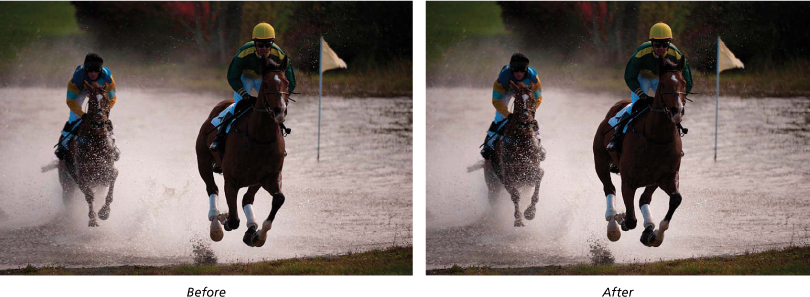
Now, click on the right-side handle and drag over toward the left to squeeze the photo, bringing the horses and jockeys closer together. Again, Elements does a good job of removing the space between them without making them look like they were squished. As you can see, I can get away with plenty of squeezing here in this example, but even if you can’t, I’ve got a trick for you in the next step.
I wanted to point out another Recompose tool option and that is a button up in the Options Bar with a little person (shown circled here in red). You turn this Highlight Skintones option on when you have people in the photo you’re about to resize and it tells the Recompose tool to automatically highlight people’s skin tones for protection so they don’t get, well, recomposed. Now, Elements will try to avoid those areas. It doesn’t always work, but it usually helps.

Step 10:
Press Enter (Mac: Return) to lock in your recomposition, then press the C key to switch to the regular Crop tool, and crop away the excess background. Now, if you look closely enough, you’ll see the Recompose tool made a jagged line and some deformities between the horses, and in the trees in the background (while it’s a bit hard to see this here in print, you should be able to see it better on your computer screen). If this ever happens to you, don’t feel like you have to abandon the Recompose tool altogether because of a small area. Instead, we can always try some of the retouching tools to clean that area up.
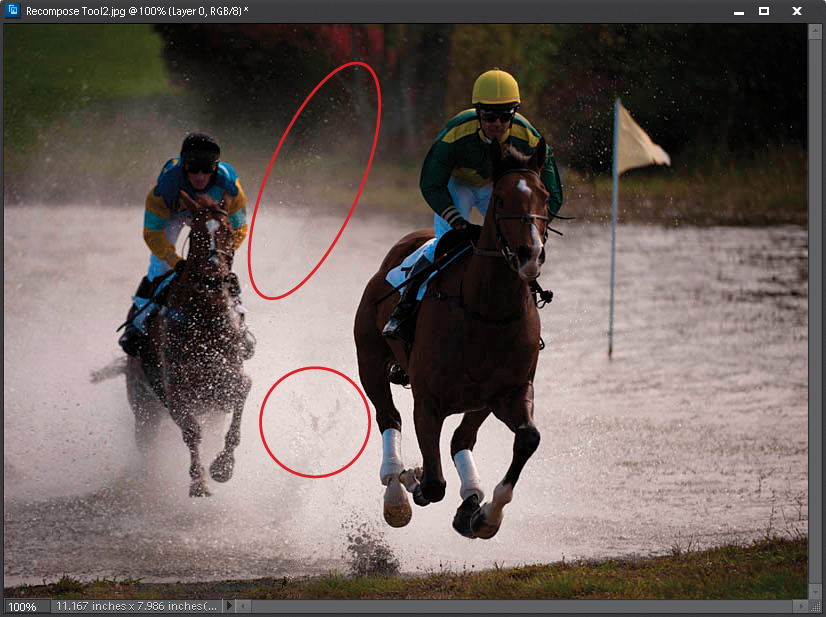
I think the Healing Brush tool will work great here, so go ahead and select it from the Toolbox (or just press J until you have it). In the Options Bar, set the Mode to Luminosity, so we only affect the lightness in the water. Now, Alt-click (Mac: Option-click) in a clear area next to the line in the water and sample from the background. Release the Alt key and paint over that line to remove it. You may need to Alt-click a few times and really zoom in while healing, so you don’t sample from either of the horses. Now the horses and jockeys look really close and you’ve got a smaller image.