
In this chapter, you will begin to build the logic and presentation tiers of the sales force application itself. The Microsoft .NET Compact Framework offers many different data driven controls to help you get your application up in the shortest possible time. We will cover most of these controls and learn to use them effectively in this chapter. With these controls, there are also numerous design pitfalls that you can potentially encounter if you're not careful. This chapter will provide tips to help you avert these pitfalls and ensure a clean segregation of code between the three tiers.
You will also be making use of the data libraries you've built in Chapter 2 to supply data to the sales force application. By the end of this chapter, you will have learned:
- How to build a robust logic tier around the data objects generated from the data tier
- How to use the .NET data-binding features to bind presentation-layer controls to your business objects
- How to build a flexible form navigation class
- How to include data validation in your business objects
- How to handle master-detail data
- How to create .NET user controls
- How to create custom controls that inherit from the .NET Listview control
- How to handle and parse XML-based data using the XML Document Object Model
- How to handle file attachments
In this chapter, the first screen your users will see after launching the SalesForceApp application is the main menu as shown in the next screenshot.
The Setup datasources icon probably sounds familiar to you. It should, because clicking this icon will bring the user to the PluginsSetup form you built in the previous chapter. The Leads, Opportunities, and Customers buttons will let the user browse a listing of the respective accounts stored on the mobile device, while the New Account button will let the user create a new account immediately.

In the accounts listing screen (shown in the following screenshot), the first thing you will notice is that the data is displayed in pages. Each page of data will display up to ten records. Four buttons at the top of the screen allow the user to navigate between pages of data.
The accounts by default will be sorted in descending order by the date and time the account was created. We will, however, provide a context menu to the user so that he or she can re-sort the accounts by name if desired.

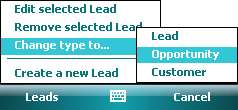
In the menu bar, clicking the Leads item will pop up a menu that lists a few actions the user can perform on the selected lead. For instance, the user can choose to create an entirely new lead or to edit or remove the selected lead. He or she can also opt to promote or demote the selected account between the Lead, Opportunity, and Customer types.
Removing a lead is straightforward. The user highlights an account on the list and chooses the Remove selected Lead menu item. A confirmation box will appear and, upon confirmation, the account is deleted from the database immediately. The list of accounts will then refresh itself to reflect the latest data.

When a user decides to create a new lead, he or she will be presented with the lead details screen as shown in the next screenshot. There are a total of six tabs in the lead details screen. The first tab, the General tab, allows the user to key in general lead information. Compulsory fields are marked with an asterisk and presented in red. You will be using the data-binding features provided in the .NET Compact Framework to bind the controls on this screen to your business objects.

The second tab, the Interest tab, displays all of Tomorrow Inc.'s products in a checklist format. The user ticks the items that the lead or opportunity is interested in. To implement the checklist functionality, you will be creating a custom control that inherits from the ListView control. Our approach to this feature will also be interesting—the list of products are retrieved as rows of data from the Products table, but the user's checklist selection is stored and retrieved in XML.

The next tab, the Address tab, is another simple data-gathering screen similar to the General tab. It allows the user to specify the lead's mailing correspondence and website address (if available).

The fourth tab, the Tasks tab, will provide the user with a means to create and manage tasks for the particular account. This will be an example of the classic master-detail form.

Upon clicking the New or Edit buttons, it will display the task detail window, where the user will be able to either create a new task or edit an existing one. It is important to take note that at this step, any changes to the list of tasks are not immediately committed to the database. The changes are held in the DataSet in memory and are only committed when the user saves the main lead record.

The next tab, the History tab, is a specialized list control that will display historical data of all correspondence with a customer grouped by date in the fashion shown in the following screenshot. As direct data binding will not allow you to achieve this type of grouping, you will build a custom control that inherits from the Listview control to handle the desired formatting. This control will also be purely read only. The data input to this control will be automatically generated when your application detects incoming/outgoing phone calls and SMS messages. The generating of the input data will be covered in Chapter 5, Building Integrated Services. In this chapter, we will focus on building the control responsible for its display.

The last tab, the Files tab, allows the user to manage the file attachments for the particular account. This is another set of master-detail data, similar to that of the Task list.

Clicking on the New or Edit buttons launches the file details screen shown in the next screenshot. Through this screen, the user will be able to browse for a file attachment (of any type) on the mobile device and upload it to the sales force system. Upon selecting a file, the file size is automatically retrieved and displayed in the same screen. What is interesting is that you will be building a reusable FileUpload user control to handle the uploading and launching of the file.

Your FileUpload user control will also feature a clickable link that will automatically launch the file in its viewer (if the viewer application is installed on the mobile device) when the user clicks on it. In the next screenshot, Windows Mobile's default image viewer is used to open a JPEG photo of the customer's living room (so that the technicians have a good idea where to place The Chair).

When the user clicks the Save button in the menu bar, the entire lead together with the task and file attachment records will be committed to the database all in one go. You will be implementing some level of validation on the business objects, so that your users will be prompted to fill in compulsory fields if they've left them out, or be notified when an account with the same name already exists.

The Opportunity and Customer screens will behave exactly like the Lead screen, so reusability of UI will be one of the core objectives in building this application.