
You've spent all your time sculpting and perfecting your applications—it's now time to get them from the development machine into the hands of your users (literally!). Packaging and deploying an application is an important part of the user experience. It is essentially the first interaction between your users and your application, and a troublesome installation process can quickly leave your users unimpressed and frustrated. Imagine the pain of a systems administrator who has to repeat this for every mobile device that requires an installation.
If you're a mobile user, you will have noticed that mobile software applications are generally deployed in two forms—CAB files and MSI files. CAB files consist of multiple compressed files stored as a single file. Due to their convenience and small size, they are ideal for distribution of a mobile application.
CAB files come with a disadvantage, however, and that is they involve a steeper learning curve for first-time users. To install a CAB file from a Compact Disc, for example, the user must first establish an ActiveSync connection between the mobile device and the development machine, manually copy the CAB file into the device, and then run it off the device.
MSI files make the deployment process slightly easier—they provide an installation wizard (on the PC) that automatically copies the CAB files onto the mobile device and executes them, but an ActiveSync connection still needs to be set up first. In this chapter, you will learn the following:
- How to deploy your solution as a CAB file
- How to deploy your solution as an MSI file
- How to create a service that checks for updates on a remote server and automatically downloads and installs them onto the mobile device
Microsoft Visual Studio provides the necessary project templates to help you build CAB and MSI packages for the smart device. You can create a CAB project by choosing the Smart Device CAB Project template under the Other Project Types | Setup and Deployment category in Visual Studio (shown as follows):

Tip
It is a good idea to have the CAB suffix in your project name, as you are also going to build an MSI installer in the same solution later.
After you've done so, you need to add the project containing your sales force application to the solution. Go to the File menu and click on the Add | Existing Project menu item. Browse for your sales force application project, and include it in the solution. You should also consider changing the name of your solution to a more generic one (like SalesForceAppInstaller), as you are going to house the MSI project later in the same solution.
You now need to tell the CAB project to include the output files of the sales force application project. To do so, right click on the CAB project and choose the Add | Project Output menu item (shown as follows).

When you've done that, you will see a screen similar to the one shown as follows. Here you can choose to include the output files of a particular project in the solution. There are several types of project output groups. You can choose to include the Primary Output of the selected project (the EXE and DLL files of the project), the Documentation Files (XML documentation files of the project), or Content Files (External content files, such as images, attached to the project), to name a few.
As we're only interested in the SalesForceApp.exe executable file and its DLL dependencies, select the SalesForceApp item as the project, and Primary Output as the project output group.

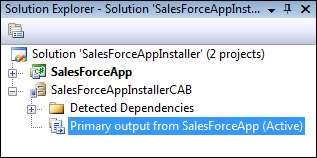
Click OK to continue. After you have done this, you will see your selection appear within your CAB project (shown as follows):
The next step is to include the other files required by the SalesForceApp project. If you recall from the first few chapters of this book, you've created a few other DLLs that are required for the proper functioning of the sales force application:
CRMLiveFramework.dllSQLServerPlugin.dllOracleLitePlugin.dll
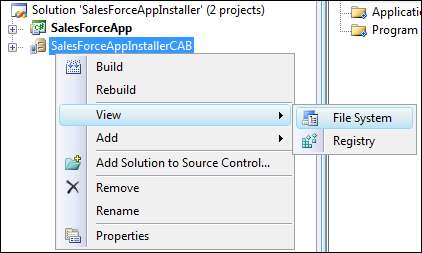
You can manually include these files in the CAB project by right-clicking on the CAB project and navigating to the View | File System menu item (shown below).
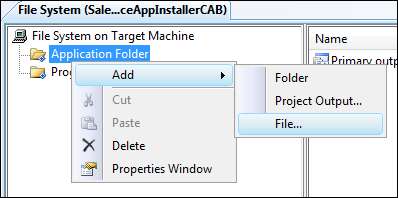
This will show the CAB File System folder hierarchy in the right pane of the Visual Studio IDE. The folders shown here correspond to where the actual files will be installed during deployment on the mobile device. You will also notice that the Primary output option you've selected appears in the Application Folder item, denoting that SalesForceApp.exe and its DLL dependencies will be installed in the application folder on the mobile device. You can now individually add your own files to the list. Right-click on the Application Folder item, and choose Add | File.
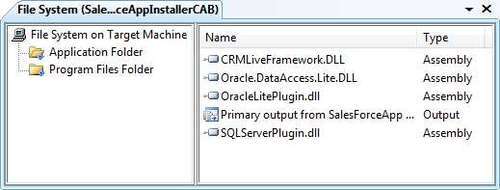
Browse for the OracleLitePlugin.dll and SQLServerPlugin.dll files and add them to the list. Take note that adding each DLL file automatically includes their dependency files as well. In this case, both plug-in files reference the CRMLiveFramework.dll file. The CRMLiveFramework.dll file is, therefore, automatically included in the list.
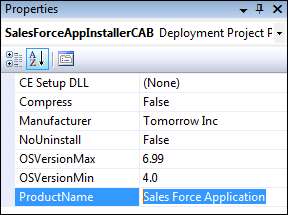
When creating the CAB file, you should also remember to set a number of other settings, such as the Product name, Manufacturer name, and so on. You can access these properties from the project properties window of your CAB project.
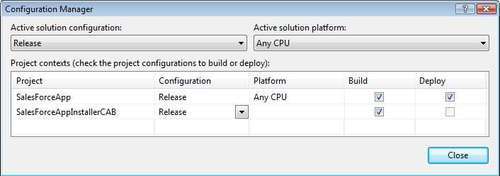
You should also remember to change the build type of all your projects to Release mode instead of the default Debug mode. Doing this reduces the size of the executable file on the device. You can perform this task by right-clicking on the solution and choosing Configuration Manager from the pop-up menu. You will see a pop-up window similar to the following screenshot. Change the active solution configuration from Debug to Release.
You are now ready to build your CAB project! Build the solution. This will create the CAB file in the project output folder (shown as follows). At this point, you can also try to copy the CAB file into your mobile device (over an ActiveSync connection) and run it from there. This will automatically deploy the files you've included in the CAB.

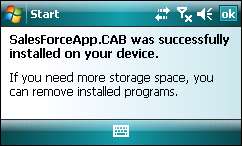
This CAB file is useful, but your users still need to manually copy it into the mobile device to run it. After running the CAB file in the mobile device, you will see the screen shown as follows, indicating that the installation has successfully completed.
In the following section, let's take a look at how you can create an automatic installer that automatically installs the CAB file into the mobile device without doing a manual copy. This can be achieved through an MSI file.