
Your first MSMQ application will do something really simple—create a local queue (on the device), send a message to the queue, and then read it back from the queue immediately after.
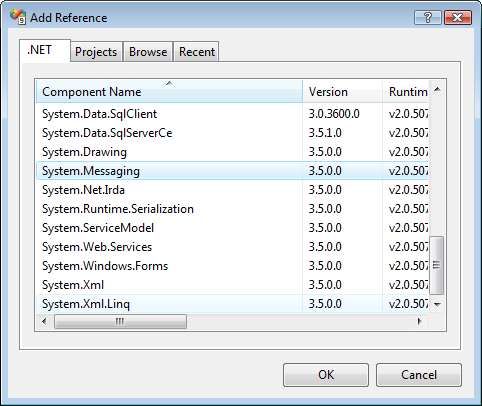
Create a new Smart Device Application project named SupportCase, and add a new form to your project. Add a reference to the System.Messaging library in your project. This library contains the MSMQ routines.
Create a new class named Generic.cs. This class will contain the initialization routines for MSMQ. Write the following code:
using System.Diagnostics;
using System;
using System.Windows.Forms;
using System.Messaging;
using System.Runtime.InteropServices;
namespace SupportCase
{
public class Generic
{
//Import the following API functions in CoreDLL.dll
[DllImport("CoreDll.dll")]private static extern int
CloseHandle(IntPtr hProcess);
[DllImport("CoreDll.dll")]private static extern IntPtr
ActivateDevice(string lpszDevKey, int dwClientInfo);
//This function will initialize MSMQ and ensure that the //service is running. It will ultimately return true if
//MSMQ is running
public static bool InitializeMSMQ()
{
bool returnValue;
returnValue = RunMSMQCommand("status");
if (returnValue == false)
{
//MSMQ service is not started yet, so we will
//attempt to recreate the registry keys and start
//the service
RunMSMQCommand("register cleanup");
RunMSMQCommand("register install");
RunMSMQCommand("register");
RunMSMQCommand("enable binary");
RunMSMQCommand("enable srmp");
returnValue = RunMSMQCommand("start");
if (returnValue == false)
{
//You have to perform ActivateDevice
//(specifically for Pocket PC devices)
//to load the MSMQ device drivers.
RunActivateDevice();
//Check the status of the MSMQ service again returnValue = RunMSMQCommand("status");
}
}
return returnValue;
}
//This function loads the MSMQ device drivers
public static void RunActivateDevice()
{
try
{
IntPtr handle =
ActivateDevice("Drivers\BuiltIn\MSMQD", 0);
CloseHandle(handle);
}
catch (Exception ex)
{
MessageBox.Show(ex.ToString());
}
}
//This function allows you to run an msmqadm command
//programmatically. It is functionally similar to
//executing statements in visadm.exe
public static bool RunMSMQCommand(string Command)
{
try
{
Process _process = new Process();
_process.StartInfo.FileName =
"\windows\msmqadm.exe";
_process.StartInfo.Arguments = Command;
_process.StartInfo.UseShellExecute = true;
_process.Start();
_process.WaitForExit();
return (_process.ExitCode == 1 ? false : true);
}
catch (Exception ex)
{
MessageBox.Show(ex.ToString());
}
return false;
}
}
}
Now let's take a look at the code required to send a message to a queue. The first thing you need to do is to create the queue. You can create a queue programmatically using the following code:
string _queueName = ".\private$\mylocalqueue";
if (! MessageQueue.Exists(_queueName))
{
MessageQueue.Create(_queueName);
}
The queue name usually takes on the following format. The private$ keyword indicates that this queue is a private queue (that is not published on the network).
.\private$\queueName
You must now create the message object. The Message class allows you to create one in the following manner:
Message _m = new Message();
_m.Label = "My first message";
_m.Body = "Hello, this is my first message";
The Body property of the message takes in an object, which can be a string, or an entire business object. Take note that serialization of business objects is done automatically by the queue.
Now that you have the message object, you need to send it to a queue. You must first create a MessageQueue object in your code and pass in the name of the queue you want it to represent. This object contains a Send method that you can use to send the Message object to the queue. This can be done via the following code:
MessageQueue _mq = new MessageQueue(_queueName);
_mq.Send(_m);
_mq.Close();
To read from a queue, you must first inform MSMQ which data type you're using in the Body property of the message. You can do this by setting the MessageQueue.Formatter property to an appropriate formatter. In the following code, you are specifying a String data type for the formatter:
_mq.Formatter = new XmlMessageFormatter(new Type[]{typeof(string)});
The next step would be to do the actual read. You can do this by calling the MessageQueue.Receive method, which will then return a Message object. The following code shows how you can retrieve and display the Body of a received message:
Message _receivedMsg = _mq.Receive();
MessageBox.Show(_receivedMsg.Body.ToString());
Now, let's put it all together. Add a button to the form you've created earlier. In the click event of the button, write the following code to send a message to a queue and to read it back from the same queue right after:
public void btnSendLocalMessage_Click(System.Object sender,
System.EventArgs e)
{
//First we initialize MSMQ
if (Generic.InitializeMSMQ() == false)
{
MessageBox.Show("Could not initialize MSMQ");
return;
}
string _queueName = ".\private$\mylocalqueue";
try
{
//Create the queue if it does not exist
if (! MessageQueue.Exists(_queueName))
{
MessageQueue.Create(_queueName);
}
//Send the message to the queue
MessageQueue _mq = new MessageQueue(_queueName);
Message _m = new Message();
_m.Label = "My first message";
_m.Body = "Hello, this is my first message";
_mq.Send(_m);
_mq.Close();
MessageBox.Show("MSMQ message sent!");
//Set the formatter to use when reading the incoming
//message back from the queue. Typeof(string) indicates
//that you wish to read the body of the message as a
//string
_mq.Formatter = new XmlMessageFormatter(new Type[]
{typeof(string)});
//Retrieve the message from the queue and display it
Message _receivedMsg = _mq.Receive();
MessageBox.Show(_receivedMsg.Body.ToString());
}
catch (Exception ex)
{
MessageBox.Show(ex.ToString());
}
}
If you run this sample, you will see that the message is first sent to the local queue, and then is displayed.
