In this chapter, you will learn to: | |
✓ | Work in the message window. |
✓ | Create and send messages. |
✓ | Attach files to messages. |
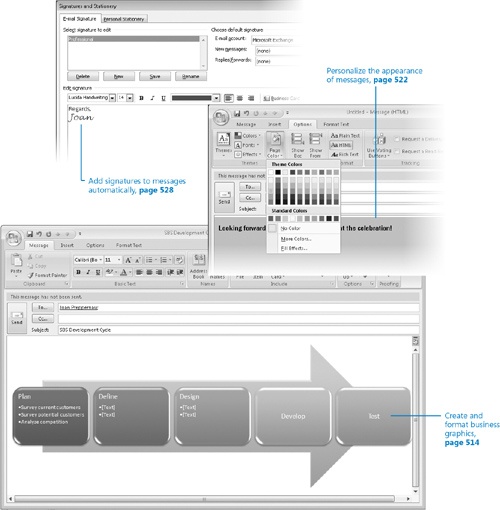
✓ | Create and format business graphics. |
✓ | Personalize the appearance of messages. |
✓ | Add signatures to messages automatically. |
Although Microsoft Office Outlook 2007 includes useful components for managing your calendar, contacts, tasks, and notes, the primary reason most people use Outlook is to send and receive e-mail messages. Over the past decade, e-mail (short for electronic mail) has become an accepted and even required form of business communication. And of course, many people use e-mail to keep in touch with friends and family, either from work or from home. Outlook makes it easy to connect to multiple e-mail accounts, either on a business network or over the Internet, and provides all the tools you need to send, respond to, organize, filter, sort, find, and otherwise manage e-mail messages.
When sending messages from Outlook, you can:
Include attachments such as documents, spreadsheets, or business graphics.
Personalize your messages by using colors, fonts, backgrounds, electronic signatures, and electronic business cards.
Set message options such as voting buttons, importance, sensitivity, and reminders.
Request electronic receipts when a message is delivered to the recipient’s mailbox or opened by the recipient.
In this chapter, you will look at elements of the item window interface. You will create and send messages, learn various ways of addressing messages to recipients, and practice sending messages with and without attachments. Then you will create and format a business graphic using the exciting new SmartArt feature provided in Outlook as well as in Microsoft Office PowerPoint 2007 and Microsoft Office Word 2007. Finally, you will experiment with the various ways you can personalize a message, including changing the font and background and adding a signature.
Important
You will use the messages you create in this chapter as practice files for exercises in later chapters of this book.
See Also
Do you need only a quick refresher on the topics in this chapter? See the Quick Reference entries at the beginning of this book.
Important
Before you can use the practice files in this chapter, you need to install them from the book’s companion CD to their default location. See "Using the Book’s CD" at the beginning of this book for more information.
Troubleshooting
Graphics and operating system–related instructions in this book reflect the Windows Vista user interface. If your computer is running Microsoft Windows XP and you experience trouble following the instructions as written, please refer to the "Information for Readers Running Windows XP" section at the beginning of this book.
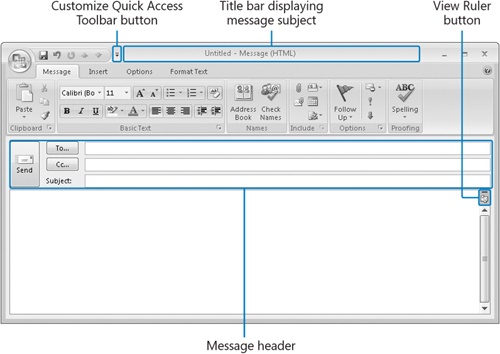
Outlook displays e-mail messages in the Mail module. When you create or respond to an e-mail message, it opens in a message window. The message window has its own set of commands separate from those in the Outlook program window. You can format and modify outgoing e-mail messages by using the message window commands.
Commands related to managing messages (such as saving, printing, securing, and sharing a message) are available from the Office menu.
In this exercise, you will take a tour of the message item window elements that differ from the contact window elements. There are no practice files for this exercise.
On the Standard toolbar, click the New Mail Message button.
An untitled message window opens.
Important
Depending on your screen resolution and the size of the message window that opens, you might see more or fewer buttons in each of the groups, or the buttons you see might be represented by larger or smaller icons than those shown in this book. Experiment with the size of the message window to understand the effect on the appearance of the command interface tabs.
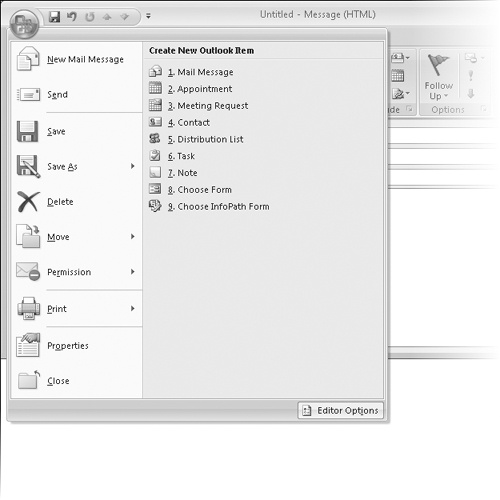
In the upper-left corner of the message window, click the Microsoft Office Button.
Notice that although you are working in the message window, you can create any type of Outlook item from the Office menu. We’ll review the commands available from the Office menu in other chapters of this book.
Click away from the Office menu to close it.
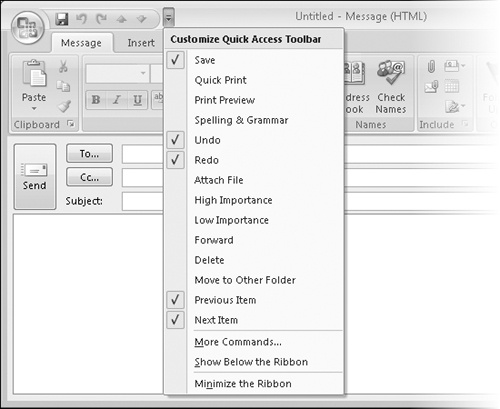
Click the Customize Quick Access Toolbar button.
A menu of commonly used commands and customization options appears.
Clicking a command in the first menu section adds it to the Quick Access Toolbar.
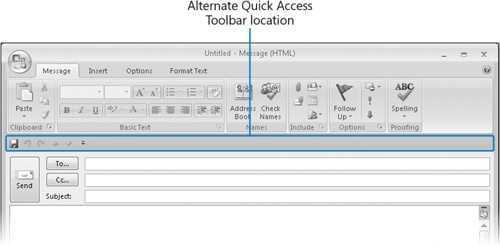
On the Customize Quick Access Toolbar menu, click Show Below the Ribbon.
The Quick Access Toolbar moves to a position between the tabs and the message header. You might find this position useful if you place many additional commands on the Quick Access Toolbar and it crowds the text shown in the message title bar.
On the Customize Quick Access Toolbar menu, click Show Above the Ribbon to return the Quick Access Toolbar to its original location.
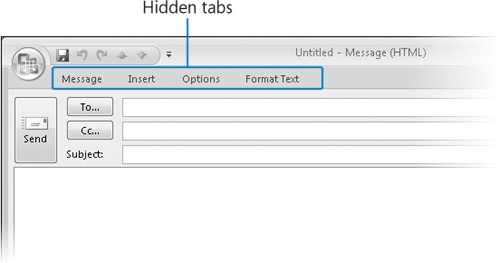
The message window commands are organized in groups on four tabs:
Message
Insert
Options
Format Text
Tip
Depending on what programs you have installed on your computer, tabs and groups other than those described here might also appear on the Ribbon.
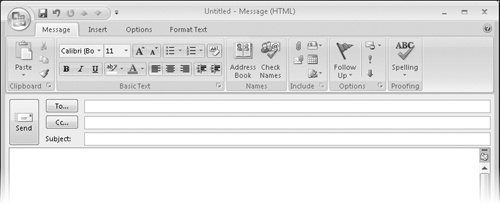
The Message tab is active by default. Buttons representing commands related to creating messages are organized on this tab in six groups:
Clipboard
Basic Text
Names
Include
Options
Proofing
You can compose and send any standard e-mail message by using only the commands available on this tab.
Double-click the Message tab.
Double-clicking the active tab hides the Ribbon and provides more space for the message.
The Ribbon reappears, with the Insert tab active.
Tip
If you click away from the Ribbon (for instance, in the content pane) the Ribbon hides again. This behavior is the default until you again double-click a tab.
Buttons representing commands related to items you can insert are organized on this tab in six groups:
Include
Tables
Illustrations
Links
Text
Symbols
Click the Options tab.
Buttons representing commands related to the format, appearance, and actions of messages are organized on this tab in five groups:
Themes
Fields
Format
Tracking
More Options
Command buttons related to the appearance of message content are organized on this tab in six groups:
Clipboard
Font
Paragraph
Styles
Zoom
Editing
Many of the commands on this tab also appear on the Message tab.