In this chapter, you will learn how to: | |
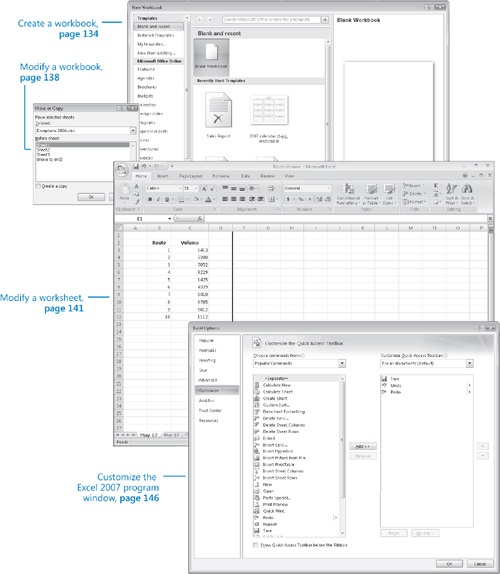
✓ | Create a workbook. |
✓ | Modify a workbook. |
✓ | Modify a worksheet. |
✓ | Customize the Excel 2007 program window. |
When you start Microsoft Office Excel 2007, the program presents a blank workbook that contains three worksheets. You can add or delete worksheets, hide worksheets within the workbook without deleting them, and change the order of your worksheets within the workbook. You can also copy a worksheet to another workbook or move the worksheet without leaving a copy of the worksheet in the first workbook. If you and your colleagues work with a large number of documents, you can define property values to make your workbooks easier to find when you and your colleagues attempt to locate them by using the Microsoft Windows search facility.
Another way to make Office Excel 2007 easier to use is by customizing the Excel 2007 program window to fit your work style. If you have several workbooks open at the same time, you can move between the workbook windows by using the new user interface. However, if you switch between workbooks frequently, you might find it easier to resize the workbooks so they don’t take up the entire Excel 2007 window. In that case, you just need to click the title bar of the workbook you want to display.
The 2007 Microsoft Office system design team created the new user interface to reduce the number of places you have to look for commands; if you find that you use a command frequently, you can add it to the Quick Access Toolbar so it’s never more than one click away.
In this chapter, you learn how to create and modify workbooks, create and modify worksheets, make your workbooks easier to find, and customize the Excel 2007 program window.
See Also
Remember, you can get a quick refresher on the topics in this chapter. See the Quick Reference entries at the beginning of this book.
Important
Before you can use the practice files in this chapter, you need to install them from the book’s companion CD to their default location. See "Using the Book’s CD" at the beginning of this book for more information.
Every time you want to gather and store data that isn’t closely related to any of your other existing data, you should create a new workbook. The default new workbook in Excel 2007 has three worksheets, although you can add more worksheets or delete existing worksheets if you want. Creating a new workbook is a straightforward process—you just click the Microsoft Office Button, click New, and identify the type of workbook you want to create.
When you start Excel 2007, the program displays a new, blank workbook; you can begin to enter data in the worksheet’s cells or open an existing workbook. In the exercises that follow, you’ll work with some of the workbooks that have already been created for Consolidated Messenger. After you make any desired changes to a workbook, you should save the workbook to avoid losing your work.
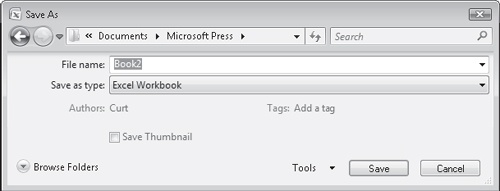
When you save a file, you overwrite the previous copy of the file. If you have made changes that you want to save, but you want to keep a copy of the file as it was previously, you can use the Save As command to specify a name for the new file.
Tip
Readers frequently ask, "How often should I save my files?" It is good practice to save your changes every half hour or even every five minutes, but the best time to save a file is whenever you make a change that you would hate to have to make again.
You also can use the controls in the Save As dialog box to specify a different format for the new file and a different location in which to save the new version of the file. For example, Jenny Lysaker, the chief operating officer of Consolidated Messenger, might want to save an Office Excel file that tracks consulting expenses as an Office Excel 2003 file if she needs to share the file with a consulting firm that uses Office Excel 2003.
After you create a file, you can add additional information to make the file easier to find when you search for it using the Windows search facility. Each category of information, or property, stores specific information about your file. In Windows, you can search for files based on the file’s author or title, or by keywords associated with the file. A file tracking the postal code destinations of all packages sent from a collection might have the keywords postal, destination, and origin associated with it.
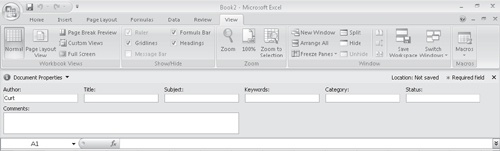
To set values for your workbook’s properties, click the Microsoft Office Button, point to Prepare, and click Properties to display the Document Properties panel on the user interface. The Standard version of the Document Properties panel has fields for the file’s author, title, subject, keywords, category, and status, and any comments about the file. You can also create custom properties by clicking the Property Views and Options button, located just to the right of the Document Properties label, and then clicking Advanced Properties.
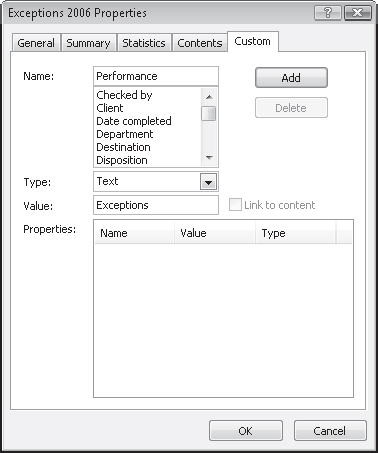
On the Custom tab of the advanced Properties dialog box, you can click one of the existing custom categories or create your own by typing a new property name in the Name field, clicking the Type arrow and selecting a data type (for example, Text, Date, Number, Yes/No), selecting or typing a value in the Value field, and then clicking Add. If you want to delete an existing custom property, move your mouse pointer down to the Properties list, click the property you want to get rid of, and click Delete. After you finish making your changes, click the OK button. To hide the Document Properties panel on the user interface, click the Close button in the upper-right corner of the panel.
In this exercise, you will create a new workbook, save the workbook under a new name, assign values to the workbook’s standard properties, and create a custom property.
Note
USE the Exception Summary workbook in the practice file folder for this topic. This practice file is located in the Creating folder under SBS_Office2007.
BE SURE TO start Excel 2007 before beginning these exercises.
OPEN the Exception Summary workbook.
Click the Microsoft Office Button and then click Close.
The Exception Summary workbook disappears.
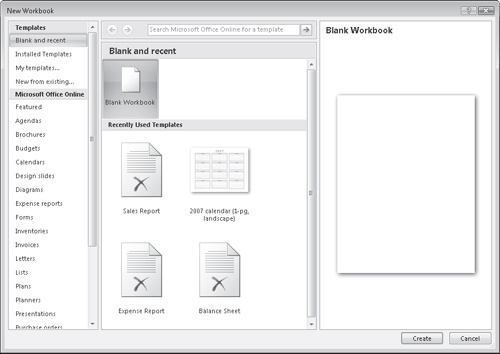
Click the Microsoft Office Button and then click New.
The New Workbook dialog box appears.
Click Blank Workbook and then click Create.
A new, blank workbook appears.
Click the Microsoft Office Button and then click Save As.
The Save As dialog box appears.
Use the navigation controls to display the My DocumentsMicrosoft PressExcel SBSSetting UpCreating folder. In the File name field, type Exceptions 2006.
Excel 2007 saves your work, and the Save As dialog box disappears.
Click the Microsoft Office Button, click Prepare, and then click Properties.
The Document Properties pane appears.
In the Keywords field, type exceptions, regional, percentage.
In the Category field, type performance.
Click the Property View and Options button and then click Advanced Properties.
The Exceptions 2006 Properties dialog box appears.
Click Custom.
The Custom tab appears.
In the Name field, type Performance.
In the Value field, type Exceptions.
Click the Add button and then click OK.
The Exceptions 2006 Properties dialog box disappears.
On the Quick Access Toolbar, click the Save button to save your work.