
In this chapter, you will learn to: | |
✓ | Display different views of a calendar. |
✓ | Define your available time. |
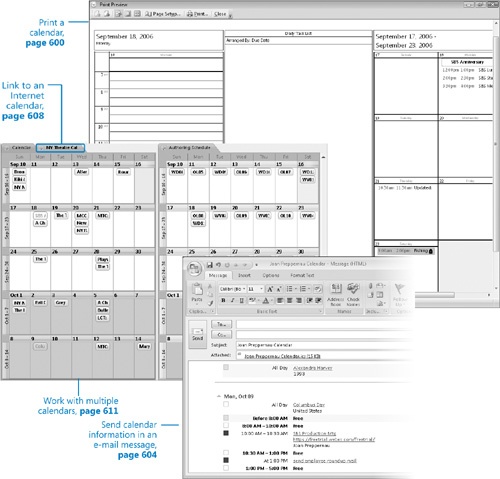
✓ | Print a calendar. |
✓ | Send calendar information in an e-mail message. |
✓ | Link to an Internet calendar. |
✓ | Work with multiple calendars. |
Using the Microsoft Office Outlook 2007 Calendar is a big step toward efficient time management. Earlier in this book, you learned how to enter and update various types of appointments in your calendar. To make your calendar work more effectively for you, and to simplify the process of finding the information you need, you can refine the default calendar settings.
In this chapter, you will learn about the different ways you can display calendar information. Then you will print daily and monthly calendars and attach calendar information to an e-mail message. Finally, you will link to a public calendar on the Internet and experiment with the different ways you can display and move between calendars. You also learn how to add region-specific holidays to your calendar, configure Outlook for use in multiple time zones, save information from your Calendar as a Web page, and create a OneNote page linked to a Calendar item, as well as ways in which you can delegate control of your calendar to another person or manage a calendar on behalf of another person.
See Also
Do you need only a quick refresher on the topics in this chapter? See the Quick Reference entries at the beginning of this book.
Important
No practice files are required to complete the exercises in this chapter. For more information about practice files, see "Using the Book’s CD" at the beginning of this book.
Troubleshooting
Graphics and operating system–related instructions in this book reflect the Windows Vista user interface. If your computer is running Microsoft Windows XP and you experience trouble following the instructions as written, please refer to the "Information for Readers Running Windows XP" section at the beginning of this book.
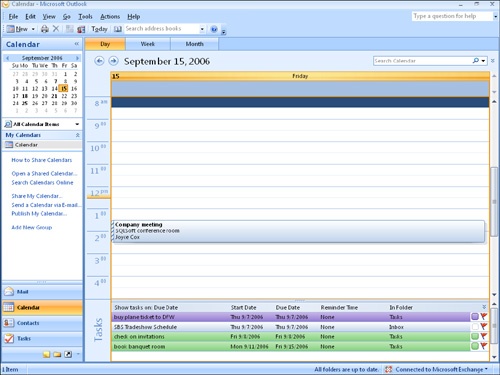
In the Calendar module, the Navigation Pane includes the Date Navigator, lists of calendars you can connect to, and links to open, search, share, send, and publish calendars. To help you stay on top of your schedule, you can view your calendar in a variety of ways:
Day/Week/Month view. A calendar view displaying one of the following:
Day view, displaying one day at a time separated into half-hour increments.
Work Week view, displaying your work week, which by default is defined as Monday through Friday from 8:00 A.M. to 5:00 P.M. You can define your work week as whatever days and hours you want.
See Also
For information about modifying the work week show in Outlook, see "Defining Your Available Time" later in this chapter.
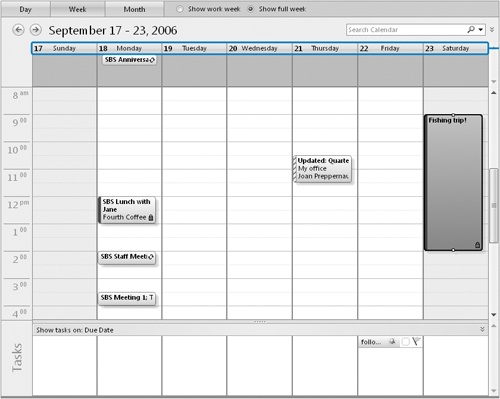
Week view, displaying one week (Sunday through Saturday) at a time.
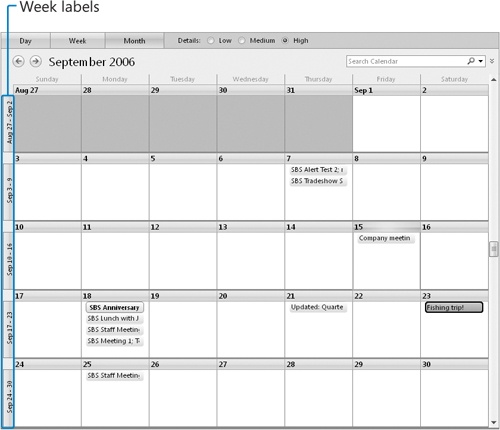
Month view, displaying five weeks at a time.
You switch among time periods by clicking the buttons at the top of the Calendar pane. In Month view, you can click the week tab at the left edge of a week to display only that week. In Week view, you can switch between displays of the work week and the full seven-day week. In either view, you can double-click a day to display only that day.
All Appointments view. A list view displaying all appointments (but not events) grouped by frequency of recurrence (none, Daily, Weekly, Monthly, or Yearly).
Active Appointments view. A list view displaying all appointments starting on or after the current day, grouped by frequency of recurrence.
Events view. A list view displaying only day-long events, grouped by frequency of recurrence.
Annual Events view. A list view displaying only events that recur yearly.
Recurring Appointments view. A list view displaying only recurring appointments and events, grouped by frequency of recurrence.
By Category view. A list view displaying all calendar items grouped by Color Category. Items assigned to multiple categories appear in each of the assigned category groups.
Outlook Data Files view. A list view displaying all calendar items grouped by Outlook Data File and then by frequency of recurrence.
By default, Outlook displays your calendar in Day view. To change the view, select the view option you want in the Current View list in the Navigation Pane, or click the view you want on the View menu. To return to the current Day view from any other view, click the Today button on the Standard toolbar.
You can display the previous or next time periods by clicking the Back or Forward button next to the date or date range, or you can display a specific day, week, or month by selecting it in the Date Navigator.
To display a month, click the current month name and then in the list, click the month you want to display. To scroll beyond the seven-month range displayed by default, point to the top or bottom of the month list.
To display a week, click the margin to the left of that week. Or, if you display week numbers in the Date Navigator and Calendar, click the week number to display that week.
Tip
Week numbers are used in some countries to reference events, vacations, and the like. Week 1 is the calendar week (Sunday through Saturday) in which January 1st falls, Week 2 is the following week, and so on through to the end of the year. Because of the way the weeks are numbered, a year can comprise Weeks 1 through 53. To display week numbers, click Tools on the Options menu, click the Calendar Options button, and then select the Show Week Numbers In The Month View And Date Navigator check box. Then click OK in the open dialog boxes.
To display a day, click that day.
Tip
If you’ve made changes to any view (such as the order in which information appears) and want to return to the default settings, point to Current View on the View menu, click Customize Current View, and then in the Customize View dialog box, click Reset Current View. If the Reset Current View button is unavailable, the view already displays the default settings.
In calendar views that include the Date Navigator, increasing the width of the Navigation Pane also increases the number of months shown in the Data Navigator. You can allocate up to 50% of the program window to the Navigation Pane.
You can use the Outlook 2007 Instant Search feature to quickly locate appointments, events, meetings, or holidays by searching on any text within the calendar item.
See Also
For more information about Instant Search, see "Quickly Locating Messages" in Chapter 19.
In this exercise, you will display different periods of time in the Date Navigator and in your calendar, and display different views of your schedule.
Note
BE SURE TO start Outlook before beginning this exercise.
USE the calendar items you created in Chapter 20. If you did not complete the exercises in that chapter, you can complete them now, or use any appointments, meetings, or events in your own calendar.
In the Navigation pane, click the Calendar button to display the Calendar module.
By default, Outlook displays your calendar for the current day, which is indicated in the Date Navigator by a red outline. Tasks due today are listed in the Tasks area at the bottom of the Calendar pane.
In the Date Navigator, click a bold date to display your calendar for a day on which you have scheduled appointments or meetings.
Dates with scheduled events (but no appointments or meetings) do not appear bold.
At the top of the Calendar pane, click Week.
Outlook displays your calendar for the work week of the selected date, and highlights the corresponding days in the Date Navigator. The Tasks area displays tasks due each day.
At the top of the Calendar pane, select the Show full week option.
Outlook displays the full seven-day week. Time that falls outside of your defined work week appears shaded.
At the top of the Calendar pane, click Month.
Outlook displays your calendar for the month. Alternating months are shaded to provide an obvious visual indicator of the change. The Tasks area is not available in Month view.
You can display a different month by scrolling the Calendar pane or by clicking the month you want to view, in the Date Navigator.
At the top of the Calendar pane, to the right of Details, select the Medium option.
The calendar changes to display only events as readable items; appointments and meetings appear as horizontal lines, with the width of the line indicating the amount of time scheduled for that item. The lines representing items assigned to color categories appear in the assigned color.
Select the Low option to hide appointments and meetings entirely.
Click one of the week labels that appears along the left edge of the Calendar pane.
Outlook displays the selected week in the most recent week view (Work Week or Full Week) you selected. No detail level is available in Day or Week view; Outlook shows all the calendar items.
To the left of the date range in the calendar header, click the Forward button.
The calendar moves forward one week.
Click one of the day labels that appears in the calendar header.
Outlook displays the selected day in Day View.
On the Standard toolbar, click Today to return to the default view.
Adding and Removing Local Holidays
You can add the national holidays of any country to your Outlook calendar.
To add the holidays of one or more countries to your calendar:
On the Tools menu, click Options.
On the Preferences tab of the Options dialog box, click Calendar Options.
In the Calendar Options dialog box, click Add Holidays.
In the Add Holidays to Calendar dialog box, select the check boxes of the countries whose holidays you want to add to your calendar, and then click OK.
After Outlook adds the selected country’s holidays to your calendar, click OK in each of the open dialog boxes.

Outlook 2007 assigns a color category named Holiday to all holidays in your calendar. If the only holidays in your calendar were added in Outlook 2007, you can view a list of holidays by displaying the calendar in By Category view and then scrolling to the Holiday category. You can then remove all holidays from your calendar by selecting the Categories: Holiday group header and pressing the Delete key.
If your calendar includes holidays created in a previous version of Outlook, or if you want to remove only the holidays of a specific country, follow these steps to remove the holidays:
Display the Calendar in All Appointments view.
On the View menu, point to Current View, and then click Customize Current View.
In the Customize View dialog box, click the Group By button.
In the Group By dialog box, clear the Automatically group according to arrangement check box if it is selected. Then click the Group items by arrow, and in the list, click Location.
Ensure that all the Then by lists display (none), and then click OK in each of the open dialog boxes.
In the Calendar pane, collapse the displayed groups or scroll the pane until the Location group of the holidays you want to remove (for instance, Location: Sweden) is visible.
To remove all the holidays of the displayed country, click the Location group header, and then press the
 key. If a Outlook displays a message box warns you that this action will apply to all items in the selected group, click OK.
To remove selected holidays, click the holiday(s) you want to delete (hold the
 key to select multiple holidays), and then press .