Assigning messages to categories can help you more easily locate information. Outlook 2007 introduces Color Categories, which combine named categories with color bars to provide an immediate visual cue when viewing messages in your Inbox.
You can apply color categories to messages, calendar items, contacts, tasks, and notes. You can apply color categories several ways:
In any folder, you can select one or more items, click the Categorize button on the Standard toolbar, and then click the category you want.
In any folder, you can right-click a single item or a selection of multiple items, point to Categorize, and then click the category you want.
In any mail folder, you can right-click the Category bar that appears when the Reading Pane is displayed, and then click the category you want.
If you frequently use a particular category, you can assign it as your Quick Click category. You can then apply the Quick Click category to a message by clicking its Category bar.
To quickly view the messages belonging to a category, you can group your messages by category or include the category as a search criterion in the Query Builder. On the To-Do Bar, you can arrange your flagged messages and tasks by category.
Tip
To help you easily distinguish messages received from certain people, you can color-code message headers. For example, you might show all messages from your boss in red and all messages from the finance department in green. You can also choose to have messages that were sent only to you displayed in a different color than messages sent to multiple people or a distribution list. You apply color-coding on a per-folder basis. To experiment with color-coding, click Organize on the Tools menu, and then click the Using Colors tab.
In this exercise, you will display the default color categories, rename and create categories, change the color associated with a category, categorize a message, and sort the Inbox contents by category.
Note
USE For this exercise, take any message in your Inbox and forward it to your Inbox with the new subject line SBS Alert Test 1.
BE SURE TO start Outlook and display your Inbox in the default Messages view before beginning this exercise.
In the Inbox, click the SBS Alert Test 1 message.
On the Standard toolbar, click the Categorize button.
Troubleshooting
If the Categorize button is not visible or active, click any message in the Inbox to activate it.
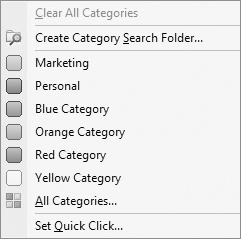
The Category list displays the standard and currently assigned categories. Notice that you can remove all categorizations from a message by clicking Clear All Categories.
In the Category list, click All Categories.
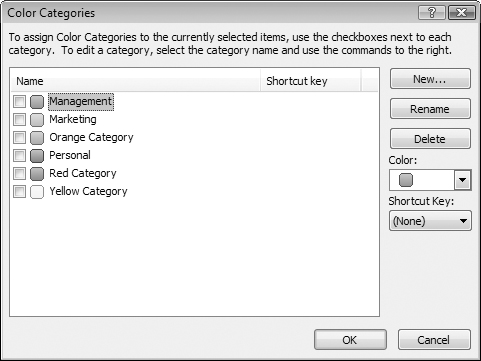
The Color Categories dialog box opens, displaying the current color-to-category assignments. You can rename any of the standard color categories or create new color categories.
In the Color Categories dialog box, click the Blue Category name (not the check box), and then click Rename. With the category name selected for editing, type Management, and then press
 .
.The category name changes.
With the Management category still selected, click the Color arrow, and then in the color palette, click the Yellow square.
The color associated with the Management category changes from Blue to Yellow.
In the Color Categories dialog box, click New.
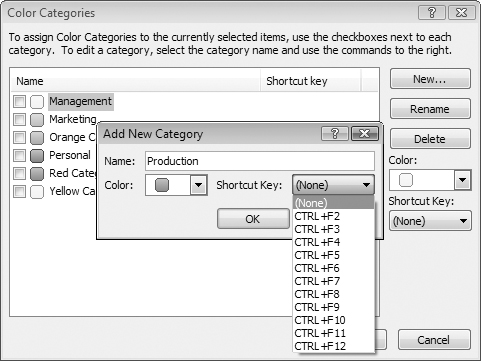
The Add New Category dialog box opens.
In the Name box, type Marketing. Click the Color arrow, and then in the color palette, click the Red square. Then click the Shortcut Key arrow.
Notice that you can assign keyboard shortcuts to up to 11 color categories. You might want to implement this feature if you frequently use multiple categories.
In the Shortcut Key list, click None. Then in the Add New Category dialog box, click OK.
The new category appears at the bottom of the Color Categories list. Its check box is selected, indicating that it has been assigned to the currently selected message.
In the Color Categories dialog box, click OK.
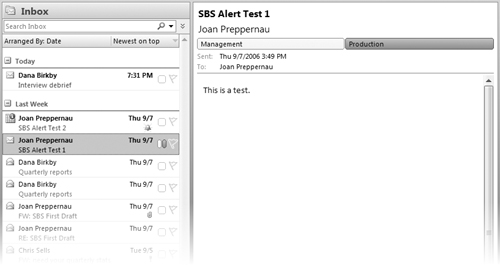
In the message list, a red square appears in the Category bar of the selected message, and in the Reading Pane, a red bar with the category name Production appears at the top of the message.
In the message list, right-click the Category bar of the SBS Alert Test 1 message, and then in the list, click Management.
The Category bar changes to display both red and yellow icons, indicating that the message is assigned to two categories. You can assign a message to an unlimited number of categories, but only the three most recently assigned appear in the Category bar.
The Reading Pane displays two colored bars of equal size. Up to three categories can be displayed in one row; additional categories are displayed in additional rows.
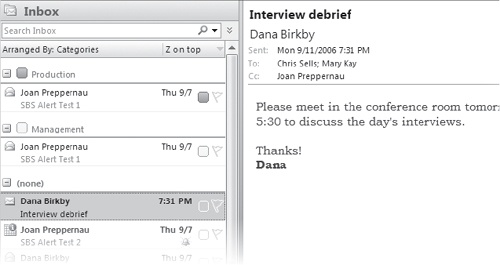
In the Inbox header, click the Arranged By bar, and then click Categories.
The messages are arranged by category, beginning with the uncategorized messages.
To the right of the Arranged By bar, click A on top.
The order reverses so that the categorized messages are displayed at the top of the list.