Working with layers
Using layers for a selection
Changing the stacking order of a layer
Moving and cloning objects to another layer
Hiding and locking layers
This chapter shows you just how simple it is to use layers and how helpful layers can be when you're producing complex artwork. Layers are similar to clear pages stacked on top of your artwork: You can place content (text, shapes, and other objects) on a layer, lift up a layer, remove a layer, hide and show layers, or lock a layer so that you can't edit its content. The incredible Layer feature can help you
Organize the painting (stacking) order of objects.
Activate objects that would otherwise be difficult to select by using either the Selection or Direct Selection tool.
Lock items that you don't want to reposition or change.
Hide items until you need them.
Repurpose objects for artwork variations. For example, a company's business cards use the same logo and company address, but the name and contact information changes for each person. In this case, placing the logo and company address on one layer and the person's name and contact information on another layer lets you easily create a new business card by just changing the person's name.
Many Illustrator users don't take advantage of layers. Maybe these people don't understand the basic functions of layers or they think that layers are much more complicated than they are. After reading this chapter, you'll be able to take advantage of layers in Illustrator.
Note
Unlike in Photoshop, layers in Illustrator don't unreasonably increase file size.
When you create a new Illustrator document, you automatically have one layer to start with. To understand how layers work, create a new file and then follow these steps to create new layers and put objects on them:
If the Layers panel isn't already visible, choose Window

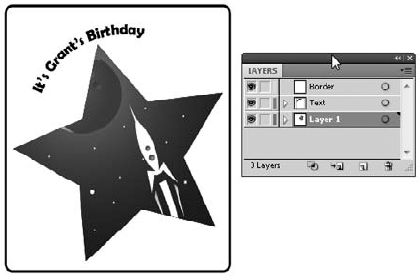
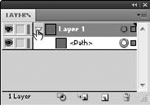
The Layers panel appears. In Illustrator CS5, you see layer color bars to help identify selected objects and the layer they're on, as shown in Figure 8-1.
In Figure 8-2, the Notes layer name is in italic because the creator double-clicked that layer (to open the Layer Options dialog box) and deselected the Print check box.
Create a shape anywhere on the artboard.
The size of the shape doesn't matter, but make sure that it has a colored fill so that you can see it easily. For example, create a square.
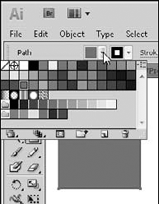
Click the Fill button in the Control panel and select any color for the shape from the Color Picker that appears, as shown in Figure 8-3.
The Fill button is the swatch with an arrow on the left side of the Control panel.
The blue handle color that appears on the active shape matches the blue color bar you see in the Layers panel on the left side of the layer name and the small selection square to the right of the radio button. The small selection square on the right disappears if you choose Select
Notice in Figure 8-4 that you've added a shape to this layer, so an arrow appears to the left of the layer name. This arrow indicates that you now have a sublayer, which is essentially a layer within a layer. Click the arrow to expand the layer and show any sublayers nested underneath it; sublayers are automatically created when you add objects, which helps when you're making difficult selections.
Alt-click (Windows) or Option-click (Mac) the Create New Layer button at the bottom of the Layers panel to create a new layer.
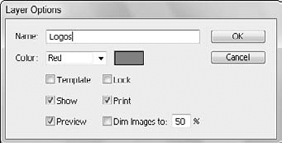
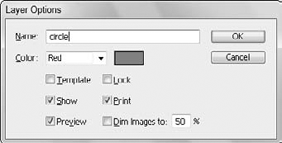
The Layer Options dialog box appears (see Figure 8-5), and you can use it to name a layer and change the selection color. You don't have to hold down the Alt or Option key when making a new layer, but if you don't, you don't have the opportunity to name the layer when you create it.
Enter a name for the new layer in the Name text box and click OK.
In Figure 8-5, we entered circle because it's the shape we add in Step 6.
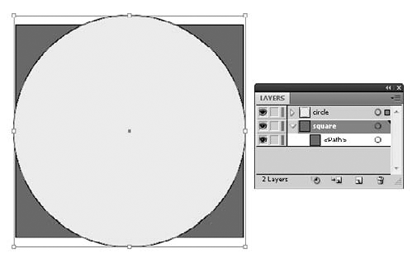
If you want to stay organized, you can name the original layer square, by double-clicking Layer 1. Just make sure that you click the circle layer again to make it the active layer.
A new layer is added to the top of the stack in the Layers panel.
Make a shape on the new layer and overlap the shape you created in Step 2 (see Figure 8-6).
We created a circle, shown in Figure 8-6.
Change the fill color for your new shape.
Check out the selection handles: They change to a different color, indicating that you're on a different layer. The different handle colors are for organizational purposes only and aren't printed.
Just to be different this time, choose New Layer from the panel menu.
The Layer Options dialog box appears.
(Optional) In the Layer Options dialog box, change the color of the selection handles by selecting an option from the Color drop- down list.
You can also hide or lock the contents of the layer.
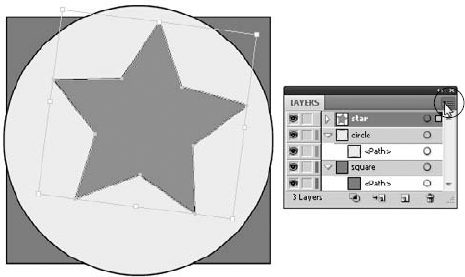
Enter a name for this new layer in the Name text field, click OK, and then create a shape on it.
For the example shown in Figure 8-7, we entered star into the Name text box and used the Star tool to create a star on the new layer.
Again, change the fill color of your newest shape so that it's different from the other shapes.
Use the Selection tool to move the new shape so that it overlaps the others slightly.
Tip
You can open the Options dialog box for any existing layer by choosing Options for Layer (Named Layer) from the panel menu in the Layers panel, or by double-clicking on a layer in the Layers panel.
You've created new layers and now have a file that you can use to practice working with layers.
When you have a selected object on a layer, a color selection square appears to the right of the named layer. If you click the radio button directly to the right of the layer's name in the Layers panel, as shown in Figure 8-8, all objects are selected on that layer.
Sublayers have their own radio buttons. If sublayers are visible, you can use the same technique to select objects that may be buried behind others.
Tip
If you think you'll be selecting sublayers frequently, double-click the default name and type a more descriptive name for that layer.
In Chapter 7 of this minibook, we tell you about the Object
As you add shapes to a layer, a sublayer is created, and it has its own little stacking order that's separate from other layers. In other words, if you choose to send an object to the back and it's on the top layer, it goes only to the back of that layer and is still in front of any objects on layers beneath it.
Note
Understanding how the stacking order affects the illustration is probably the most confusing part about layers. Just remember that in order for an object to appear behind everything else, it has to be on the bottom layer (and at the bottom of all objects on that bottom layer); for an object to appear in front of everything else, it has to be on the topmost layer.
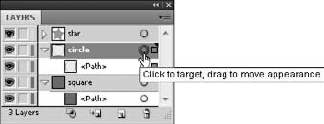
To move a selected object from one layer to another, click the small color-selection square (shown in Figure 8-9) to the right of the layer's radio button in the Layers panel, drag the object to the target layer, and release. That's all there is to moving an object from one layer to another.
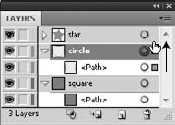
You can also clone an item, or make a copy of it while you move the copy to another layer. Clone an object by Alt+dragging (Windows) or Option+dragging (Mac) the color selection square to another layer. A plus sign appears while you drag (so you know that you're making a clone of the object). Release when you reach the cloned object's target layer.
To the left of each layer in the Layers panel is an eye icon — a visibility toggle button. Simply clicking the eye icon hides the layer (the eye disappears, denoting that this layer is hidden). Click the empty square (where the eye icon was) to show the layer again.
Alt-click (Windows) or Option-click (Mac) an eye icon to hide all layers except the one you click; Alt-click (Windows) or Option-click (Mac) the eye icon to show all layers again.
Ctrl-click (Windows) or