In order to send an e-mail from Microsoft CRM 2011, we need to set up e-mail integration. Mainly, we have the following two options for e-mail integration:
- Using an e-mail router
- Using CRM for the Microsoft Outlook client
Both options have their own pros and cons. Please refer to http://blogs.msdn.com/b/crm/archive/2008/02/07/crm-4-0-e-mail-integration-overview.aspx for more details about e-mail integration.
We have an e-mail router installed in our development server, so we are going to use this e-mail router. Before setting up the e-mail router, we need to configure mail access for every CRM user. We need to perform the following steps to set e-mail access configuration to use the e-mail router:

We need to set up e-mail integration so that we can distribute the e-mail activity created for the campaign. We can send an e-mail from Microsoft CRM using the following two options:
- Microsoft Outlook
- E-mail router
We are going to use an e-mail router for the integration of our e-mail. First we need to download the e-mail router from http://www.microsoft.com/download/en/details.aspx?id=27818. After the e-mail router is installed, we need to configure the e-mail router. We will be performing the steps explained in the next section to configure the e-mail router.
First we need to configure at least one profile, depending on our requirement regarding e-mail integration. For example, if we are only going to send e-mails from Microsoft CRM, then we will configure an outgoing profile, and if we are only going to receive e-mails in Microsoft CRM, we will just configure an incoming profile.
Perform the following steps to configure the profiles:
- Select the Configuration Profiles tab and click on New to create a new profile.
- We need to set up the following information to configure an incoming or outgoing profile:
- Profile Name: Enter the name of the profile here.
- E-mail Server Type: Here we set up the e-mail server types for the incoming and outgoing profiles.
For the incoming profile, the e-mail router supports the Exchange Server 2003/2007/2010/Online exchange or POP3 e-mail systems.
For the outgoing profile, the e-mail router supports only the Exchange Online or SMTP e-mail system.
- Authentication Type: We have three options to set the authentication type.
The first option is Windows Authentication. This authentication type is available if we are using Microsoft Exchange Server for incoming e-mail.
The second option is NTLM. This option is available only if we are using POP3 for the incoming profile.
The third option is Clear Text. This option is available if we are using POP3 or the Online Exchange server.
- Location: We enter the name of the e-mail server.
- Access Type: Depending on the other configuration profile options, we need to set up the access type, where we can provide the User name and Password that the e-mail router will use to access each mailbox.

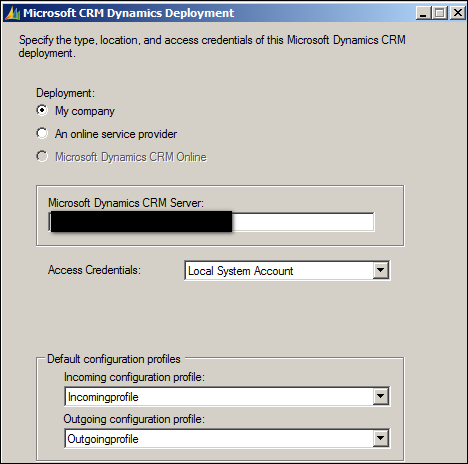
In Deployments, we need to mention our organization name along with the incoming and outgoing profiles that we created in the previous section:
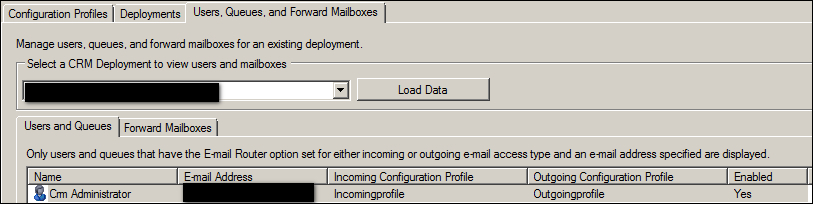
Once we have configured our profile and deployed it, we need to set up users and queues. Perform the following steps to configure the users and queues:
- Navigate to the Users, Queues, and Forward Mailboxes tab.
- Select our deployment from the deployment drop-down menu.
- Click on Load Data to load the list of users and queues that were configured to use the e-mail router.
- Once the user is configured, we can click on the Test Access button to test the connection with the e-mail servers, and click on Publish to publish the settings for the e-mail router.
Tip
You can download the e-mail router configuration guide from http://www.microsoft.com/download/en/details.aspx?id=21445.