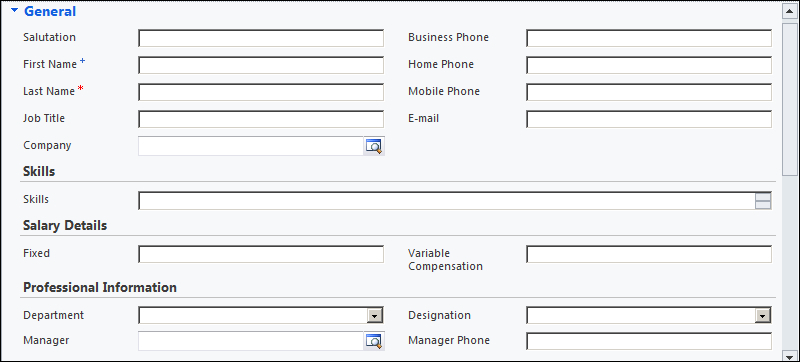
We need to create and customize entity fields; based on the data model we just saw, let's create candidate entity fields. Use the following steps to create fields:
- Open our HRModule solution.
- Navigate to Entities | Candidate | Fields.
- Click on New to create a new field.
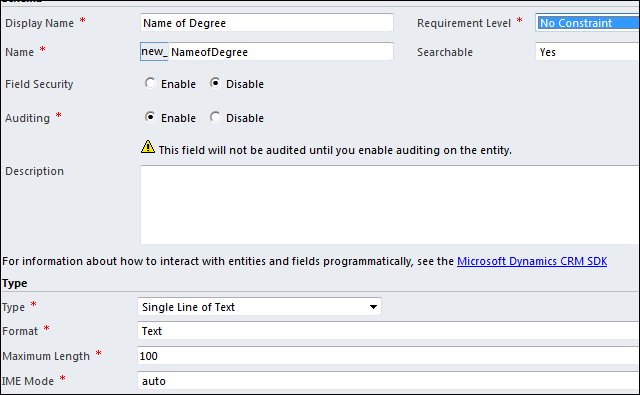
- Enter the following field properties:
- Display Name: Text that you want to show to the user on the form.
- Name: This will be populated automatically as we tab out from the Display Name field.
- Requirement Level: Used to enforce data validation on the form.
- Searchable: If this is true, this field will be available in the Advance Finds field list.
- Field Security: Used to enable field-level security. It is a new feature added in Microsoft CRM 2011. Refer to the Setting field-level security in Microsoft CRM 2011 section for more details.
- Auditing: Used to enable auditing for entity fields. It is also a new feature added in Microsoft CRM 2011. Using auditing, we can track entity and attribute data changes for an organization. You can refer to http://msdn.microsoft.com/en-us/library/gg309664.aspx for more details on the auditing feature.
- Description: Used to provide additional information about fields.
- Type: Represents what type of data we are going to store in this field; based on the type selected, we need to set other properties.
After filling in this information, our entity form should look like the following screenshot:
We need to create fields for all entities based on the preceding steps, one by one.
In Microsoft CRM 2011, we can relate two entities by creating a relationship between them. We can create three types of relationships:
- One-to-many relationship: A one-to-many relationship is created between one primary entity and many related entities. Microsoft CRM 2011 creates a relationship field (lookup field) automatically for each related entity when a one-to-many relationship is created.
- Many-to-one relationship: A many-to-one relationship is created between many related entities and one primary entity.
- Many-to-many relationship: A many-to-many relationship can be created between many related entities. To create a many-to-many relationship, the user must have Append and Append To privileges in both side entities.
Tip
We can define different relationship behaviors while creating a relationship; you can refer to http://msdn.microsoft.com/en-us/library/gg309412.aspx for more details.
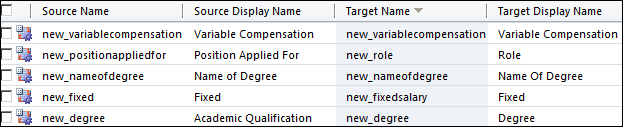
After creating a relationship, we can define a mapping to transfer values from parent entity to child entity, but this functionality can only achieved when a child entity record is created from a parent entity using the Add New button from the Associated view We need to set up relationship mapping so that we can take the candidate field values to the employee entity when the recruiter converts a candidate into an employee. Use the following steps to set the mapping:
- Navigate to 1:N Relationship under the Candidate entity.
- Open the contact_originating_lead mapping to edit it.
- Navigate to Mapping and click on New to add a mapping.
- Select new_variablecompensation from the Source and Target entities and click on OK.
- Follow step 4 to add mapping for the fields shown in the following screenshot:
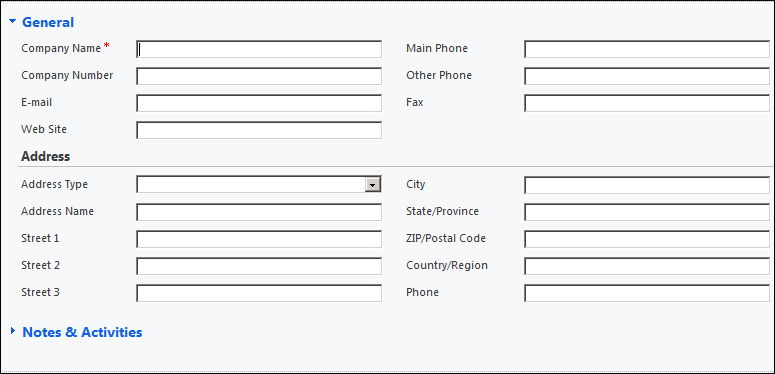
Now we need to design forms for our entity, and we need to remove unnecessary fields from entity forms.
Use the following steps to customize entity forms:
- Open the solution that we created.
- Navigate to Entity | Account | Forms.
- Open the main form to modify it, as shown in the following screenshot:
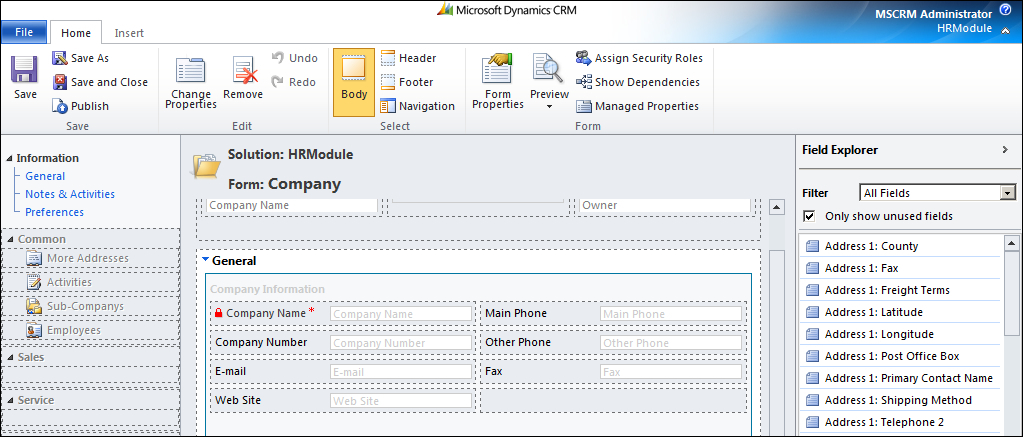
We can remove unwanted fields easily by selecting them one by one and using the Remove ribbon button on the entity form. To place the field, we just need to drag-and-drop it from the right-hand side field explorer.
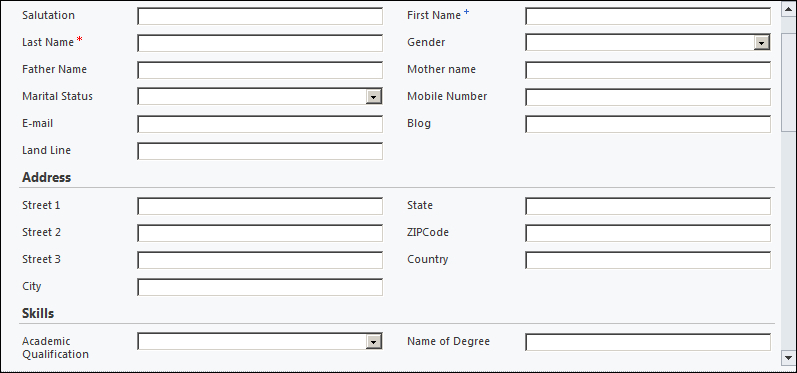
Once we have customized the account entity, we need to design the account form shown in the following screenshot: