
14.11. Layout Controls
The main layout controls in Silverlight are the following:
Canvas
StackPanel
Grid
14.11.1. Canvas
Canvas is the simplest of all the layout controls. You can think of it as a rectangle or <div> tag in which you put content. Content added to a canvas is normally then positioned absolutely by setting the Canvas.Left and Canvas.Top properties. Canvas is unique from the other layout controls in that it is the only layout control that allows you to modify the Z index (or which elements on top of which).
14.11.2. StackPanel
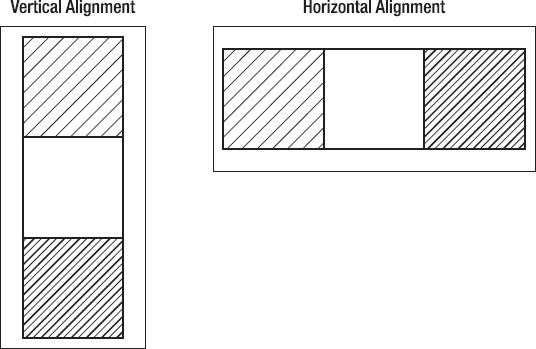
A StackPanel allows you to set items positioned within them to flow horizontally or vertically by setting a property called Orientation to either Vertical or Horizontal (see Figure 14-7).
Figure 14.7. Diagram of a stack panel set to vertical and horizontal alignment
Let's create an example stack panel now:
1. Right-click the project, and add a new folder called Layout.
2. Right-click, and select Add
New Item.
3. Select Silverlight User Control.
5. Name the control StackPanelTest.
6. Add the following XAML inside the LayoutRoot Grid tag (make sure to alter the width and height, or you will not see the whole column):
<StackPanel  Orientation="Vertical" Width="200" Height="500">
  <Rectangle Fill="blue"  Width="100" Height="100"></Rectangle>
  <Rectangle Fill="Red"  Width="100" Height="100"></Rectangle>
  <Rectangle Fill="Yellow"  Width="100" Height="100"></Rectangle>
  <Rectangle Fill="Green"  Width="100" Height="100"></Rectangle>
</StackPanel>
You now need to modify the MainMenu control to enable it to take you to the stack panel page you have just created.
Wiring up a button in Silverlight is similar to performing the same task in ASP.NET or Windows forms. You need to wire up an event in the page loaded event because the button won't be created until this point.
Add an event handler for when MainMenu is loaded in the MainMenu constructor:
public MainMenu()
{
    InitializeComponent();
    this.Loaded += new RoutedEventHandler(MainMenu_Loaded);
}
In MainMenu_Loaded(), add the following code:
void MainMenu_Loaded(object sender, RoutedEventArgs e)
        {
            this.cmdStackPanel.Click += new RoutedEventHandler(cmdStackPanel_Click);
        }
Your code should now look similar to the following:
public partial class MainMenu : UserControl
{
    public MainMenu()
    {
        InitializeComponent();
        this.Loaded += new RoutedEventHandler(MainMenu_Loaded);
    }

    void MainMenu_Loaded(object sender, RoutedEventArgs e)
    {
        this.cmdStackPanel.Click += new RoutedEventHandler(cmdStackPanel_Click);
    }

    void cmdStackPanel_Click(object sender, RoutedEventArgs e)
    {
        PageNavigator.LoadPage(newLayout.StackPanelTest());
    }
}
Now press F5 to run the application. Click the StackPanel button, and you should see a screen similar to Figure 14-8.
Figure 14.8. Laying out items with the stack panel
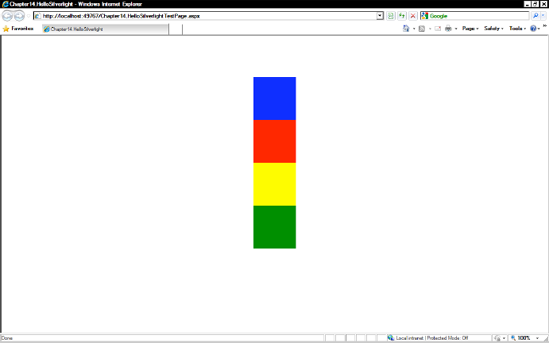
Try changing the Orientation of the StackPanel to Horizontal to see how it affects the positioning of the squares. The StackPanel control is a very useful control and is very flexible. It is used extensively to perform tasks such as laying out lists of elements and creating menus.
14.11.3. Grid
The Grid layout control allows you to define a grid structure to place individual elements within and is in some ways similar to an HTML table. You will create a 2-by-2 grid and some colored rectangles and then position them within the grid:
Right-click the Layout folder, and select Add
 New Item
  Silverlight User Control.
Name it GridTest.
Enter the following XAML between the Grid tags (note that the Grid was defined first, and then the Grid.Row and Grid.Column attached properties are added to position the elements):
<Grid.RowDefinitions>
  <RowDefinition  Height="150"></RowDefinition>
  <RowDefinition  Height="150"></RowDefinition>
</Grid.RowDefinitions>
<Grid.ColumnDefinitions>
  <ColumnDefinition Width="300"></ColumnDefinition>
  <ColumnDefinition Width="300"></ColumnDefinition>
</Grid.ColumnDefinitions>
<Rectangle Fill="blue" Grid.Row="0" Grid.Column="0" Width="100" Height="100"></Rectangle>
<Rectangle Fill="Red" Grid.Row="0" Grid.Column="1" Width="100" Height="100"></Rectangle>
<Rectangle Fill="Yellow" Grid.Row="1" Grid.Column="0" Width="100" Height="100"></Rectangle>
<Rectangle Fill="Green" Grid.Row="1" Grid.Column="1" Width="100" Height="100"></Rectangle>
Let's add the ability to navigate to this page on the main menu. Open ~/MainMenu.xaml.cs.
Add the following code to the MainMenu_Loaded() method:
this.cmdGrid.Click += new RoutedEventHandler(cmdGrid_Click);
Add the following event handler:
void cmdGrid_Click(object sender, RoutedEventArgs e)
{
    PageNavigator.LoadPage(new Layout.GridTest());
}
Press F5 to run the application; you should see a page like Figure 14-9.
Figure 14.9. Laying out items in a grid
