14.12. Simple Animation
Silverlight allows you to animate objects both declaratively and programmatically. Animation is perhaps easier to understand programmatically, so you will create a very simple animation to move a rectangle across a screen and at the same time change its transparency by modifying its opacity.
You will use a Storyboard class to create an animation. The Storyboard defines what will happen within the animation (the story) and contains features to start, stop, and repeat the animation.
The storyboard has a property called Interval that is a timer that allows you to perform the animation. In the example when the storyboard interval occurs, you will increment the x and y positions of the rectangle and increase the opacity.
14.12.1. Creating Animation Programmatically
Let's start the example:
Create a new folder called Animation within your project.
Right-click this folder, and select Add
 New Item
  Silverlight User Control.
Call it Animation.
Remove the d:DesignHeight="300" d:DesignWidth="400" properties from the user control tag.
Replace the Grid tags with the following XAML:
<Canvas Width="900" Height="700" Background="AliceBlue">
  <Rectangle Width="52" Height="52" Stroke="#FF000000" Opacity="0" Fill="Red"
             x:Name="rectAnimation" RadiusX="10" RadiusY="10" />
</Canvas>
Open ~/Animation/Animation.xaml.cs, and enter the following code:
public partial class Animation : UserControl
{
    Storyboard StoryBoard = new Storyboard();
    int Count = 0;

    public Animation()
    {
        this.Loaded += new RoutedEventHandler(Animation_Loaded);
        StoryBoard.Completed += new EventHandler(StoryBoard_Completed);
        InitializeComponent();
    }

    public void Animation_Loaded(object sender, RoutedEventArgs e)
    {
        StoryBoard.Duration = TimeSpan.FromMilliseconds(10);
        StoryBoard.Begin();
    }

    void StoryBoard_Completed(object sender, EventArgs e)
    {
        Canvas.SetTop(rectAnimation, Count);
        Canvas.SetLeft(rectAnimation, Count);
rectAnimation.Opacity = 0.001 * Convert.ToDouble(Count);
        Count += 1;

        StoryBoard.Begin();

        if (Count == 100)
            StoryBoard.Stop();
        }
    }
}
Add the code to load Animation.xaml when the Animation button is clicked:
void cmdAnimation_Click(object sender, RoutedEventArgs e)
{
    PageNavigator.LoadPage(new Animation.Animation());
}
Press F5 to run the application.
When the page is loaded, you should see a rectangle move diagonally across the screen. Note that you incremented the Opacity value using the following code:
rectAnimation.Opacity = 0.001 * Convert.ToDouble(Count);
However, when you incremented the Left and Top properties, you had to increment the values using the following syntax:
Canvas.SetTop(rectAnimation, Count);
Canvas.SetLeft(rectAnimation, Count);
This is because Opacity is not an attached property, but Top and Left are.
14.12.2. Responding to User Events
You will now detect the user clicking the rectangle and then perform a different animation:
Let's add another storyboard for an animation that will start when the rectangle is clicked. You will change the rectangle's color to yellow to indicate that it has been clicked and then move it horizontally instead of diagonally across the screen—Pixar has nothing to fear. Add a new Storyboard object within the Animation class:
Storyboard StoryBoard2 = new Storyboard();
Create the methods rectAnimation_MouseLeftButtonDown() and StoryBoard2_Completed():
void rectAnimation_MouseLeftButtonDown(object sender, MouseButtonEventArgs e)
{
    rectAnimation.Fill = new SolidColorBrush(Colors.Yellow);
    rectAnimation.Opacity = 1;
    StoryBoard.Stop();

    StoryBoard2.Completed += new EventHandler(StoryBoard2_Completed);
    StoryBoard2.Duration = TimeSpan.FromMilliseconds(10);
    StoryBoard2.Begin();
}

void StoryBoard2_Completed(object sender, EventArgs e)
{
    Canvas.SetLeft(rectAnimation, Count);
    Count += 1;
    StoryBoard2.Begin();
}
Press F5 to run your application, and then click the rectangle. The rectangle should change to yellow and then move across the screen.
14.12.3. Declarative Animation
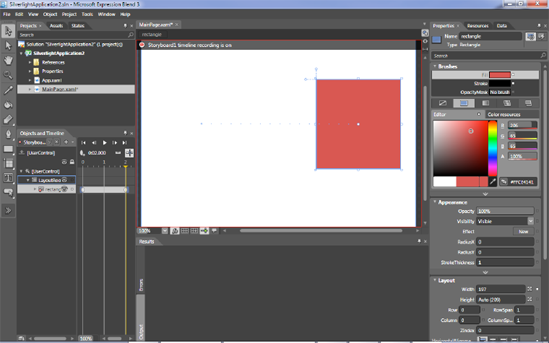
Animation can also be declared declaratively. The following is an example produced by Blend 3 for moving a rectangle horizontally across the screen in two seconds (not the sort of thing you will be writing yourself):
<UserControl.Resources>
  <Storyboard x:Name="Storyboard1">
    <DoubleAnimationUsingKeyFrames BeginTime="00:00:00" Storyboard.TargetName="rectangle"
       Storyboard.TargetProperty="(UIElement.RenderTransform).(TransformGroup.Children)[3].
(TranslateTransform.X)">
       <SplineDoubleKeyFrame KeyTime="00:00:00" Value="0"/>
       <SplineDoubleKeyFrame KeyTime="00:00:02" Value="258"/>
    </DoubleAnimationUsingKeyFrames>
  </Storyboard>
</UserControl.Resources>

<Grid x:Name="LayoutRoot" Background="White">
  <Rectangle Height="80" HorizontalAlignment="Left" Margin="34,123,0,0"
             VerticalAlignment="Top" Width="91" Fill="#FFE24646" Stroke="#FF000000"
             x:Name="rectangle" RenderTransformOrigin="0.5,0.5">
    <Rectangle.RenderTransform>
      <TransformGroup>
        <ScaleTransform/>
        <SkewTransform/>
        <RotateTransform/>
        <TranslateTransform/>
      </TransformGroup>
    </Rectangle.RenderTransform>
  </Rectangle>
</Grid>
Although the preceding XAML is not as readable as animating the item programmatically, it is arguably easier to produce. Blend allows you to define key frames for your object and will then animate between them. For more information about Blend, check out the great tutorial videos available at http://silverlight.net/learn/videocat.aspx?cat=2#HDI2Basics.
Figure 14.10a. Blend showing timeline on right and the path the square will move to