15.1. IDE Enhancements
The IDE support in VS2008 for WPF and (particularly) Silverlight developers was not fantastic; in fact, for Silverlight developers, it sucked because the design view was read-only! Although some readers will no doubt be happier working in pure XAML, the design view can be very useful. The improvements make it easier than ever to develop WPF and Silverlight applications.
15.1.1. VS2010 WPF/Silverlight Designer
VS2010 contains a much improved designer that offers the same full design-time experience in both WPF and Silverlight projects. The new VS2010 WPF/Silverlight designer supports WPF 3.5, WPF 4.0, and Silverlight 3.0 project types and is constructed in an extensible manner so will also work with future releases—which is important with Silverlight 4.0 just around the corner!
It is worth noting that Silverlight SDK is included with VS2010, so it is no longer necessary to install the Silverlight tools to receive IDE support.
15.1.2. Sort by Property Source
The Properties window in VS2010 for XAML applications has a new view mode that prioritizes the properties that you have defined above all the others. This allows you to easily amend and change properties you are interested in rather than scroll through a lengthy list.
Let's say you wrote the following XAML (and you would probably write something much more witty and interesting):
<TextBlock Text="Hello" FontFamily="Arial"></TextBlock>
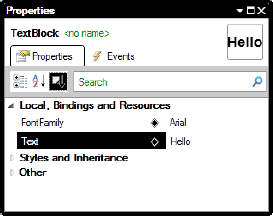
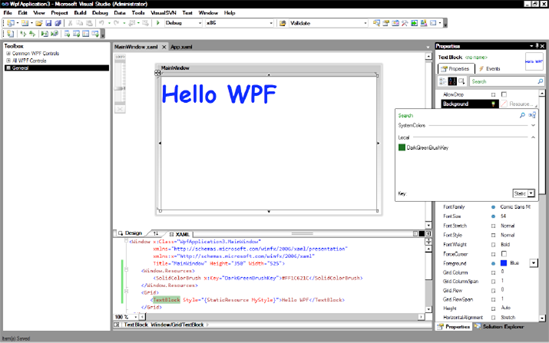
In VS2010 you can now open the Properties window, click the "Sort by property source" button (the third one), and you will find the properties that you just defined appear at the top of the list (see Figure 15-1).
Figure 15.1. Sorting by property source
15.1.3. Property Icons
Determining how a property gets set can sometimes be quite difficult in WPF. The Properties window now appends a small icon after each property to indicate its source. Figure 15-1 shows how FontFamily and Text are prefixed with a diamond (this indicates a locally set item). A small blue sun indicates a style setter, and a brush indicates a resource. You can also view further information about how a property gets set by hovering the mouse pointer over the icon.
15.1.4. Style
The designer in VS2010 makes it much easier to create and manage styles with the new enhancements to the Properties window. Let's take a look at this fabulous feature now:
Add the following style to App.xaml:
<Style x:Key="MyStyle" TargetType="TextBlock">
<Setter Property="FontFamily" Value="Comic Sans MS"/>
<Setter Property="FontSize" Value="54"/>
<Setter Property="Foreground" Value="#FF0000FF"/>
</Style>
Now add a TextBlock to your page:
<TextBlock>Hello WPF</TextBlock>
Make sure that the TextBlock is selected, and then open the Properties window.
In the Properties window, scroll down to where it says Style.
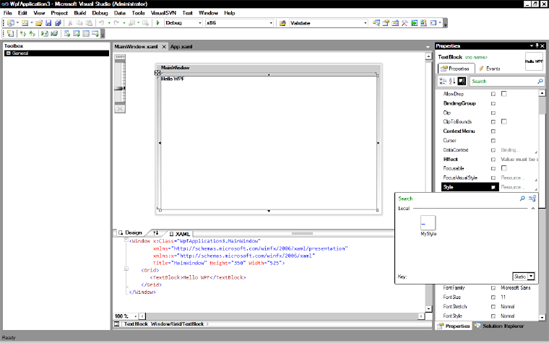
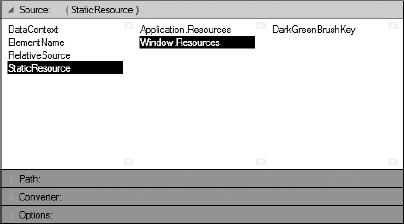
Click the text box on the right labeled Resource; this will open a new window. The new window will show various styles available within the current project (see Figure 15-2). Note this window also offers a text box–based search because larger projects can obviously contain many styles.
Figure 15.2. Style selection box
Finally, select the style MyStyle that defined earlier by clicking it to apply it to the element. The XAML will then be updated to the following:
<TextBlock Style="{StaticResource MyStyle}">Hello WPF</TextBlock>
15.1.5. Brushes
The Properties window contains new functionality to make it easier to create brushes:
To see this, select the window or grid, and then go to the Properties window.
Select the button next to the Background text box, and a new color picker dialog will appear, as shown in Figure 15-3 (this color picker window is new).
Figure 15.3. New color picker
Select a color (I choose a murky swamplike green).
Give the resource a name, and note you are going to save it in the only option currently available (App.xaml; if you had resource dictionaries, they would be available here as well).
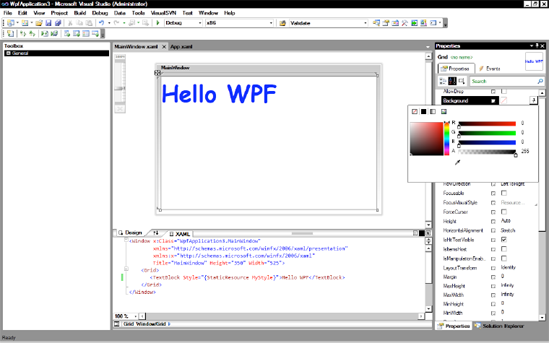
A new window will pop up showing the resources you can apply. Click the local selection bar to expand it, and select the resource you created earlier. You should then see something similar to Figure 15-4.
Figure 15.4. Using the newly created brush to commit crimes against graphic design
15.1.6. Binding Window
VS2010 makes creating bindings much easier with a new Binding window. To see this window, open the Properties window; then right-click any property that supports data binding (e.g., a dependency property), and select the Apply Data Binding option on the context menu.
A window similar to Figure 15-5 will then appear that allows you to easily create and modify bindings. Note that you can modify the source and path, specify converters, and define various other advanced options.
Figure 15.5. Binding window
15.1.7. Design-Time Data Binding
You can now define a new data source setting that is used just in design view. This could be useful to allow designers to see how formatting changes would look. At the time of writing, I have no information on this feature.
15.1.8. New Image Picker
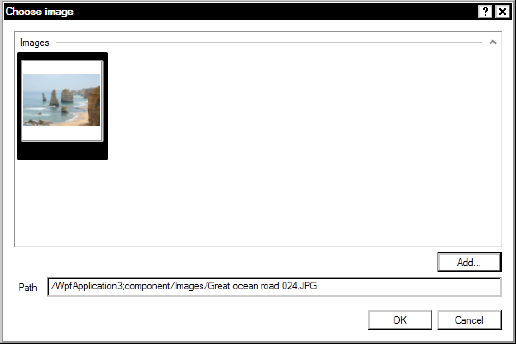
A new image picker dialog has been added that allows you to easily select images and will take care of formatting the returned path for you (see Figure 15-6).
Figure 15.6. New image picker
15.1.9. Improved Grid Designer
VS2010 adds a new option to the DataGrid control to allow you to easily define how columns and rows should be sized. This window will appear when you define columns and rows and then hover over it. The menu allows you to choose the following options: Fixed (e.g., 200), Star (* weighted proportion), or Auto (where the size is determined by the contents). See Figure 15-7.
Figure 15.7. New grid designer feature

15.1.10. Improved Error Handling for User Controls
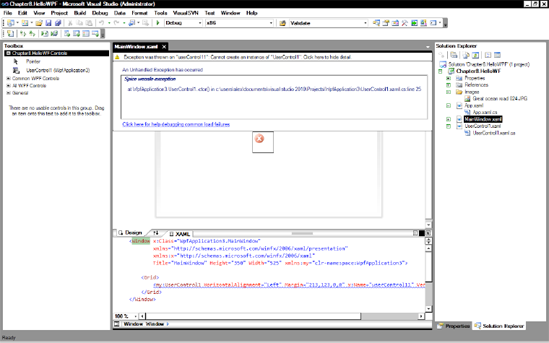
In VS2008, if you added a control to a page that contained an error, it would not appear, and you would be left with no clue about what the error could be. This improves in VS2010 because the editor will now give you a detailed exception message allowing you to easily debug the problem (see Figure 15-8). Note that until the exception is fixed, the designer will be read-only.
Figure 15.8. Improved error handling for user controls
15.1.11. Static Resource and Designer Fix
Previously, if a static resource was declared in App.xaml, you could not use it in the designer. In VS2010, you can.
15.1.12. Drag-and-Drop Data Binding
I'm not a big fan of drag-and-drop data binding, and I think it's fair to say that most programmers will rightly scorn such functionality. However, this type of feature can be very useful for quickly putting together simple data entry forms and prototyping applications.
VS2010 includes new functionality to easily create data forms and creates some pretty clean XAML. It seems likely that Microsoft might have brought in this feature to encourage some WinForms developers to move over.
You will now learn about this feature by creating a simple master-detail form:
Select Data
 Show Data Sources.
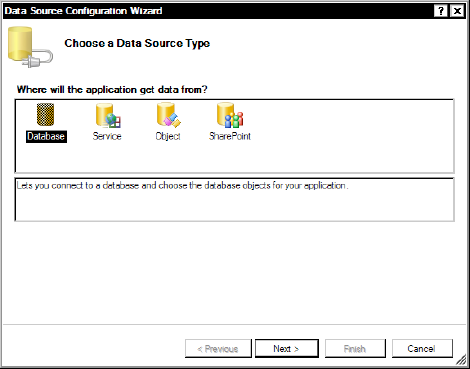
Click the Add New Data Source button in the Data Sources window, and the Choose a Data Source Type screen will appear (see Figure 15-9).
Figure 15.9. Choose a Data Source Type screen
Select Database, and then click Next. The Choose a Database Model screen will appear (see Figure 15-10).
Figure 15.10. Choose a Database Model screen
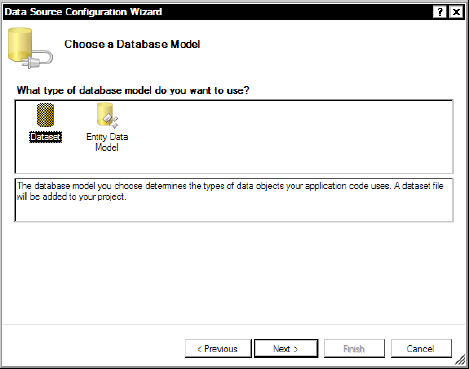
Select Dataset (you could also use an entity data model for this feature), and then click Next.
On the next screen, select the connection to the example database connection (or create it if you haven't already), and then click Next.
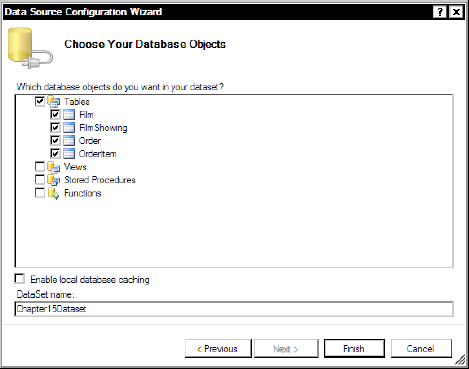
A new screen (similar to Figure 15-11) will now appear, allowing you to select the objects you want to use.
Figure 15.11. Choose Your Poison...sorry!...Database Objects screen
You now have the data source set up, and if you look over to the Data Sources window (see Figure 15-12), you will see all the tables and their fields.
Figure 15.12. Data Sources window after configuring the data source
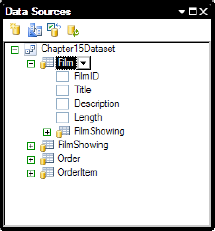
You will now create a data grid to show all the films. You don't want the field FilmID to appear, so click the FilmID node beneath the Film table node. A drop-down menu will then appear, allowing you to select different types of UI to be generated for the field. In this case, you don't want it to appear, so select None.
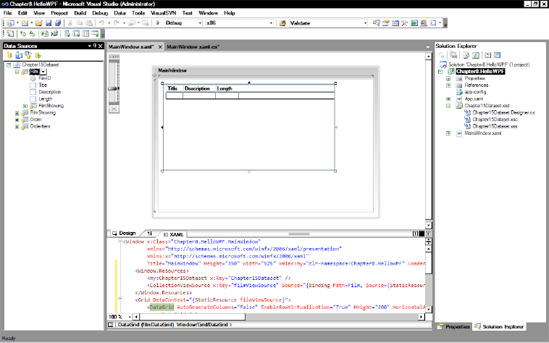
Now drag the Film table node onto the designer surface to create a DataGrid of films (see Figure 15-13). If you run your project now, you will find a fully working DataGrid. However, you're not done yet; VS2010 also supports the ability to easily create master-detail forms.
Figure 15.13. Data grid linked to data source
Now click the Film node, and on the drop-down menu change it to Details before dragging it to the right of the data grid (you might want to reposition the grid).
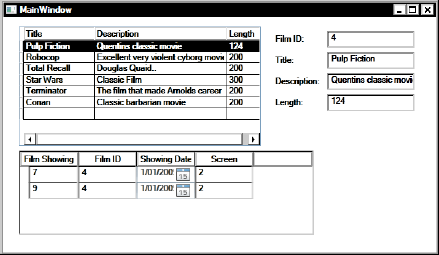
Now press F5 to run your application, and you will have a fully functional master-detail view similar to Figure 15-14.
Figure 15.14. The final product of the drag-and-drop binding
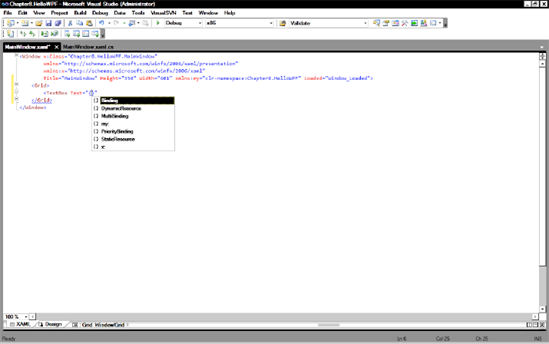
15.1.13. Improved XAML IntelliSense
XAML IntelliSense has been tweaked. Now when you enter the curly bracket for a binding expression, IntelliSense will add the other curly bracket for you and pop up a dialog with available options (see Figure 15-15). It seems a shame the team didn't go further with this feature and show you different objects you could bind to.
Figure 15.15. Improved XAML IntelliSense