
16.3. Web Roles
The first type of application to create is called a web role. In Windows Azure, the term web role refers to an application that is accessible over HTTP (which in our example is an ASP.NET application), although it is also possible to create other types such as ASP.NET MVC, Delphi, PHP, Ruby, or even a C++ application (through a CGI web role). It's also probably worth mentioning also that Azure applications operate in full trust.
16.3.1. Hello, Azure
You will now create and deploy a very simple application that reads a value from a configuration file and prints it to the screen with the current time and date:
Load Visual Studio.
Create a new Windows Azure Cloud Service project called Chapter16.HelloAzure.
Visual Studio will now ask you what roles you want to create within your project (Figure 16-2).
Figure 16.2. Adding a web role to project
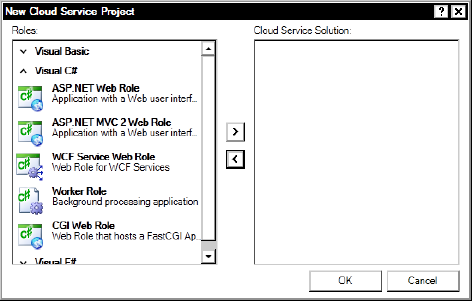
Select ASP.NET Web Role, and click the > button to add it into your solution.
Right-click the role in the right pane, select Rename on the context menu, and call it Chapter16.WebRole.
Click OK.
Visual Studio will now create two projects within the solution (Figure 16-3):
Chapter16.HelloAzure
Chapter16.WebRole
Figure 16.3. Azure project layout
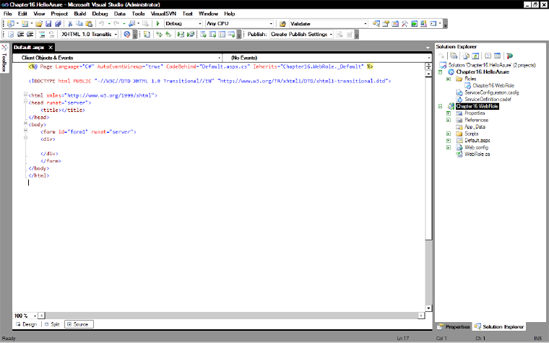
16.3.1.1. Chapter16.WebRole
This is a standard ASP.NET project that references some Azure-specific functionality.
16.3.1.2. Chapter16.HelloAzure
The Chapter16.HelloAzure project describes your application to Windows Azure and allows you to configure it for the Azure platform. You will use the output from this project when you deploy your application. Chapter16.HelloAzure contains two (annoyingly similarly named) configuration files that are new to you:
ServiceDefinition.csdef
ServiceConfiguration.cscfg
16.3.1.2.1. ServiceDefinition.csdef
ServiceDefinition.csdef is responsible for the following:
Defining configurable settings that your application will use (the actual values are defined in ServiceConfiguration.cscfg)
Defining configuration settings applicable to all instances of your application
16.3.1.2.2. ServiceConfiguration.cscfg
ServiceConfiguration.cscfg is responsible for the following:
Defining the values of your configuration settings for each role
Determining the number of instances of your application to create
16.3.2. Azure and Configuration Settings
Most applications have some element of configuration. In the example application, you will define a configurable value that will be read in the Page_Load event with the RoleManager.getConfigurationSetting() method:
Select the Chapter16.HelloAzure project, and open ServiceDefinition.csdef. The contents should look something like this:
<?xml version="1.0" encoding="utf-8"?>
<ServiceDefinition name="Chapter16.HelloAzure" xmlns="http://schemas.microsoft.com/ServiceHosting/2008/10/ServiceDefinition">
  <WebRole name="Chapter16.WebRole">
    <InputEndpoints>
      <InputEndpoint name="HttpIn" protocol="http" port="80" />
    </InputEndpoints>
    <ConfigurationSettings>
      <Setting name="DiagnosticsConnectionString" />
    </ConfigurationSettings>
  </WebRole>
</ServiceDefinition>
Add the following inside the ConfigurationSettings element to tell Azure that you will be creating a setting called Message:
<Setting name="Message"/>
Your ServiceDefinition.csdef file should now look like the following:
<?xml version="1.0" encoding="utf-8"?>
<ServiceDefinition name="Chapter16.HelloAzure"
xmlns="http://schemas.microsoft.com/ServiceHosting/2008/10/ServiceDefinition">
  <WebRole name="Chapter16.WebRole">
    <InputEndpoints>
      <InputEndpoint name="HttpIn" protocol="http" port="80" />
    </InputEndpoints>
<ConfigurationSettings>
      <Setting name="DiagnosticsConnectionString" />
      <Setting name="Message"/>
    </ConfigurationSettings>
  </WebRole>
</ServiceDefinition>
While you are working with ServiceDefinition.cscfg, find the element that reads as follows:
<Instances count="1"/>
and change it to the following:
<Instances count="5"/>
Changing the instances count tells Azure to create five instances of your application and simulates scaling your application to use five Azure nodes (you will need to set this back before deployment depending on your pricing structure). This setting can be easily amended online; note how easy it is to quickly scale up your application depending on demand. Microsoft recently announced Azure supports an API that allows you to do this programmatically. Your ServiceDefinition.cscfg should now look like this:
<?xml version="1.0"?>
<ServiceConfiguration serviceName="Chapter16.HelloAzure" xmlns="http://schemas.microsoft.com/ServiceHosting/2008/10/ServiceConfiguration">
  <Role name="Chapter16.WebRole">
    <Instances count="5" />
    <ConfigurationSettings>
      <Setting name="DiagnosticsConnectionString" value="UseDevelopmentStorage=true" />
      <Setting name="Message" value="Hello Azure"/>
    </ConfigurationSettings>
  </Role>
</ServiceConfiguration>
Open Default.aspx.cs, and enter the following code:
using Microsoft.WindowsAzure.ServiceRuntime;

protected void Page_Load(object sender, EventArgs e)
{
    string GreetingString =
      "" + RoleEnvironment.GetConfigurationSettingValue("message");
    Response.Write(GreetingString + " at " + DateTime.Now.ToString());
}
Press F5 to run the application, and you should see the greeting value you defined output to the screen with the current time and date.
16.3.3. Logging and Debugging
When running your Azure applications locally, you can make full use of standard Visual Studio debugging facilities. However, when applications are deployed to the cloud, debugging and logging support is a bit limited at the time of writing.
At the time of writing, the logging APIs are in a state of flux (http://blogs.msdn.com/windowsazure/archive/2009/10/03/upcoming-changes-to-windows-azure-logging.aspx), so expect the final version to have performance-monitoring features and integration with Azure storage.
Note that the RoleManager.WriteToLog() method that was present in preview versions has been removed.
16.3.4. Testing Azure Applications
You have now finished your application's development, so you need to test it. Development would be very slow if you had to deploy to the cloud each time to test it, so Microsoft provides a local version of Azure called the development fabric that simulates how your applications will function in the cloud.
Before you can run Azure your application, you will need to create the development storage database (which is just a SQL Server database). This seems to be used for deploying and testing Azure applications. It can also be quite useful for debugging Azure storage issues (discussed later in the chapter).
16.3.5. Creating Development Storage
To create development storage, open the Windows Azure SDK command prompt (on the Windows menu under the Windows Azure SDK v1.0 folder), and then enter the following command, replacing INSTANCENAME with the name of your SQL Server instance (if you don't want to use an instance, just enter a dot to refer to the machine):
DSInit /sqlinstance:INSTANCENAME
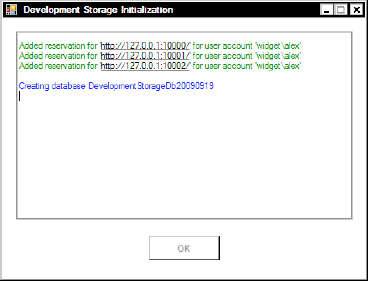
After you press Return, the DSInit utility will start creating the development storage database (Figure 16-4).
Figure 16.4. Creation of development storage
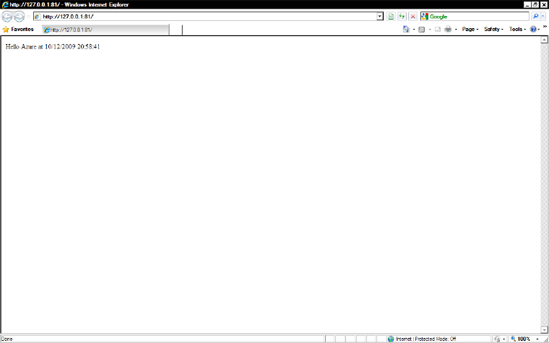
Now press F5 to run your application, and you should see an exciting screen like Figure 16-5.
Figure 16.5. Hello Azure application
Well done—you have created your first Azure application—but don't close the web browser window just yet. Take a look at the Windows taskbar (you may have to click "Show hidden icons" if you are using Windows 7), where there will be a small blue Windows Azure flag showing. Clicking this will show you the current Azure storage and development fabric status (Figure 16-6).
Figure 16.6. Azure storage

Now right-click the blue flag, and notice how you can shut down the development storage and fabric here as well. This time, however, select the option to show the development fabric UI, and you should see a screen similar to Figure 16-7.
Figure 16.7. Development fabric UI
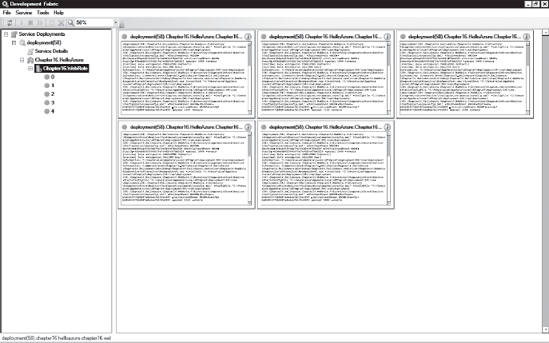
The window is split into two panes. On the left side is a tree structure that allows you to view details of the service and individual web roles, while on the right is the logging output from the various Azure instances.
16.3.5.1. Service Details Node
Click the Service Details node to show you details of where your service is running.
16.3.5.2. Chapter16.HelloAzure Node
Right-click the Chapter16.HelloAzure node, and you will see options for starting, suspending, and restarting the services. You can further configure the project restart configuration by right-clicking and selecting Settings.
16.3.5.3. Chapter16.WebRole Node
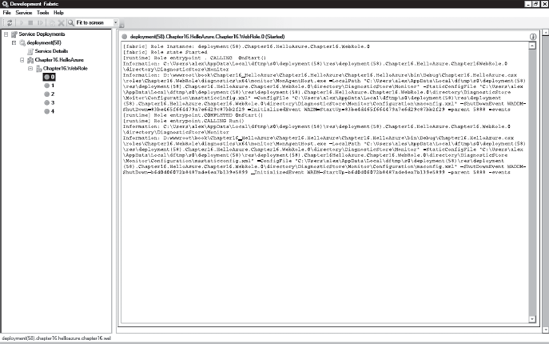
Right-click the web role node, and you will see options for clearing the logs and changing the logging level. Left-clicking the web role node will expand it to show all instances of the application running, which are represented by a number of green globes. The black screens on the left show the output from the individual nodes.
16.3.5.4. Green Globes
If you right-click a green globe (web role), you will see options to attach a debugger and view the local store.
16.3.6. Viewing Azure Logs
To view the log file of your application, click one of the black screens to see the output. If you right-click the green globe, you have the options to filter the message types displayed by selecting the logging level (Figure 16-8).
Figure 16.8. Viewing Azure log on development storage
|
