15.14. Effects and Transformations
WPF 4.0 and Silverlight 3.0 introduce some great new effects functionality. Let's take a look at these now.
15.14.1. Plane Projection
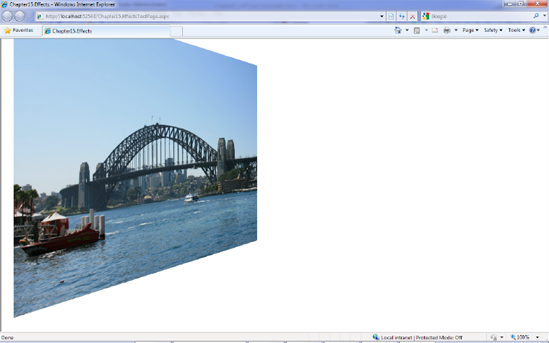
Plane projection is a new effect that allows you to rotate XAML elements around a 3D axis. Figure 15-27 shows the results of a plane projection transformation.
Figure 15.27. Plane projection transformation to an image

The effect was created with this XAML:
<Image Source="/pic1.jpg">
            <Image.Projection>
                <PlaneProjection RotationY="130"></PlaneProjection>
            </Image.Projection>
        </Image>
Note the transformation effect simulates rotating elements around the x, y, and z axes but does not apply light or shading effects.
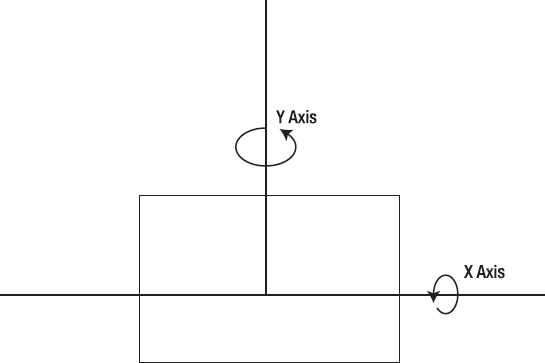
THE RESULT OF A ROTATIONX TRANSFORM?You might have expected Figure 15-27 to be the result of a x axis rather than y axis rotation. It can help to imagine that the y axis is like a vertical pole, and the image is placed in front of this pole (see Figure 15-28). When the transformation is applied, the image is rotated around whichever pole is specified (in this case, the y pole). Figure 15.28. How Silverlight 3.0 views rotation transformations
|
Don't think that perspective transforms can be used only on images. Perspective transformations can also be applied to any WPF element, allowing you to create some really weird and cool animation effects—and the best part is that the control will still function as per normal, detecting clicks and events!
This can be used for some silly (and unfriendly UI design), as Figure 15-29 shows.
Figure 15.29. Projection transform applied to stack panel

15.14.2. Easing Effects
Earlier, I discussed some of the new easing effects in WPF 4.0. Let's take a look at the BounceEase effect, which animates an element to make it look like a ball bouncing up and down that gradually loses height with each bounce.
The level of springiness can be controlled through the adeptly named Bounciness property, in which lower numbers bounce more (e.g., a rubber ball) than higher numbers (e.g., a cricket ball). This XAML shows how to apply a BounceEase effect to an image (note you will have to start this storyboard to see the animation):
<Canvas>
    <Canvas.Resources>
        <Storyboard x:Name="bounceyAnim">
            <DoubleAnimation
                        Duration="0:0:3"
                        From="0"
                        To="300"
                        Storyboard.TargetName="myPic"
                        Storyboard.TargetProperty="(Canvas.Top)">
                <DoubleAnimation.EasingFunction>
                    <BounceEase Bounciness="2" Bounces="5"
                                EasingMode="EaseOut"></BounceEase>
                </DoubleAnimation.EasingFunction>
            </DoubleAnimation>
        </Storyboard>
    </Canvas.Resources>

    <Image Source="/pic1.jpg" Width="200" Height="200" Canvas.Left="50" Canvas.Top="50"
           x:Name="myPic"></Image>

</Canvas>
15.14.3. Pixel Shaders
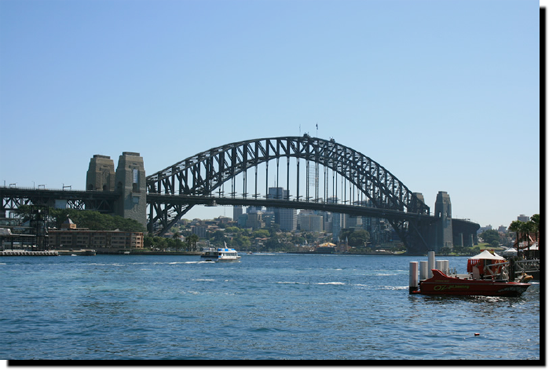
Pixel shaders manipulate a rendered element at the pixel level and can be used to apply cool effects such as shadows and blurs. Figure 15-30 shows the shadow effect applied to an image.
Figure 15.30. Shadow pixel shader

This effect was created with the following code:
<Image x:Name="myPic" Source="sydney2.jpg">
    <Image.Effect>
        <DropShadowEffect ShadowDepth="15"></DropShadowEffect>
    </Image.Effect>
</Image>
Silverlight contains another great built-in pixel shader called Blur (shown in Figure 15-31).
Figure 15.31. Blur pixel shader effect

Applying the Blur effect is very similar to applying DropShadow:
<Image Source="/pic1.jpg" Width="700" Height="500" Canvas.Left="50" Canvas.Top="20"
       x:Name="myPic">
    <Image.Effect>
        <BlurEffect Radius="15"></BlurEffect>
    </Image.Effect>
</Image>
|
|
15.14.4. Creating Your Own Pixel Shaders
You can create your own pixel shaders by utilizing a language called High Level Shader Language (HLSL).
René Schulte created an excellent filter that simulates an old movie tape effect. For more information on how René created this effect and an example of this applied to a movie, please refer to http://kodierer.blogspot.com/2009/08/ye-olde-pixels-silverlight-3-old-movie.html.

