
4.4. Using Toolbars and Task Panes
SharePoint Designer makes most of its designing and development features available through toolbars and task panes. You can enable or disable toolbars in SharePoint Designer by choosing View ![]() Toolbars. The Task Panes menu in SharePoint Designer can be used to enable and disable the task panes. One of the really cool features of SharePoint Designer task panes is that they can be docked in and out of the user interface. This feature allows SharePoint Designer users to lay out the environment as they want it. So, if a designer is working heavily on data views, he or she can modify the interface so that the task panes and toolbars associated with data views are enabled and activated for easy access.
Toolbars. The Task Panes menu in SharePoint Designer can be used to enable and disable the task panes. One of the really cool features of SharePoint Designer task panes is that they can be docked in and out of the user interface. This feature allows SharePoint Designer users to lay out the environment as they want it. So, if a designer is working heavily on data views, he or she can modify the interface so that the task panes and toolbars associated with data views are enabled and activated for easy access.
4.4.1. Laying out your SharePoint Designer interface
While the default view of the SharePoint Designer environment has the task panes and toolbars located in a specific manner, the interface is very flexible and allows you to modify it to keep the most frequently used task panes activated.
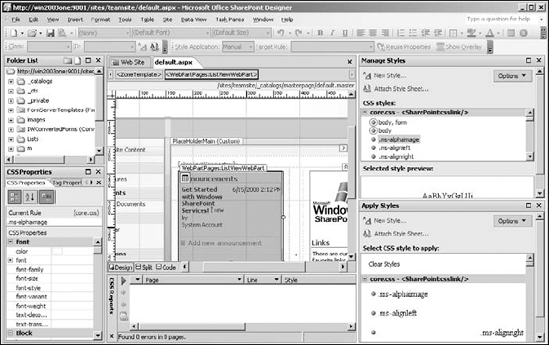
You can easily drag and dock task panes to either corner of the center section (which displays the Web Site panes) or drag them to another screen if you're working with multiple monitors and running out of screen real estate. Toolbars and the menu bar can also be docked around any corner of the screen. Figure 4.8 shows such a customized view of the SharePoint Designer environment.
The Style and Style application toolbars can be seen in the top section, the CSS Properties task pane is activated in the left section, the CSS reports in the center section, and the Manage Styles and Apply Styles task panes are enabled in the right section. This environment is set up for ease of operation when working with CSS.
Figure 4.8. A customized view of the SharePoint Designer environment
4.4.2. Using the Customize dialog box
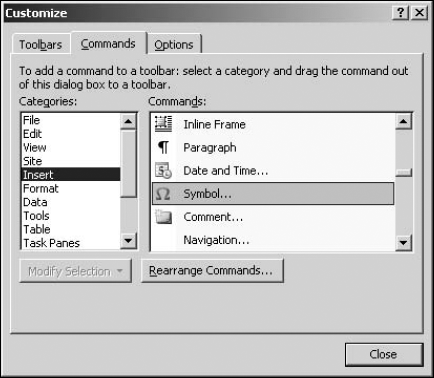
The Customize dialog box, as shown in Figure 4.9, provides the Commands well for SharePoint Designer, which is used to host menus, menu options, commands, etc. These menu options and commands can be dragged and dropped into new or existing menus and toolbars to customize the SharePoint Designer environment to suit your needs.
Figure 4.9. The Commands well in the Customize Dialog box
NOTE
SharePoint Designer stores the customizations you make to its interface in a state file called CMDUI.PRF stored in the user's profile at C:Documents and Settings<username>Application DataMicrosoftSharePoint DesignerState.
In the next exercise, I take you through the steps to create a new toolbar for SharePoint Designer by using the Customize dialog box:
Choose View
 Toolbars
  Customize to open the Customize dialog box.
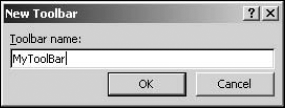
In the Toolbars tab, click the New button. Type the name for your custom toolbar in the New Toolbar dialog box, as shown in Figure 4.10.
Figure 4.10. The New Toolbar dialog box
To access the Commands well, click the Commands tab. Here, the left list shows the command categories, and the right list shows the list of available commands.
Locate the commands you want to add to your new toolbar. Drag and drop the commands into the newly created toolbar. After you drop a command inside the new toolbar, the Modify Selection button becomes enabled. This button can be used to change the name, image, and text of the command in the toolbar.

NOTE
You can learn more about macros at this Web site: http://msdn.microsoft.com/en-us/library/bb149050.aspx.
When the toolbar is complete, you can drag and dock it to any of the four corners of the SharePoint Designer environment.