9.3. Creating Forms
The form components based on form handlers available with FPSE have been some of the most commonly used Web components of FrontPage 2003. They have also been inherited by SharePoint Designer, although the access points for configuring these forms have changed a little. FrontPage forms can be used to submit data to various types of files, to send to e-mail addresses, or to store it in databases. Web designers can use the SharePoint Designer interface to configure the forms, and the FPSE components implement the actual function of saving the data to the back-end file.
Because of the simplicity introduced by these form components to develop interactive forms for collecting data from users visiting the Web sites, these components have been a feature of choice for many Web site developers for a long time.
9.3.1. Using HTML form controls
The first step in creating a form by using SharePoint Designer is to collect data from a user to create the form. Most of the form controls that you might want to place in your form are available in the Form Controls section of the Toolbox task pane.
To create a simple form using the form controls in SharePoint Designer, follow these steps:
Choose Task Panes
 Toolbox to display the Toolbox task pane.
If the form control doesn't already exist on the Web page, using the Form Controls section, double-click Form to insert an HTML <form> tag inside the Web page.
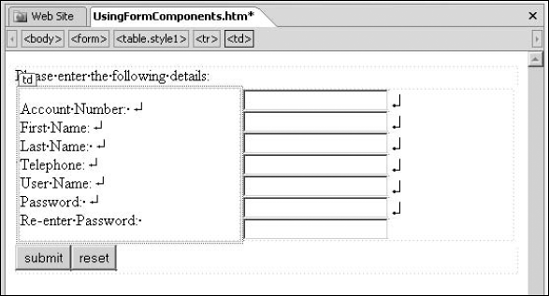
Using the Form Controls section of the toolbar, add other form controls to the <form> tag to create a form. Ensure that you also insert the Submit and Reset button controls on the form. A sample form is shown in Figure 9.16. An HTML table is used to format the form a little better.
Save the Web page.
Figure 9.16. Creating an HTML form using form controls
After you create the form structure, you have to choose how it performs the save operation. You can make these choices by configuring the form properties.
NOTE
Using the form handlers provided with FPSE to send data to files or e-mail addresses requires that the Web page where the form is inserted be an HTML/HTM Web page. If you use the form to send data to a database, the page is automatically saved as an ASP page.
9.3.2. Setting forms properties
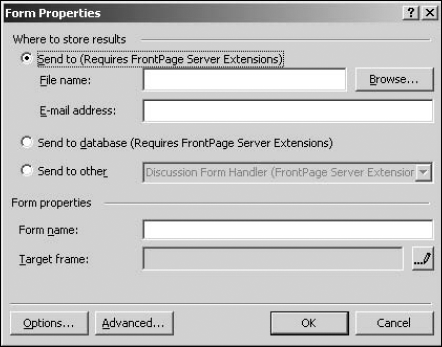
You can right-click the HTML form on a Web page and then choose Form Properties from the popup menu to access the Form Properties dialog box. As shown in Figure 9.17, you can use the Form Properties dialog box to choose which method you want to use to save the form data.
Click Advanced to specify any hidden data that needs to be saved along with the form data. Based on the radio button selection you make in the Form Properties dialog box, the user interface available when you click Options changes.
Figure 9.17. The Form Properties dialog box
9.3.2.1. Sending to a file or an e-mail address
You can choose to send data submitted in the form to a file residing inside the Web site or to an e-mail address. Simply click Browse to choose the file where you want to save the data and then add an e-mail address in the E-mail address text field. As indicated in the Form Properties dialog box, you need to have FPSE configured on a Web site to use this feature.
NOTE
For security purposes, SharePoint Designer recommends that you save the files in the _private folder of your FPSE-based Web site. FPSE makes this folder secure by adding special permissions to it.
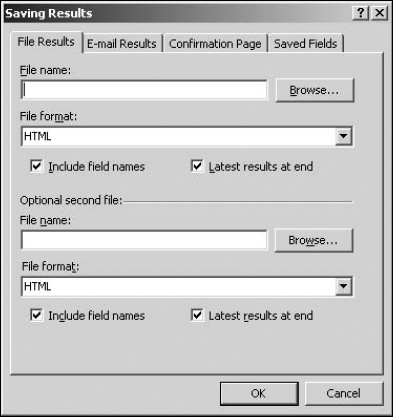
With this option selected in the Form Properties dialog box, clicking Options opens the Saving Results dialog box, as shown in Figure 9.18, where you can set more properties for the form.
The Saving Results dialog box provides the following tabs for setting form properties:
File Results: Allows you to choose the file where the form data should be saved. You can also choose the format in which the form data should be saved in the file. Optionally, you can choose to send the form data to another file.
E-mail Results: Allows you to specify the e-mail address where the form data should be sent to. Again, you can choose the format in which the form data should be sent and then type a custom Subject and Reply To line.
Confirmation Page: Allows you to optionally specify a custom confirmation page that's displayed when the user submits the data by using the form
Saved Fields: Allows you to choose from which form controls the data should be saved. Also, you can use this tab to optionally save the date and time when the form was submitted as well as additional fields, such as computer name, username, and browser type.

Figure 9.18. Configuring the form properties by using the Saving Results dialog box
9.3.2.2. Sending to a database
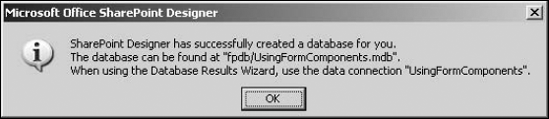
Click the Send to database radio button in the Form Properties dialog box and then click Options to open the Options for Saving Results to Database dialog box. This dialog box allows you to create a database file (an .mdb file) with a table that holds the form data. When you click Create Database in this dialog box, SharePoint Designer automatically creates an Access database file with a table inside it to hold the data from the form. As shown in After you create the database, SharePoint Designer displays a message indicating that the database is stored in the fpdb folder inside the Web site, as shown in Figure 9.19.
Figure 9.19. Creating a new database file to store data from a form
Also, if you click Add Connection in the Options for Saving Results to Database dialog box, the Site Settings dialog box opens. The Database tab in this dialog box shows the newly created database connection that's used to establish the connection to the database file for storing the data. You can also click the Database tab to create custom connection strings to different database types. SharePoint Designer, like FrontPage 2003, generates ASP code in the background to enable the send results to database functionality. The database connection code is stored in a file named global.asa that's created during the process of creating a new database.
NOTE
The Send to database feature in SharePoint Designer uses a lot of proprietary legacy ASP code. Given a choice, it's recommended that you use the new ASP.NET 2.0 data controls to create forms that save data in a database. These controls are discussed in Chapter 16.
After you create the database for storing the form data, click the Saved Fields tab in the Options for Saving Results to Database dialog box to match the columns in the database to the form controls. To summarize, follow these steps to send form data to a database:
Right-click on the form and then choose Form Properties from the popup menu to open the Form Properties dialog box.
Click the Send to database radio button and then click Options to open the Saving Results to Database dialog box.
Click Create Database to let SharePoint Designer create an Access database for storing the form data. After the database is created, the Database Connection to Use and Table to hold form results dropdown menus are automatically populated with the newly created database connection and newly created table in the database, respectively. You can also specify a custom confirmation and error page in the Database Results tab.
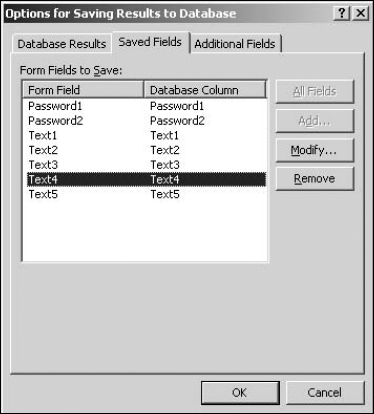
Click the Saved Fields tab and then ensure that the form fields are correctly mapped to the corresponding database columns. This is shown in Figure 9.20. If not, double-click the form field in the list and then use the Modify Field dialog box to match the form field to the database column. You can also add additional fields to be saved in the database by using the Additional Fields tab.
Click OK. If the Web page you started with is an HTM/HTML page, a request to change the extension of the Web page to ASP appears. This is important, as the Save Results to Database feature is implemented by using ASP.
Save the Web page with an .asp extension.
Figure 9.20. Mapping form fields to database fields
9.3.2.3. Sending to other
Clicking the Send to other radio button in the Form Properties dialog box allows you to send the form data to a custom CGI ASP script running on the Web server for processing. It also allows you to use the discussion and registration form handlers provided by FPSE.
In the next exercise, I show you how you can use the SharePoint Designer discussion form handler in conjunction with the Included Content's Page Web component to quickly create a discussion Web page inside a Web site. As a prerequisite to these steps, ensure that you have an HTML form created with the required form fields:
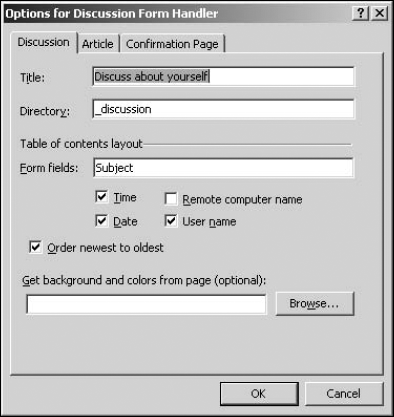
In the Discussion tab, type the title for the discussion and the name of the folder to store all the discussion files.
NOTE
The Directory box already has an underscore in it. Usually, the directories with prefix _ are considered as directories containing files on which other functionality depends. Because the discussion form that you create in this exercise depends on the discussion folder, you might want to add an underscore prefix to it.
Click the Date, Time, and User name check boxes. The completed Discussion tab is shown in Figure 9.21.
Figure 9.21. The Options for Discussion Form Handler dialog box
Click OK and then save the Web page. If you refresh the Folder List task pane, a new folder (_Directory Name) is created for storing the discussion files. This folder has a tocproto.htm file in it.
Place the cursor below the form in the discussion form Web page.
Select Included Content in the Component type section and then choose Page in the Choose a type of content list.
Click OK.
Save the Web page and then preview it in a browser.
|
When you submit the form, you're taken to the Form Confirmation page. When you go back to the form page and refresh (by pressing F5), a new article is shown at the location of the included page Web component. Clicking on the article takes you to a Web page inside the folder you created for storing the discussion files.
9.3.3. Validating forms
If you right-click on a form control inside your HTML form, the Form Field Properties menu option appears. Clicking on this menu takes you to the properties dialog box specific to the form control being worked on.
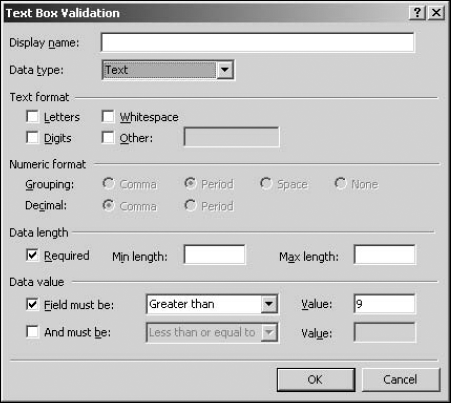
The Validate button in this dialog box provides an access point to the SharePoint Designer user interface to create validation constraints on the form fields. These constraints are implemented by SharePoint Designer as client-side scripts that are used to validate whether the user input matches a specific format. If the user input doesn't meet the required format, the form submission is cancelled. Figure 9.22 shows the validation dialog box specific to text form fields.
Depending on the constraint you choose in the Data Type dropdown menu, the rest of the validation options are enabled. For example, choosing Text as a data type in the Data type dropdown menu enables the Text Format group of options that allow you to further define the validation constraint for text format.
After the constraint is applied to a form field, the Code view just shows an HTML comment and hides the actual validation script that enables the constraint. For example, you should see the following code after applying a validation constraint to a text form field:
<!--webbot bot="Validation" S-Data-Type="Integer" S-Number-
   Separators="." B-Value-Required="TRUE" S-Validation-
   Constraint="Greater than" S-Validation-Value="9" -->
However, when you open the page in another text editor, such as Notepad, the actual script that implements the validation appears.
NOTE
SharePoint Designer hidses the actual code for the script in the Code view to avoid unintentional tampering.
Figure 9.22. The Text Box Validation dialog box