
8.1. Working with Interactive Buttons
Inserting interactive buttons on Web pages is simple. You can follow these steps to create the interactive buttons of your choice on a Web page:
In the Design view, open the Web page where you want to insert an interactive button.
Choose Insert
 Interactive Button to open the Interactive Buttons dialog box, as shown in Figure 8.1. This dialog box allows you to choose a format for the button and shows a quick preview of how the button will look on the Web page.
In the Buttons list, choose the button you want to use, type the button text, and specify the URL to be associated with the button.
Click the Font tab. Here, you can change the font of the text on the button and also specify the various colors that text should take when the mouse is over or moved off the button text.
Click the Image tab. Using this tab, you can specify certain properties of the image of the button that's created by SharePoint Designer. You can choose whether the hover and the clicked image should be created. The hover image is displayed when the mouse is hovered over the button, and the clicked image is displayed when the button is clicked.
Click OK. The button is inserted on the Web page.
Save the Web page. SharePoint Designer asks you to save the images associated with the interactive button. Save the images to the location of your choice.
When you preview the page in a browser, the button changes color when you move the mouse over it. When you click the button, the image changes again.
To understand what SharePoint Designer did internally for enabling the interactive buttons, open the Behaviors task pane from the Task Panes menu. After the Behaviors task pane opens, just click the newly inserted button. As shown in Figure 8.2, a number of events (onmousedown, onmouseout, onmouseover, and onmouseup) have been set for the <img> tag associated with the button.
Figure 8.1. The Interactive Buttons dialog box
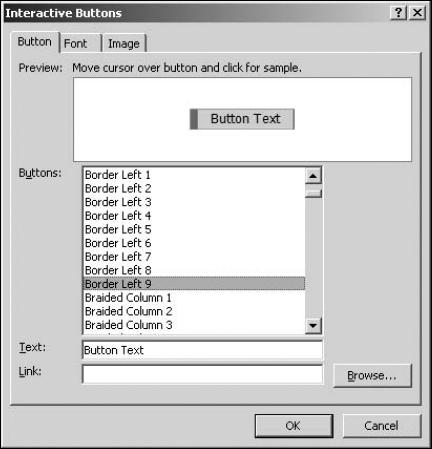
Figure 8.2. The Behaviors task pane for an interactive button
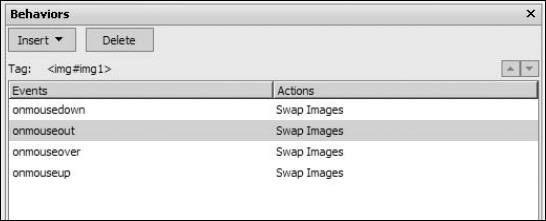
While I discuss these in more detail in the next section, the point to understand is that when you created the interactive button, SharePoint Designer first created three images and then created a set of JavaScript functions that swap the images based on the event that takes place. To successfully use the interactive button on a Web page, it's important that the images associated with the button are available. For example, when you publish a Web page that has an interactive button on it, you must ensure that the button images are also published.