9.2. Inserting Web Components
Most SharePoint Designer Web components are available in the Insert Web Component dialog box, which is accessible by choosing Insert ![]() Web Component. You need to have a Web page active (open in the Design or Code view) in SharePoint Designer to be able to insert Web components.
Web Component. You need to have a Web page active (open in the Design or Code view) in SharePoint Designer to be able to insert Web components.
NOTE
If the Manage the Web site using hidden metadata check box in the Site Settings dialog box isn't selected for a Web site, most of the components in the Insert Web Components dialog box are thus disabled.
9.2.1. Creating hit counters
Hit counters are a very desirable feature, and the Hit Counter Web component provides an easy way to implement this functionality on a Web site. To insert a hit counter on a Web page of your Web site, follow these steps:
Open the Web page where you want to insert the hit counter.
Choose Insert
 Web Component to open the Insert Web Component dialog box.
In the Component type section, select Hit Counter. In the Choose a counter style section, you can select the style of counter you want to use, as shown in Figure 9.1.
Click Finish. The Hit Counter Properties dialog box opens, as shown in Figure 9.2. Choose the style you want for your hit counter. You can also click the Reset counter to check box and then specify the initial value from which the counter should start counting. Clicking the Fixed number of digits check box allows you to specify the number of digits to be used in the hit counter.
Click OK to complete the configuration of the hit counter for the Web page.
Figure 9.1. Inserting a hit counter on a Web page
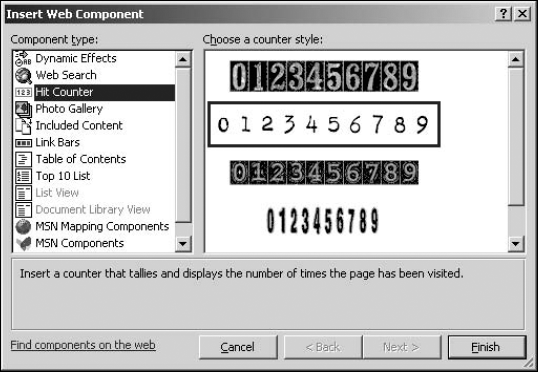
Figure 9.2. The Hit Counter Properties dialog box

When you browse to the Web page that has the hit counter, the hit counter is incremented on every refresh of the Web page by using a hit counter image. The image that you choose is divided into 10 sections for each number and then the sections are swapped to show the increment in the hit count at runtime. As shown in Figure 9.3, the actual counter value is stored in a file with the extension .cnt in the _private folder for the Web site. You can change the value of the counter in this file to reset the counter.
Figure 9.3. Counter value for the Hit Counter Web component

The design of the hit counter allows you to use a custom image for the hit counter. You can create an image of suitable dimensions by using your favorite graphics-creation program or picture editor program and then specify in the Hit Counter Properties dialog box that the hit counter should use the custom image.
9.2.2. Working with included content
As shown in Figure 9.4, when you select the Included Content component type in the Insert Web Component dialog box, you can make use of a number of options for including content on the active Web page. In this section, I take you through the components that assist in including content.
9.2.2.1. Comment
Selecting Comment in the Choose a type of content list allows you to insert an HTML comment on the Web page contents, which are visible in the Design view in SharePoint Designer. When you insert a comment in this way, the following code is written to the Code view of the Web page:
<!--webbot bot="PurpleText" PREVIEW="Insert image here" -->
SharePoint Designer provides the interface that allows you to change the value of the Preview attribute, which actually forms the comment that's displayed in the Design view. You can right-click on the comment component and then choose Comment Properties from the popup menu to change the preview text.
9.2.2.2. Date and Time
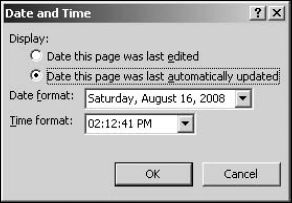
The Date and Time component provides a way to show when the page on which the component is inserted was last modified. As shown in Figure 9.5, when you insert a Date and Time component, you can choose whether you want to show the date when the page was last edited or when the page was last automatically updated.
Figure 9.4. Inserting included content Web components
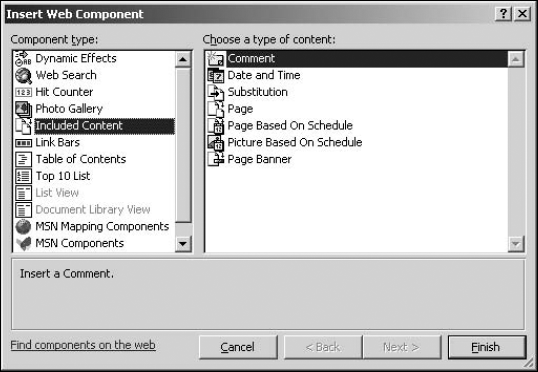
Figure 9.5. Date and Time component properties
You can choose from a list of date and time formats by using the Date and Time dialog box. Depending on the format chosen, the following code is inserted on the Web page to enable the Date and Time component:
<!--webbot bot="Timestamp" S-Type="EDITED" S-Format="%A, %B %d, %Y
   %I:%M:%S %p" -->
When you preview the Web page in a browser, the Date and Time Web component displays the last modified date and time of the Web page. This information is picked up from the hidden metadata that's maintained for all pages inside the Web site that support hidden metadata.
NOTE
If you try to put a Date and Time Web component on a Web page inside a Web site that doesn't support hidden metadata — for example, by cutting and pasting code — it won't work. This means that the dates and times in the Web component aren't refreshed.
9.2.2.3. Substitution
The Substitution Web component provides a way to centrally manage commonly displayed text on Web sites. For example, consider a situation where you need to specify some volatile information on a lot of pages inside a Web site. If you type this information on every page, a change would require you to go back and change the information on all the Web pages.
Instead, you can use a Substitution Web component in conjunction with a site parameter to display this information on all pages. Follow these steps:
Click the Parameters Tab, click Add to add a parameter name and value, as shown in Figure 9.6, and then click OK.
Figure 9.6. Creating a new site parameter via the Site Settings dialog box
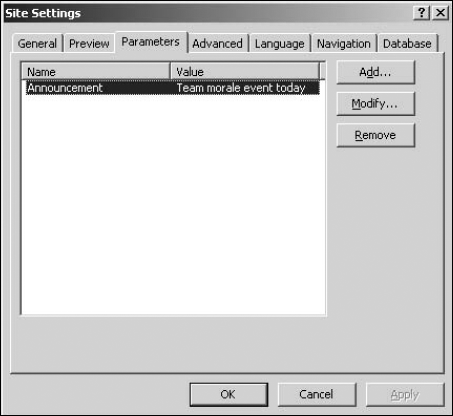
Select the site parameter and then click OK.
The value of the site parameter is inserted on the Web page, and the following code is inserted in the code of the Web page:
<!--webbot bot="Substitution" S-Variable="Announcement" -->
You can insert a Substitution Web component on all the Web pages where the value of the site parameter needs to be displayed. Whenever a change is required, all you need to do is change the site parameter by using the Site Settings dialog box, and the substitution components are automatically updated to show the new information.
9.2.2.4. Page
The Page Web component allows you to display the contents of a Web page inside another Web page. When you insert the Page Web component on a Web page, the user interface allows you to pick a Web page that needs to be included in the currently active Web page.
After you insert the page Web component, if you switch to the Code view of the Web page, the following code is inserted for the Web page:
<!--webbot bot="Include" U-Include="bottom.htm" TAG="BODY" -->
The Code view actually hides the fact that the actual code of the included Web page is included for the page on which the page component has been added. As shown in the following code, if you open the Web page by choosing Open With ![]() Notepad, the code of the included page is actually present in the Web page:
Notepad, the code of the included page is actually present in the Web page:
<body> <p> </p> <!--webbot bot="Include" U-Include="bottom.htm" TAG="BODY" startspan --> <p>Contents of bottom.htm</p> <!--webbot bot="Include" i-checksum="18282" endspan --> </body>
As shown in the previous code, the content of the included page exists with the webbot comments of the page Web component.
9.2.2.5. Page Based On Schedule
The Page Based On Schedule Web component allows you to configure the included page in such a manner that it's displayed only for a certain period of time.
For example, you can configure this Web component to show the included page only between certain dates. When the scheduled date and time passes, the included page isn't displayed on the parent page anymore. Optionally, as shown in Figure 9.7, you can configure another included page to display before and after the scheduled time.
Figure 9.7. Configuring an included page based on a schedule
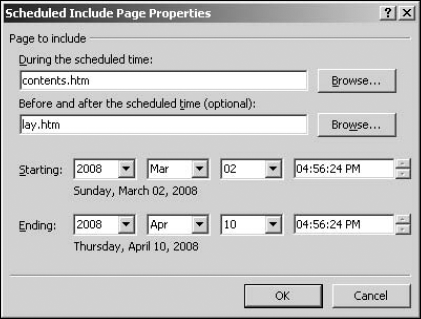
The following code is inserted on a Web page when you add the Page Based On Schedule Web component:
<!--webbot bot="ScheduledInclude" U-Include="contents.htm" U-Else-
   Include="lay.htm" D-Start-Date="02 Mar 2008 17:03:07" D-End-
   Date="10 Apr 2008 17:03:07" -->
NOTE
Because this Web component is an author time Web component, it's important to understand that the decision to make the switch is made at the time the component is inserted or the Web page is saved.
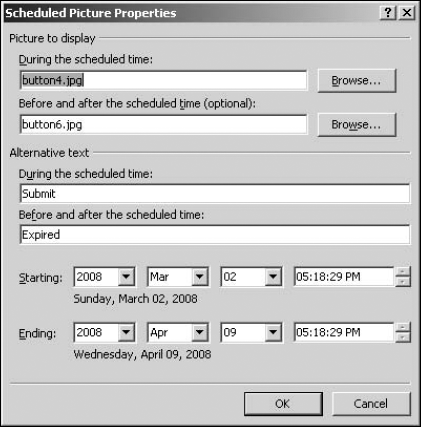
9.2.2.6. Picture Based On Schedule
The Picture Based On Schedule Web component allows you to insert a picture on a Web page and then schedule it to be displayed only during a certain time period. As shown in Figure 9.8, the Scheduled Picture Properties dialog box allows you to specify the picture and the alternate text to be used between the specified times. Optionally, you can specify to use a picture that's displayed before and after the specified time has passed.
Figure 9.8. Configuring a picture based on a schedule
9.2.2.7. Page Banner
If the Web page that you're working on is part of a Web site's navigation structure, you can use the Page Banner Web component to display the title of the Web page. Using the Page Banner Properties dialog box, as shown in Figure 9.9, you can also specify whether the page banner should be displayed as a picture or just plain text. You can also modify the text to be displayed in the page banner.
Figure 9.9. The Page Banner Properties dialog box

9.2.3. Creating page categories and a table of contents
While creating Web pages in SharePoint Designer, you have the option to create Page Categories and then associate each newly created Web page with a specific category. Categorizing the Web pages in this manner is useful later in developing a table of contents for your Web site.
To create new page categories and then associate Web pages with them, follow these steps:
Right-click on a Web page for a Web site in the Folder Lists task pane and then choose Page Properties from the popup menu.
Click the Workgroup tab. As shown in Figure 9.10, the Workgroup tab can be used to associate the selected Web page with one or more categories. You can also add new categories by clicking Categories.
Figure 9.10. Associating a Web page with a page category
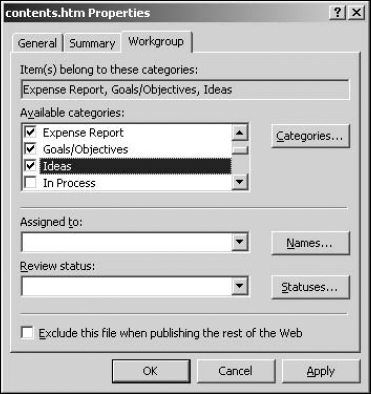
Choose the categories with which you want to associate the Web page.
Click OK to save the changes.
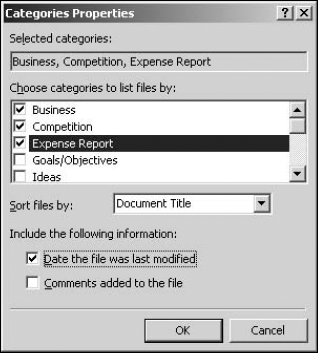
After you categorize your Web pages in this manner, you can use the Table of Contents Web component to display a table of contents based on the page categories. When you insert a table of contents based on the page category by using the Insert Web Component dialog box, the Categories Properties dialog box, as shown in Figure 9.11, opens.
Choose the page categories you want to include by using the Choose categories to list files by section, specify the sorting order, choose whether to include date modified and comments added to the Web page, and then click OK. A categorized table of contents is created for you on the Web page. The table contains links that navigate the user to the corresponding Web page.
Figure 9.11. Selecting page categories to be used in the table of contents for the Web site
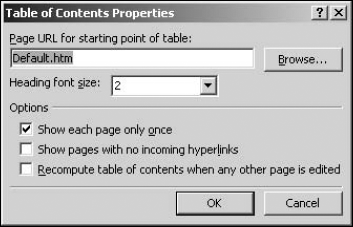
If you're not using page categories and just want to add a table of contents for your Web site, click the For This Web Site list option in the Table of Contents component type in the Insert Web Component dialog box. As shown in Figure 9.12, this displays the Table of Contents Properties dialog box, which allows you to specify the starting page for the table of contents.
Figure 9.12. The Table of Contents Properties dialog box
9.2.4. Implementing Web search
SharePoint Designer exposes the use of the search features available in Web sites that support FPSE. While FPSE handles the indexing and querying of the content of Web sites, SharePoint Designer allows Web designers to create search forms on Web pages (using the Search Form Web component), which act as the user interface for entering the search query.
The Web Search component type in the Insert Web Component dialog box has two options:
Current Web: This option creates search forms on Web pages inside Web sites that have FPSE configured for them.
Full Text Search: This option creates search forms on Web pages inside WSS v2 Web sites.
To insert a search form on a Web page inside an FPSE-enabled Web site, simply select the Current Web option in the Insert Web Component dialog box and then click Finish. The Search Form Properties dialog box shown opens, as shown in Figure 9.13, and can be used to configure some general settings for the search form.
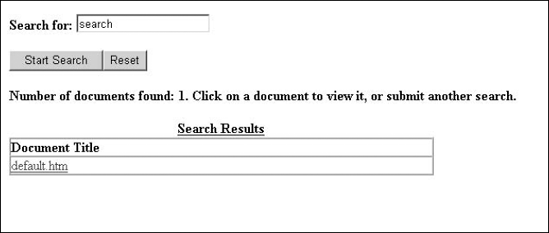
The Search Form Properties dialog box allows you to customize the search form created by the Web Search component. You can specify the label for the search box and the captions for the Submit and Reset buttons. When you browse to a Web page containing the Web Search component, a search form is displayed, as shown in Figure 9.14.
When you type a query for a word to search in the Web site content, the search form redirects the request to the _vti_bin/shtml.dll file. This file is an FPSE file residing in the _vti_bin directory (created when you configure FPSE on a Web site) and processes the search query to return the results for display in a browser.
Figure 9.13. Configuring the search form properties
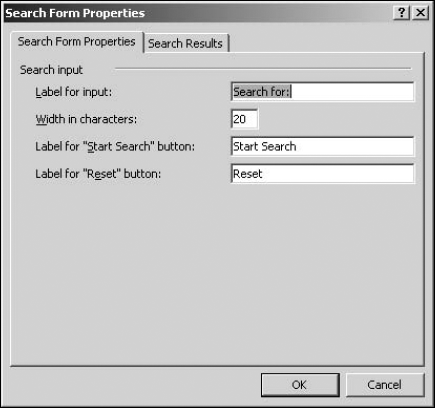
Figure 9.14. Using the search form on a Web page
|
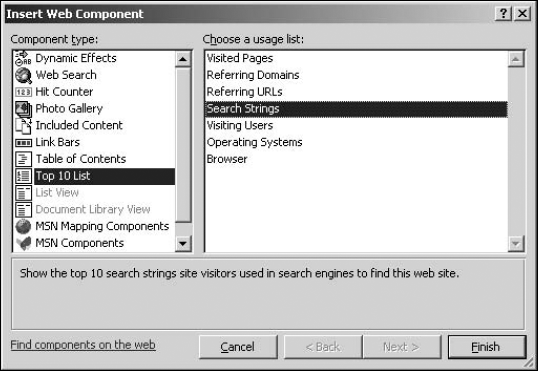
9.2.5. Using the Top 10 usage lists
The Top 10 List Web component allows you to display usage data made available by the usage analysis tools in FPSE and SharePoint sites on your Web pages.
As shown in Figure 9.15, the Insert Web Component dialog box allows you to choose from a number of usage lists. The data presented by the Web component is gathered by the FPSE or SharePoint components running on the Web server.
NOTE
Top 10 lists are only updated when the component is inserted on a Web page or when a Web page containing the component is resaved.
Figure 9.15. The Top 10 Lists Web component options