
Chapter 1
Discovering What You Need
IN THIS CHAPTER
![]() Understanding the components of a home studio
Understanding the components of a home studio
![]() Discovering how each component contributes to the final sound
Discovering how each component contributes to the final sound
Whether you use a PC- or Mac-based system for your Pro Tools studio, your home recording system of choice employs much of the same basic technology. In fact, your simple Pro Tools studio consists of the same basic components as a typical, million-dollar, professional studio complex.
In this chapter, you discover the purpose of each component of a home recording studio, and you also discover how each of these components relates to the quality of sound you ultimately get from your studio. This knowledge will help you to spend the right amount of money on the right stuff. (See Book 1, Chapter 2 and Book 2, Chapter 1 for more on purchasing gear.)
Eyeing the Big Picture
In spite of what you may surmise from this chapter — with its long list of equipment — you need only a few things to do multitrack recording with Pro Tools. This simple list comprises instruments and microphones (called input devices), a computer, a compatible audio interface, Pro Tools software, and monitors (speakers, to you home stereo enthusiasts). No matter how complicated your system becomes and how many pieces of gear you end up accumulating, your studio will still consist of these basic parts.
 This chapter breaks down recording systems into the components they have to have, but you may not need to purchase every component separately to get a great-sounding system. Many of these components come bundled together. For example, your audio interface will likely include preamps — or you may find speakers that come with a power amp inside them.
Piping the Music into Pro Tools
As you begin to build your home studio, you’ll notice a long list of components — okay, go ahead and call them “extras” — lurking within the Top Five basics of your studio: input devices, computer, interface, software, and monitors. In this section, I focus on these details of input devices so you can understand just what roles they play in your system.
 As you get more and more involved in recording, you’ll find you can add almost any of these components to your existing system to expand and enhance what you can do.
Interpreting input devices
All your expensive recording gear is useless if you have nothing to plug in to it. This is where the input device comes into play. An input device is, simply, any instrument, microphone, or sound module that produces or delivers a sound to the recorder.
Instruments
An electric guitar, a bass, a synthesizer, and drum machines are typical instruments that plug in to the interface and represent most of the input devices that you use in your studio. A synthesizer and drum machine can plug directly into the Line In inputs of your interface, whereas an electric guitar or a bass needs a direct box (or its equivalent) to plug in to first. (In the case of a Avid interface, you need to use one of the inputs that has a preamp.)
A direct box is an intermediary device that allows you to plug your guitar directly into a mixer without going through your amp first. (For more on direct boxes, see the upcoming section, “Deciphering direct boxes.”) Check out Figure 1-1 for an example of an instrument-input device.
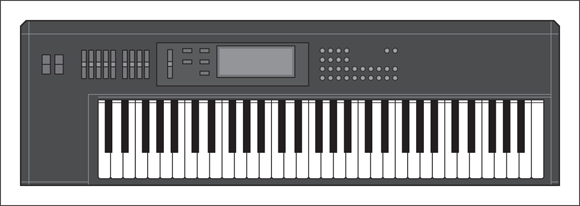
FIGURE 1-1: An instrument-input device, which you can plug right into the mixer.
Microphone
You use a microphone (mic) to record the sound of a voice or a purely acoustic instrument — sound sources that, last time I checked, can’t be plugged directly into the interface. A microphone converts sound waves into electrical energy that can be understood by the interface. I detail the several types of microphones in Book 3, Chapter 2. Check out Figure 1-2 for a look at a microphone.
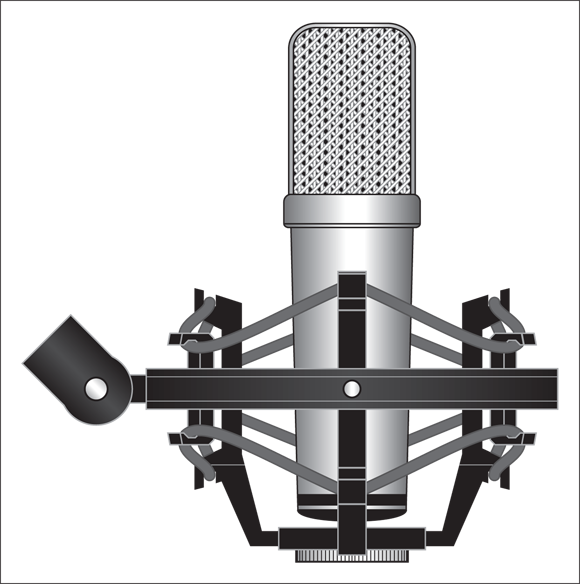
FIGURE 1-2: Use a microphone when your instrument can’t plug in to the mixer directly.
Sound modules
Sound modules are special kinds of synthesizers and/or drum machines. What makes a sound module different from a regular synthesizer or drum machine is that these contain no triggers or keys that you can play. Instead, sound modules are controlled externally by another synthesizer’s keyboard or by a Musical Instrument Digital Interface (MIDI) controller (a specialized box designed to control MIDI instruments). Sound modules have MIDI ports (MIDI jacks) to enable you to connect them to other equipment.
Often sound modules are rack-mountable, meaning they have screw holes and mounting ears so you can put them into an audio component rack. Some controllers, however, are not rack-mountable; Figure 1-3, for example, shows a drum module that rests on a stand or tabletop.

FIGURE 1-3: The sound module can be plugged right into the mixer but has to be played by another source.
Deciphering direct boxes
A direct box (or DI box, short for Direct Induction) is used to connect a guitar or bass directly into the mixer without having to run it through an amp first. A direct box’s purpose is twofold:
- To change the guitar’s impedance level so that the mixer can create the best sound possible
To change the nature of the connection from unbalanced (quarter-inch) to balanced (XLR) so that you can use a long cord without creating electrical noise between instrument and mixer
For more on cord types as well as balanced versus unbalanced signals, see Book 2, Chapter 1.
For most home recordists, the main purpose of a direct box is to act as an impedance transformer. You’re unlikely to need a long run of cords from your guitar to your mixer. Without a direct box changing your impedance levels, your guitar signal may sound thin or have excess noise.
Perusing the preamp
Microphones produce a lower signal level than line-level devices (synthesizers, for example); thus they need to have their signal level increased. For this purpose, you need a preamp, a device that boosts a microphone’s output. Preamps can be internal or external, meaning they can reside within your mixer or be a separate unit that you plug in between your microphone and mixer.
The preamp is one of the most crucial elements of a recording system because using one can affect your instrument’s sound significantly. Most professional recording studios have a variety of preamps to choose from, and engineers use particular preamps depending upon the type of sound they’re trying to capture.
The three basic types of preamps available are solid-state, tube, and hybrid. (You can find out more about preamps in Book 3, Chapter 2.)
Solid-state
Solid-state preamps use transistors to boost the level of the microphone or instrument. Top-quality (expensive) solid-state preamps are generally designed to produce a sound that’s clear and accurate (George Massenburg Labs and Crane Song brands, for instance). Solid-state preamps can also be designed to add a pleasing distortion to the music (Neve and Neve-clone preamps, for example). Many recording professionals prefer the clear and accurate sound of a solid-state preamp for acoustic or classical music or any situation where capturing a very natural sound is important. The preamps in nearly all audio interfaces are solid-state. Although not as high in quality as many of the more expensive external preamps, they are certainly serviceable for most purposes and allow you to create top-quality music when you use them correctly. (I show you how to do this in Book 3, Chapter 2.)
Tube
Since the beginning of the digital recording revolution, professionals have complained about the harshness of digital recording. As a result, many digital-recording pros prefer classic tube preamps because they can add warmth to the recording. This “warmth” is actually distortion, albeit a pleasing one. All-tube preamps are generally very expensive, but they’re highly sought after among digital recording aficionados because of their sound. Tube preamps work well with music when you want to add color to the sound (that is, not produce an accurate representation of the original source sound). No wonder they show up a lot in rock and blues — and they’re great for recording drums. You can also find tube preamps that are clean and open — much like the high-end solid-state preamps that I describe earlier — such as those made by Manley Labs.
Hybrid
A hybrid preamp contains both solid-state and tube components. Most of the inexpensive tube preamps that you find in the marketplace are actually hybrids. (These are also called starved-plate designs because the tubes don’t run the same level of voltage as the expensive tube designs.) These types of preamps are usually designed to add the classic tube warmth to your instrument’s sound. How much the sound is colored by the tubes — and how pleasing that colored sound is to the listener’s ears — will depend upon the quality of the preamp. Most hybrid preamps allow you to dial in the amount of character (pleasing distortion) that you want.
Your audio interface will come with a limited number of preamps, usually two or four. If you want to plug in more mics than the number of preamps you have — or if you want to be able to produce different sounds from your preamps — you need to buy one or more external preamps, such as the one shown in Figure 1-4.

FIGURE 1-4: An external preamp.
Meeting the Mixer
A mixer is the component you use to bring together and balance what you’re recording from all those mics, instruments, effects, and other inputs; it’s the heart of any recording system. Take a look at Figure 1-5. Although a mixer may seem daunting with all its knobs, buttons, sliders, and jacks, it’s really one of the most interesting and versatile pieces of equipment that you’ll have in your studio. With a mixer, you can control the level of the incoming signal, adjust the tonal quality of an instrument, blend the signals of two or more instruments, and do a host of other things. And don’t worry; after you read through this book, you’ll get the hang of all those knobs in no time.
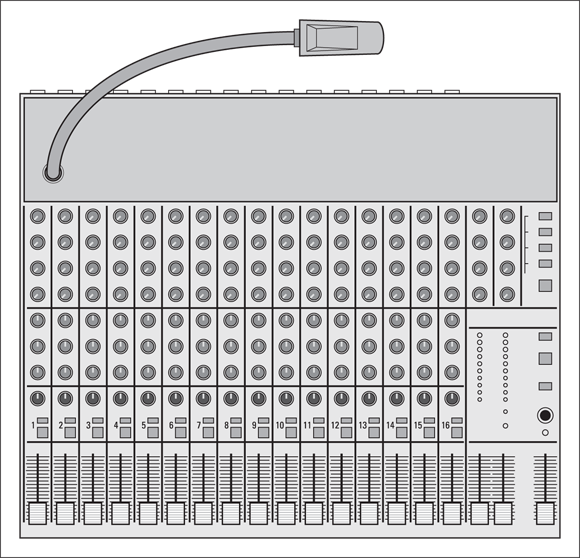
FIGURE 1-5: The mixer is the heart of your home studio system.
For the Pro Tools home recordist (that’s you), the mixer is usually incorporated into your computer software. (Of course, you can always use an external hardware mixer if you want.) The mixer in Pro Tools does the job well enough that you don’t need an external mixer, although some people prefer having physical faders and knobs to mess with.
If you’re a knob turner and like to physically touch the instrument you’re playing (or, for that matter, the gadget you’re tweaking), consider adding the Avid Artist Mix controller (as shown in Figure 1-6). This unit has physical faders that link perfectly with Pro Tools software.

FIGURE 1-6: A computer control surface offers you real knobs and faders and still uses the mixer that’s part of your Pro Tools software.
A number of third-party control surfaces are available that are compatible with Pro Tools, such as the Mackie MCU Pro (by Mackie).
Managing the MIDI Controller
If you’re like most home recordists, you’ll end up using some sort of MIDI controller in your studio. (See Book 4, Chapter 1 for more about MIDI.) The purpose of this piece of equipment is to allow the various MIDI instruments to communicate and synchronize with one another.
 MIDI is a protocol that musical instrument manufacturers (in a rare moment of cooperation) developed to allow one digital instrument to communicate with another. MIDI uses binary digital data, in the form of 1s and 0s, to tell an instrument to play or release a note, to change sounds, and send a host of other messages. (Discover more about MIDI in Book 4, Chapter 1.)
MIDI controllers come in many shapes and sizes. The most common are computer software, keyboard, or standalone controllers. These controllers can reside within the computer (Pro Tools, for example, has MIDI capabilities), a keyboard (synthesizer), or a separate box. They enable you to either play, in real time, another instrument or to trigger another instrument with the sequencer, which is a MIDI program that allows you to play an instrument without actually playing (like a player piano). They just need to have MIDI capability and be connected through their MIDI ports (using MIDI cables) or a USB ports if they use one (using as USB cable).
Pro Tools software has fine MIDI capabilities, so you don’t need to buy a separate MIDI controller. I recommend that you use the MIDI functions in Pro Tools before deciding to invest in another MIDI controller. I think you’ll be pleased with what you can do with Pro Tools.
Recognizing the Recorder
The recorder is where your music actually gets, well, recorded. In Pro Tools, your recorder consists of your computer and the software. Sound becomes data and is stored as digital information, as 1s and 0s. Digital recording introduces very little noise into the final sound and can be copied without any loss in that sound quality, depending on the bit depth and sample rate at which you record, of course.
Digital recorders
A digital recorder is included as part of your Pro Tools setup. Digital recorders use two terms to describe the overall quality of the sound that they produce — sampling rate and bit depth.
Sampling rate
Sampling rate refers to the frequency at which the recorder samples the incoming sound source. When a recorder samples a sound, it actually takes a small snapshot of the audio signal. Typical sample rates for digital recorders are 44.1 kHz (the sample rate for audio CDs), 48 kHz, 88.2 kHz, 96 kHz (the sampling rate for DVD audio), 176.4 kHz and 192 kHz. The higher the number, the more samples are taken each second, and the closer the recorded sound is to the original.
The more times per second that a digital recorder samples the sound of the incoming signal, the more of the original sound it includes (which results in, among other things, a bigger sound file that takes up more space on your computer). These numbers are described in kHz (kilohertz) — that is, as taking place thousands of times per second. For example, when you record at 48 kHz, the sound is sampled 48,000 times every second. This sounds like an awful lot, but accurate sound requires lots of samples.
Bit depth
When you start looking at digital recorders, you’ll hear jargon such as 16-bit (the bit depth of audio CDs), 20-bit, 24-bit, and so forth. This is the bit depth, which is described in terms of bits. (A bit, short for BInary digiT, is the basic unit of information in the binary numbering system used by computers.) The numbers 16 and 24 relate to the amount of digital information that can be contained in each of those sample rates that I describe in the previous section, “Sampling rate.” The higher the number, the more accurately the sound is represented; most professional audio gear now records at a 24-bit resolution. With that higher number, however, the sound takes up more of your digital storage space. This usually isn’t a big deal, though, considering the low cost of huge hard drives.
A/D and D/A converters
A third variable that affects how good a digital recorder will sound is the type of analog-to-digital (A/D) and digital-to-analog (D/A) converters that the recorder uses. The A/D and D/A converters are what actually transform the signal from an analog sound source into digital information and back again. They do this by taking small snapshots of the incoming signal (at whatever sampling rate the converter uses) and applying a number to that sample (based upon the bit depth).
For example, suppose you have a 24-bit converter with a 48-kHz sampling rate. When it senses an auditory signal — a vocal perhaps — the A/D converter takes a snapshot (measurement) of that signal 48,000 times per second (48 kHz). Each of these snapshots is given a value between –8,395,008 and +8,395,008 (24-bit resolution has 16,790,016 possible levels), which puts the vocal sound somewhere on a chart corresponding to a waveform shape. The recorder in turn reads these numbers, and the D/A converter translates these numbers back into an analog waveform again. (Pshew!)
Converting an analog signal into digital data and back again is a highly technical process. You can spend days or even weeks reading about the intricacies of audio conversion. (Check out Principles of Digital Audio by Ken C. Pohlmann, published by McGraw-Hill Professional; or The Art of Digital Audio by John Watkinson, published by Focal Press, if you’re into this techy stuff.) The most important thing to remember when considering A/D and D/A converters is how well you like the sound. If the converter sounds good to you, it’s a good converter.
You can buy separate A/D and D/A converters that can sound better than the one included in your audio interface. Depending on your ears, your engineering skills, and the style of your music, the improvement in sound of external converters can range from barely noticeable to mind-blowing. Before you spend any money on external converters, though, I highly recommend working on your skills as a songwriter, musician, and engineer.
The computer
No matter which platform of computer you choose (Mac or PC), the stuff you find inside your computer plays a major role in determining how smoothly (or how less than smoothly) your Pro Tools system runs. (Book 1, Chapter 2 details the best computer setups and needed specs for Pro Tools.)
To set up a Pro Tools computer, you need several things:
- A computer (preferably with a speedy processor)
- Bunches (BIG bunches) of memory
- Lots of storage
- An audio interface
- The software (Pro Tools, of course)
If you can afford it, get a dedicated computer — one specifically for recording audio — because running other types of applications (home finance, word processors, or video games) can cause problems with your audio applications and reduce the stability of your system.
The following list clues you in on the various pieces of hardware that you find in your computer:
The CPU: The CPU (processor) is the heart of your computer studio. The speed of your CPU ultimately dictates just how well any program runs on it. As a general rule, for audio, get the fastest processor that you can afford. For Pro Tools software, you need at least an Intel Core i5 processor (for either PC or Mac).
Because computer hardware is always changing and nearly unlimited options are available for the different components you find on a computer (especially on a PC), I strongly recommend that you consult the Avid compatibility pages at its website before you buy a computer. Or, if you already have a computer, first check whether it’s compatible: - Find compatibility information at
http://avid.force.com/pkb/articles/compatibility/Pro-Tools-12-System-Requirements. - Choose your version of Pro Tools and hardware or OS type from the expanding menus.
If you own a PC and have no idea what’s in it, use PC Wizard to find out what you have and compare it against the requirements for running Pro Tools. You can download PC Wizard by going to www.cpuid.org/pcwizard.php.If you own a Mac, you can see the specifications of your computer by choosing Apple⇒ About This Mac from the main menu bar.
- Find compatibility information at
Memory: Computer-based audio programs and all their associated plug-ins are RAM (random-access memory) hogs. My advice: Get a lot of RAM. Okay, that’s not very specific, but how much you really need depends on your recording style. If you do a lot of audio tracks and want reverb or some effect on each track, you need more RAM (and a faster processor).
Pro Tools requires a minimum of 16GB of RAM, but they recommend having 32GB or more.
Regardless of the platform you choose (PC or Mac), keep in mind that you can never have too fast a processor or too much memory.The hard drives: To record audio, be sure you get the right types of hard drives (also referred to as storage). Notice how I said hard drives (plural). Yep, you should get more than one if you want to record more than a few tracks of audio. You want one hard drive to hold all the software and the operating system — and a second drive just for audio data. If you use a lot of software instruments, especially ones with large sample libraries, you may also want to add a third dedicated hard drive for these instruments. Having multiple drives greatly increases the likelihood that your system remains stable and doesn’t crash, stall, or add clicks and pops to your tracks on you, especially if you try to run 16 or more tracks or multiple software instruments.
Nowadays you can choose between two basic types of hard drives: hard disk drives (HDD) or solid-state drives (SSDs). HDDs are the default standard drive and have been successfully used since the 1960s to store digital data. Nowadays drives with the specs needed for recording audio are relatively inexpensive and reliable.
HDDs rely on a mechanical arm that moves a read/write head over a spinning magnetic disk. There are several types of interfaces for HDDs. The most common are Parallel Advanced Technology Attachment (PATA), Serial ATA (SATA), Small Computer System Interface (SCSI), and USB. The interface you choose depends on the computer you have. Your internal drive in your computer will likely be SATA. For external drives, choose USB 3, and you’ll have the bandwidth necessary for your audio recording needs. If you don’t have a computer without USB 3 ports, you may want to consider a newer computer, because your computer is probably old enough that the hard drive won’t be the bottleneck in your system — the bottleneck will be your processor.Aside from the interface type, there are some specs you need to consider for optimal audio recording. These include spindle speed, seek time, and buffer size:
- Spindle speed: Also called rotational speed, this is the rate at which the hard drive spins. Common spindle speeds are 5,400 and 7,200. I recommend choosing 7,200-rpm drives, especially for the audio data drive.
- Seek time: This is the amount of time the drive takes to find the data stored on it. You want an average seek time under 10 milliseconds (ms).
- Buffer size: Often called cache buffers, these memory units store data while it’s being transferred. You want a buffer size of at least 2MB.
Be careful when choosing an external HDD, because many times you won’t find the specs listed anywhere. If the drive doesn’t list the specs, don’t buy it — it’s likely 5,400 rpm.SSDs are relatively new to the marketplace and have several advantages. Because there are no moving parts, they don’t make noise (there is no fan), they won’t overheat, they’re less likely to fail, and they can access data faster than HDDs. The downside is that they’re still much more expensive than HDDs per gigabyte.
So what do you choose? Here is what I recommend:
- System drive: Use whatever is currently in your computer. Unless your computer is really new (2017 or more recent), chances are, this is an HDD. It’s also likely 5,400 rpm. Although not optimal, these specs are fine for running Pro Tools software. If you have the option to choose your system drive, I recommend either a 7,200 rpm HDD or an SSD. More important, get the largest size you can afford because the operating systems are getting larger by the update. I currently have a 1TB SSD in my iMac Pro and the system software is taking up over 250GB of it. In fact, I don’t have any audio or video files on my system drive, and I’m still using over 750GB of my precious storage.
- Audio drive: You can choose either a 7,200 rpm HDD or an SSD for your audio, depending on your budget. Because I record a lot of audio, I use HDDs for my audio. My favorite drives right now are the G-Technology G-Drive mobile USB drive (2TB costs about $90) and the Fantom Drives Gforce3 Pro 2TB USB 3.0 desktop drive (around $90).
- Software instrument and sample library drive: Again, you can choose either a 7,200 rpm HDD or an SSD. Because my sample libraries aren’t super-huge (only a couple hundred gigabytes) and I don’t add new libraries very often, I’m using an SSD. I’m a fan of the Samsung T5 Portable SSD (500GB) and the WD My Passport SSD (512GB). Both cost around $160.
Computer experts often say, “Your data doesn’t exist if it doesn’t exist in at least two places.” With this in mind, I suggest adding a couple more hard drives to back up your audio data and your system software: - Audio data: Manually back up your work each day from your audio drive to another external audio drive. If you prefer not to have an additional hard drive, you can burn your data to DVDs or use your Pro Tools cloud storage or other online backup or storage service such as Dropbox (
www.dropbox.com), ADrive (www.adrive.com), Mozy (www.mozy.com), or Carbonite (www.carbonite.com). - System drive: Turn on your computer’s automated backup software and assign another hard drive to it. For Mac, use Apple’s Time Machine and for PC (Windows 10) use the Windows Backup and Restore feature.
These drives do not need to be SSD or 7,200 rpm because speed is not important, so save some money and buy a basic USB 3 backup drive. A popular one is the Seagate Expansion Plus Portable USB 3 drive (2TB costs about $70).
Getting the sound in and out
After you have a computer with enough speed and muscle (see the previous section), you need the appropriate hardware to get the sound in and out of it. Traditionally (if there can be traditions in such a new technology), you needed a sound card — also called a PCIe card because it fits in the PCI (Peripheral Component Interface Express) slot in your computer. You also needed an audio interface, which allowed you to get the sound from your mixer or preamp to the sound card. This is not the case anymore.
Currently, audio can be brought in and out of a computer in several ways:
- Through a PCI card connected to your computer’s PCI slot: PCI slots use a sound card that installs in your computer and may or may not have a separate box that houses the converters, inputs, and outputs. Originally the standard for high-end audio interfaces, few computers offer PCI slots nowadays. However, if you’re old school and you have a computer with PCI slots, you can find some great options.
- Through an interface connected to the USB port: There are a ton of audio interfaces that employ USB connectivity. USB has proven to be a robust format, and USB 2 and 3standardshave transfer rates that are fast enough to handle all the data you need to run multiple inputs and outputs. Avid’s only current audio interface, the Eleven Rack (see Book 2, Chapter 2) employs USB 2 connectivity. USB is a good choice, but avoid interfaces that use the older USB 1.1 standard for recording.
Through the Thunderbolt port: Thunderbolt is a versatile and super-fast protocol that allows for the transfer of both data and power at speeds beyond those available with USB. This is a relatively new connector type but has gone through a couple of iterations over the past few years. This ordinarily wouldn’t be a big deal. For instance, USB has grown from 1.1, to 2.0 to 3.0 to 3.1 and is largely backward compatible. This means if you have a computer with USB 3 capability, you can use a USB 2 device without any hassle or special adapters.
Thunderbolt is a different story. Thunderbolt 2 and 3 have nothing in common except a name, so if you have a computer with a Thunderbolt 3 port, you won’t be able to use your Thunderbolt 2 device without a special adapter. Likewise, a Thunderbolt 3 device will not work with your Thunderbolt 2–equipped computer. With this in mind, you’ll find both types of Thunderbolt audio interfaces. Which to choose obviously depends on the port your computer has. Most Thunderbolt 2–equipped audio interfaces also have USB ports, so they’ll work if you don’t have a Thunderbolt 2 port on you computer — as long as you have USB.
All that said, Thunderbolt audio interfaces work great, especially if you want to chain a bunch together to get large numbers of input and outputs (for recording bands live, for example).
Software
Because you’re reading this book, I’m going to assume that your main choice in recording software is Pro Tools. Three lines of Pro Tools Software are available:
- Pro Tools First: This is Avid’s free entry-level program that offers a limited number of tracks (four simultaneous recording and 16 total audio tracks). This is an inexpensive way to get into Pro Tools; it works well for artists recording their own music.
- Pro Tools: Pro Tools is Avid’s host-based program (which means that Pro Tools relies on the power of your computer to run the program as intended), with 32 simultaneous and 128 total audio tracks. This version of Pro Tools is a full-featured program that can do anything you’re likely to want to do with your own (or others’) music.
- Pro Tools | Ultimate: This is the native solution that requires you to buy Avid HD hardware to provide the processing power to run Pro Tools. This version of the software also offers some extra functionality beyond what you get with the host-based options, which some pros may find useful, such as a maximum of 256 simultaneous audio tracks, 512 auxiliary tracks, and 64 video tracks (as opposed to just one for Pro Tools and none for Pro Tools First). If you choose Avid’s HDX hardware, Pro Tools expands your total simultaneous audio tracks to a maximum of 768.
Down the road, you may want to add some other software to your system. You can include (for example) programs such as Acid (for creating loops) or Logic (for more MIDI-intensive work). You can find an online discussion board on the Internet for each of the major audio-recording software programs. Before you buy, go to the sites of the systems that interest you and see what people say about the programs. Ask questions, explore the issues that the people are having with the programs, and look for comments that reflect how well the programs interact with Pro Tools and your Avid hardware. Doing so can save you lots of time dealing with bugs in your system, allowing you to record a lot more music. You can find these sites by using the product name as the keyword in your favorite search engine, or by checking out these Internet forums:
Signing On to Signal Processors
Part of the recording process involves making adjustments to a sound before or after it’s been recorded. This is the job of the signal processor, which comes in three varieties — equalizers, dynamic processors, and effects processors. They can be incorporated into the system or be separate, standalone units. For most Pro Tools users, the signal processors of choice are integrated into the software as plug-ins, although you can also use external processors by sending the audio out of your computer and back in again.
Equalizers (EQ)
Equalizers enable you to adjust the frequencies of a sound in a variety of ways. In effect, you tell the frequencies to
- Go away. You can get rid of unwanted noise or an annoying ringing by reducing select frequencies.
- Come hither. Add life or presence to an instrument by bringing the best characteristics of that instrument forward.
- Scoot over. You can make room within the frequency spectrum for each of the instruments in your mix by selectively boosting or cutting certain frequencies.
You can find out more about EQ (and discover some great EQ tips and tricks) in Book 6, Chapter 3. The three main types of EQ are graphic, shelf, and parametric. The following sections give you the rundown.
Graphic EQ
Use graphic equalizers to choose a specific frequency to increase or decrease by a certain amount, generally up to 6 or 12 decibels (dB). Doing so enables you to eliminate an offending frequency from the signal or make other adjustments to the tonal quality of the source signal. The graphic EQ has a certain number of frequency bands that you can adjust. You’re limited to only those frequency bands that your EQ has available. Figure 1-7 shows a typical graphic EQ.
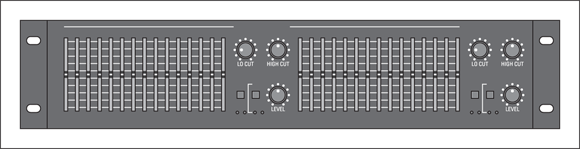
FIGURE 1-7: A graphic equalizer.
Shelf EQ
A shelf equalizer affects a range of frequencies above or below the target frequency. Shelf EQs are generally used to roll off the top or bottom end of the frequency spectrum. For example, you can set a shelf EQ to roll off the frequencies below 250 hertz (Hz) in order to reduce the amount of rumble (low-frequency noise) in a recording. You can see how this looks in Figure 1-8. Notice how the shelf EQ gradually reduces the amount of energy (sound) below the set point and then levels off — hence the shelf in its name.

FIGURE 1-8: A shelf equalizer works like this.
Parametric EQ
The parametric equalizer enables you to choose the specific frequency that you want to affect as well as the range of frequencies to put around that frequency. With a parametric EQ, you dial in the frequency that you want to change, and then you set the range (referred to as the Q) — that is, the number of octaves that the EQ will affect. Check out Figure 1-9: The two diagrams show how the Q relates to the range of frequencies affected. (The higher the Q setting, the narrower the band of frequencies affected.)

FIGURE 1-9: A parametric equalizer in a digital system. Top: Using a small Q. Bottom: Using a large Q.
The parametric EQ is one of your most useful tools when mixing all your individual tracks into a stereo pair. I describe this tool in detail in Book 6, Chapter 3.
Dynamic processors
Dynamic processors regulate the amount of sound or energy that gets passed through them. This amount is defined as the dynamic range — the range between the softest sound and the loudest sound. Dynamic processors come in three varieties: compressors/limiters, gates, and expanders. I explain each variety in the following sections.
Dynamic processors are used in a variety of ways. Use them to
- Control the signal going into the mixer and recorder.
- Tame the levels and correct the effects of an erratic musical performance when mixing.
- Optimize the levels of the finished stereo tracks when mastering.
Dynamic processors are some of the most useful tools that you have in your home studio. See Book 6, Chapter 4 for more on dynamic processors.
Compressors/limiters
A compressor’s job is not only to limit how loud a note can be, but also to reduce the difference between the loudest and softest note (that is, compress the dynamic range) of the sound being affected. The purpose of the compressor is to eliminate transients (unusually loud notes) that can create clipping (digital distortion).
Compressors are used extensively on modern recordings; the device keeps transients at bay by gently reducing the highest level that goes through it. Compressors are also used in mastering to raise the overall volume of a song without creating distortion. The device does this by reducing the overall dynamic range; as a result, a compressor effectively raises the volume of the softer notes without allowing the louder notes to be too loud and distorted.
A limiter works much like the compressor except it severely limits the highest level of a sound source. The limiter is basically a compressor on steroids; it gives you beefed-up control over volume. Any signal above a certain level, called the threshold, gets chopped off instead of compressed (as it would be with the compressor). A limiter is a good choice in extreme situations, such as when you want a really in-your-face, snare drum sound. In this instance, the limiter essentially eliminates any dynamic variation from the drummer’s snare-drum hits and makes them all as loud as possible.
Gates
A gate is basically the opposite of the limiter. Rather than limiting how loud a note can get, the gate limits how soft a note can get. The gate filters out any sound below a certain setting (the threshold) while allowing any note above that threshold to be heard.
Gates are often used on drums to keep unwanted sounds from the cymbals from bleeding through to the tom-tom or snare drum mics, or on guitars by refusing to allow the noise generated by guitar effects to be heard when the instrument isn’t playing.
Expander
An expander is basically the opposite of a compressor — instead of attenuating (reducing the volume of) the loudest notes in a performance, an expander attenuates the softest notes. For example, if you have a singer whose breath you can hear in the mic and you want to get rid of that particular blemish, just set the expander to go on at a level just above the annoying breath sounds to subtly drop the offending noise.
Effects processors
Effects are historically used to mimic real-world situations. As a home recordist, you will likely discover a great affinity toward your effects processors because they enable you to create sonic environments without having to rent some great recording room. For example, imagine dragging your drums and all your recording equipment into a large cathedral, setting them up, and spending several hours getting the mics placed just right. Sounds like a lot of work, right? (I’m tired just thinking about it.) Well, how about recording your drums in your modest home studio and simply choosing the “cathedral hall reverb” patch instead? Now, that’s much easier.
I can practically guarantee that you’ll use effects processors all the time in your studio. Scope out Book 6, Chapter 5 for how to use them effectively.
In the world of effects processors, you have many choices, and many more show up every year. The most common effects processors are (in no particular order) reverb, delay, chorus, flanger, and pitch correction. Read on for the lowdown on each type.
Reverb
Reverb is undoubtedly the most commonly used effects processor. With reverb, you can make any instrument sound as if it were recorded in almost any environment. Reverb, a natural part of every sound, is the result of the sound bouncing around inside a room. The larger the room, the more pronounced the reverb. The purpose of a reverb in audio production is to make an instrument sound more natural (especially because most instruments are recorded in small, nonreverberant rooms) or to add a special effect. Reverb can make almost any recorded instrument sound better — if used correctly.
Delay
Think of delays as a recording studio’s version of an echo. The delay can be set to happen immediately after the original sound or be delayed much longer. Delay can sound natural or be used as a spacey special effect. You can have a single echo or multiple delays (very common with the snare drum in reggae music, for instance). Delays are commonly used on vocals and guitar, although you can hear them on just about any instrument, depending on the style of music.
Chorus
A chorus effect can make one instrument sound like several. Chorus effects add very slightly off-tune versions of the unaffected sound, which results in a fuller sound. You find chorus effects used on vocals, guitars, and lots of other melodic instruments.
Flanger
A flanger (pronounced flanj-er) effect is similar to a chorus effect in sound except that the flanger gets its sound from delaying part of the affected sound in relation to the original, rather than altering its pitch. Flangers are sometimes used on background vocals and solo instruments to add an interesting texture. This is a unique sound that you recognize almost immediately upon hearing it.
The flanger effect comes from the early days in recording. You can create the flanger effect the old-fashioned way by using a two-track tape recorder to record a duplicate track of the one you want to flange. You then play the two identical parts back at the same time, gently pressing against the edge of the two-track tape (the one with the duplicate part) while it’s running. This delays certain parts of the sound slightly and drastically changes the character of the instrument.
Nowadays, you can just choose the flanger patch (sound) on your effects processor to get this sound. Isn’t technology great?
Pitch correction
Pitch correction, like its name suggests, is used to correct an out-of-tune note. You can use this effect to help a singer or an instrument player sound better by fixing those notes that are slightly out of tune. Pitch correction (also called auto-tune) has gotten a bad rap lately (mainly from its overuse and potential for abuse with a singer who can’t sing on-key). When used sparingly and appropriately, pitch correction can make an otherwise-decent vocal performance really shine. Auto-tune can also be used to create some interesting effects, such as that robotic-vocal sound you hear on so many of the pop songs on the radio nowadays. The most easily distinguished example is the lead vocal on Cher’s “Believe.”
Making Sense of Monitors
To record and mix music, you need to be able to hear it. (Hey, obvious things need love, too.) Monitors make this happen. You can use headphones or speakers as monitors; most home studios use both. Monitors are an essential part of a recording studio because you need to get what you’re recording and mixing into your ears before you make sure that it sounds good.
Without good speakers, you won’t know what your mixes are going to sound like on other speakers. (Find out more about mixing in Book 6.)
Headphones
Chances are that your first home studio will be in a spare bedroom or a corner of your garage or basement. All your recording, monitoring, and mixing will be done here. If that’s the case, a set of headphones is indispensable because then you can turn off your speakers and still hear what’s being (or was) recorded. When you go to record a guitar using a microphone in front of the guitar amp, for example, you want to hear only the guitar — not the guitar amp and the guitar amp coming back through your monitors. Headphones allow you to do this. (See Figure 1-10.)
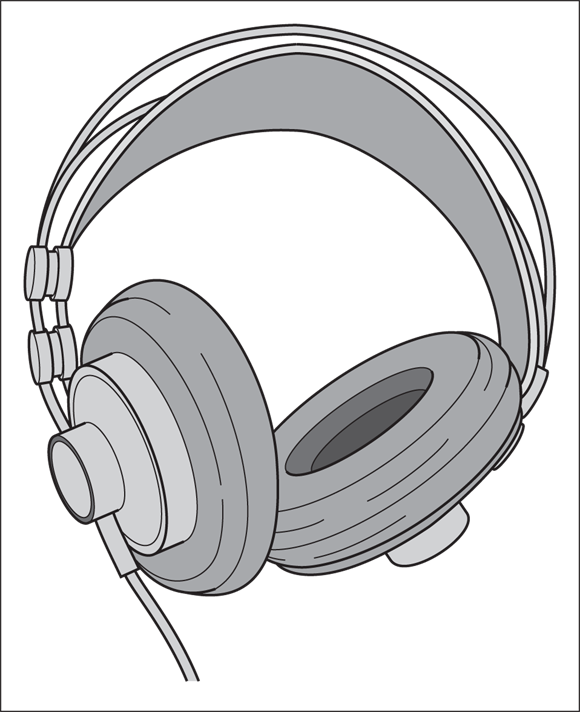
FIGURE 1-10: Studio headphones.
Speakers
For most home recordists, your first set of monitors consists of the home stereo system. Sooner or later, though, you’re gonna want a real set of monitors. Studio monitors come in many varieties, but the home recordist’s best bet is a set of near-field monitors. Near-field monitors are designed to be positioned close to you (which is often the case anyway because most home recordists have very little room in which to work).
Near-field monitors come with or without an amplifier. The amplified monitors are active monitors, and the nonamplified monitors are passive monitors. Which type of monitor you choose depends on your budget and whether you like the idea of the amp coming with the speakers or you prefer to purchase the amp separately. Figure 1-11 shows an active, near-field monitor. The amplifier is located inside the speaker cabinet.

FIGURE 1-11: An active near-field monitor: The amplifier is located inside the speaker cabinet.
If you end up getting passive monitors, you need to buy an amplifier to send power to the speakers. The amplifier connects to the outputs of the mixer and boosts the signal to the speakers. A good power amp should be matched in power to work well with whatever speakers you have.
Mastering Media
After you mix your music, you need to save your final music on some kind of medium. The two most common media for Pro Tools users are CD and raw computer files. Which medium you choose depends upon what your goals are. For instance, if you intend to send your finished mix to a mastering house, you’re better off saving it as raw audio data in a computer file. On the other hand, if you master your music yourself and just want to have it duplicated (or you want to give copies for your friends to play), you want to use a CD.
CD
With the cost of CD-R (write) and CD-RW (rewrite) drives plummeting, CD mastering is the only choice for most home recordists. With CDs, you can back up large amounts of data at a very low cost, and you can burn audio CDs that can play in any CD player. You can even send out your mastered CD to be duplicated and packaged for retail sale. (Book 8, Chapter 1 details the process for burning CDs and how to have mass quantities created.)
Computer files
Sometimes you won’t want to master your music directly to CD. You may decide to have a professional mastering house do it, or maybe you want to put your music on the Internet. In those situations, store your recordings as computer files. The following sections describe the most commonly used file formats for storing recorded music.
WAV and AIFF
WAV (Microsoft Wave format) and AIFF (Apple; Audio Interchange File Format) files are the formats for audio files found with most professional audio software. The advantage to saving your music to WAV or AIFF is that when you hand over a CD containing your WAV and/or AIFF files to a mastering house, the recorded sound is actually in a higher-quality format than that of the finished CD (provided that your recorder records in 24-bit, which most do). You can also take your music files to any other studio that supports these file formats and work with them there.
MIDI
A MIDI file is not an audio file; rather, it’s a data file that contains MIDI information that can be transferred from one computer to another; it tells the computer how to use a sound module to construct the music. An advantage to MIDI files is that they take up less room than an audio file. The disadvantage is that they contain only the MIDI information and no sound. To play a MIDI file, you have to have a sound module. And the sound you get from the file depends entirely on what sound source you use.
MP3
MP3 is a file format that has become quite popular on the Internet. Its advantage over audio CDs and other computer files is that it takes up less room. Its disadvantages are that the data is compressed and the sound quality is not nearly that of commercial CDs (contrary to what MP3 proponents claim). You can find out more about MP3s and audio quality in Book 8, Chapter 2.
AAC
AAC (Advanced Audio Coding) is the file format of choice for iTunes music and some other Internet music sites. This format is said to offer a higher quality of sound than MP3 for its size.