
Configuring a Printer
You can configure your printer during the installation process or you can configure it at your convenience using the Printer Configuration applet in the Linux control panel. In either case, the process is the same.
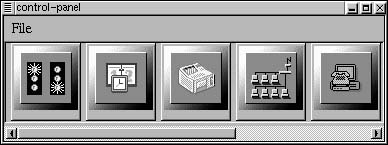
Figure 2.21. Select the Printer Configuration applet from the Linux control panel
To add a printer with the Printer Configuration applet:
1. | Open a terminal window, either by clicking the terminal icon on the Gnome panel or by choosing Gnome Terminal from the Gnome Utilities menu. |
2. | Click the terminal window, so that it has the focus of keyboard entries. |
3. | With the terminal window open, at the prompt type su root. |
4. | Enter the root password at the prompt. You'll see at the next prompt that you are effectively logged on as root. |
5. | |
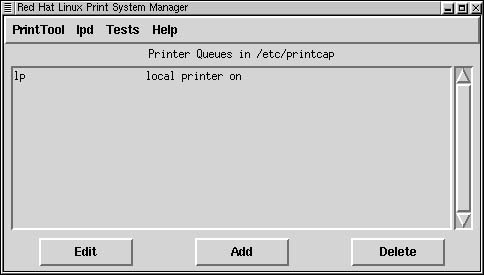
6. | Select the Printer applet by clicking its icon (the third from the left in Figure 2.21). The Red Hat Print System Manager will open (Figure 2.22). Figure 2.22. The Print System Manager is used to add, edit, and monitor printers
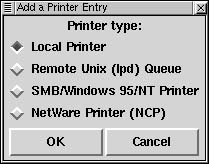
Figure 2.23. If your printer is connected directly to your Linux system, you should choose Local Printer
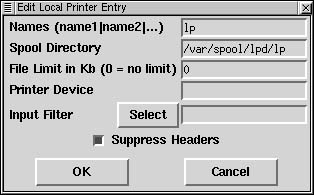
Figure 2.24. It is likely that you will not need to edit the default printer entries.
Figure 2.25. When your printer has been added, you will see it listed in the Print System Manager.
|
7. | |
8. | Choose your printer type. Choose Local Printer if you have a printer directly connected to your Linux system. For information on configuring a Windows printer using Samba, see Chapter 8. |
9. | |
10. | If the default settings are correct, choose OK. You should now see your new printer listed in the Print System Manager (Figure 2.25). |

..................Content has been hidden....................
You can't read the all page of ebook, please click here login for view all page.