
Using NFS
NFS—the Network File System—allows you to share files between Linux (and Unix) computers on a TCP/IP network.
In concept, NFS works pretty much the same way as devices such as CD-ROMs or floppy drives added to your file system. In other words, to access a remote NFS file system as a client, it must first be mounted. It then becomes part of the file tree structure that you can see, joined at the mount point.
Conversely, for a client to access a file system on an NFS server, the server must make it available for mounting. (By the way, this has obvious security implications, which will be touched on in this section and later in this chapter in the "Security" section.)
When you make your file system available for mounting, you decide what portion can be mounted. If you make everything starting at root available, then your entire file system can be accessed. More typically, you will make only a branch of the file system available for mounting, so that the files on that branch are all that can be accessed.
It's possible to make a NFS mount of your file system available to anyone (at least anyone who can reach your host). It is more usual to make the mount available to a specific host or hosts.
Once an NFS mount that you have exported has been mounted remotely, from the viewpoint of the remote host it becomes part of the remote host's file tree, and it can be used and manipulated in the same fashion as the remote host's local file system.
Mounting a remote NFS file system
The mount command can be used to mount a remote NFS file system that has been exported, and the contents of the /etc/fstab file can be edited to start the mount at startup. However, under Red Hat Linux 6 it is easier to use Gnome's visual tools to achieve the same goals.
To mount a remote file system:
1. | Log on as root. |
2. | Open the Linux Configuration applet. |
3. | Scroll down the left panel to File Systems. |
4. | Under File Systems, click Access NFS Volume. The NFS Volume tab will open (Figure 13.17). Figure 13.17. The NFS Volume tab is used to add mounts for remote exported NFS file systems.
|
5. | Click Add. The Volume Specification dialog box will open (Figure 13.18). Figure 13.18. The Volume Specification dialog box is used to provide specific information about the remote mount.
|
6. | Enter the name of the server that is exporting the file system and the local mount point. |
7. | To set options, click the Options tab (Figure 13.19). For instance, you might want to not allow file execution. Also, if you check Not Mount at Boot Time, the remote file system will not be automatically mounted at startup. Figure 13.19. You can set options for a remote mount, such as whether files can be executed, and whether the remote file system should be mounted at startup.
|
8. | To mount the remote file system, click Mount. |
9. | To add the file system to the list of remote file systems that are mounted at startup, click Accept. The mount will appear on the NFS volume tab (Figure 13.20). |
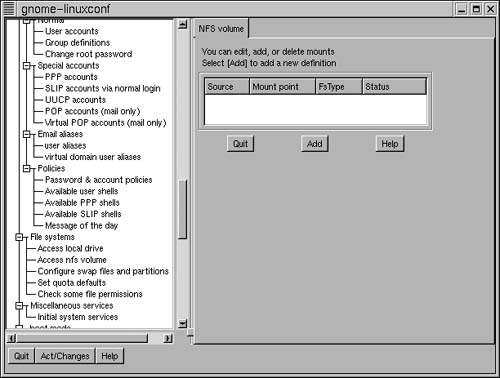


Figure 13.20. Remote file systems that are automatically mounted at startup appear on the NFS volume tab.

Exporting a file system
To export a branch of your file system (or the entire file system, by specifying / as the starting place) the old-fashioned way, you can edit the /etc/exports file. Again, though it's much easier to let the visual configuration tools do the work.
To export a file system:
1. | Log on as root. |
2. | Open the Linux Configuration applet. |
3. | Scroll down the left panel to Server Tasks. |
4. | Click Exported File Systems (NFS). The Exported File Systems tab will open (Figure 13.21). Figure 13.21. The Explorted File systems tab is used to export branches of your file system.
|
5. | Click Add. The One Exported File System tab will open (Figure 13.22). Figure 13.22. Enter export information on the One Exported File System tab.
|
6. | Enter the path you want to export: for example, /exports or /home/hdavis Of course, / means root, or your entire file tree. |
7. | Enter a client name. By the way, client name means the name of the client host machine. It is not a user's name. If you leave client name blank, then any client host can mount the exported file system. |
8. | Select the appropriate options (see the following tips). |
9. | Click Add. Your exported file system will now appear in the list of systems accessible through NFS (Figure 13.23). |
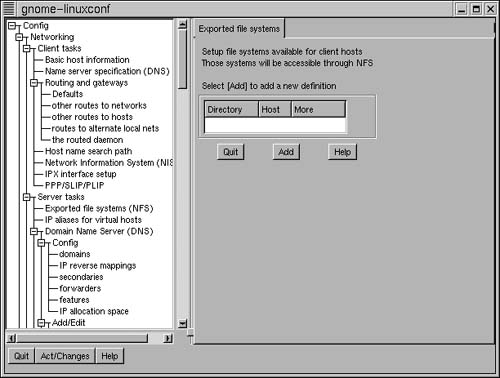
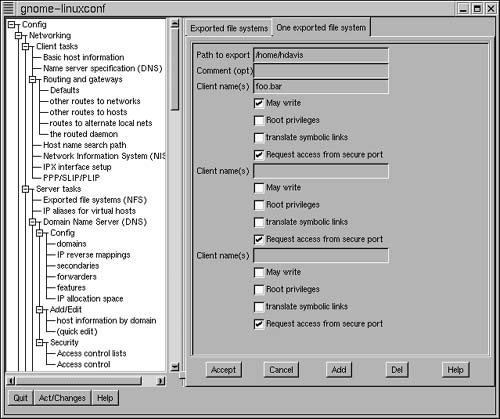
Figure 13.23. Those file systems that are accessible to other client hosts through NFS appear in the Exported File Systems list.

Tip
Your choices on the One Exported File System tab have substantial security implications.
Tip
Allowing access to your root file structure is a potential danger. Allowing a remote user to have root privileges is giving the keys away—so do so only in a situation in which it is appropriate.
Tip
Allowing write access is also a potential security problem—remote users could delete essential files and attack your file system by overwhelming it.
Tip
Requesting access from a secure port is a prudent precaution.