
Installing Linux
Enough with preliminaries! It is time to install Linux.
Figure 1.8. The first step in the installation process is to select a language that the program will use.

To boot the installation program:
1. | Power down your computer. |
2. | With the CD-ROM in its drive and the Linux boot disk that you created in the floppy drive, turn the power back on. After a brief delay, a text-based boot screen will appear. |
3. | Press Enter to accept the default options. The installation program will begin. |
Tip
If you don't press Enter, after one minute the installation program will start running with the default options.
Figure 1.9. You must specify the installation media, most likely a CD.

Navigating the installation windowsOnce the Red Hat Linux installation program begins, you will need to use your keyboard for navigation because the program does not respond to mouse commands. The following keystrokes are used in the installation dialog boxes:
|
To run the installation program:
1. | The first dialog box you'll see once the installation starts asks you to select a language to be used during the installation process (Figure 1.8). Use the arrow keys to highlight the language of your choice. |
2. | Press the spacebar to select the language. |
3. | Tab to the OK box and press Enter to select it. |
4. | |
5. | |
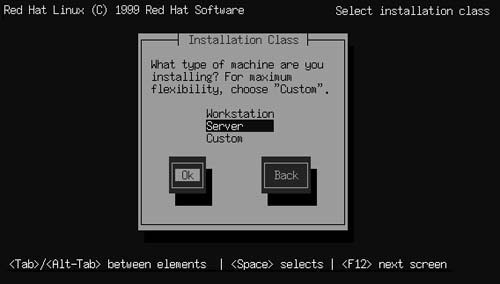
6. | The installation program will prompt you to make sure the CD is in place. Press Enter on the keyboard to verify that it is. If the installation program doesn't find your CD-ROM, reboot your computer with the CD-ROM in place and restart the installation program. Figure 1.11. There are three classes of installation: Workstation, Server, and Custom.
|
7. | The program will probe your system to find and identify your CD-ROM drive. If your CD-ROM drive is controlled by a SCSI controller, you will be asked if there are additional SCSI controllers in your system. Select No (unless you have other SCSI controllers). |
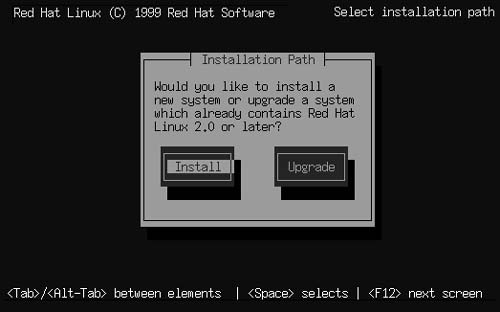
8. | Choose whether you want to upgrade or perform a new installation (Figure 1.10).Upgrading will preserve applications and data files and existing configuration files (which will be renamed with a .rpmsave extension). You should choose Upgrade only if your system is already running Red Hat Linux version 2.2 or greater. Figure 1.12. A Server-class installation deletes all the partitions on your hard drive.
|
9. | In the next dialog box, you will be asked to choose the installation class (Figure 1.11). There are three choices: Workstation, Server, and Custom. A Workstation-class installation erases all current Linux partitions from your system. A Server-class installation erases all partitions from your system. A Custom-class installation gives you complete control over partitioning, and over which components are installed. See Chapter 2 for more information on Custom-class installations. Tab to the Server check box and press the spacebar to select it. |
10. | |
11. | You will be warned that you are about to delete all the partitions on your hard drive, meaning that all your data will be lost (Figure 1.12). Tab to the OK box and press Enter to continue. |
12. | Select your mouse type and connection using the Tab key, arrow keys, and spacebar. |
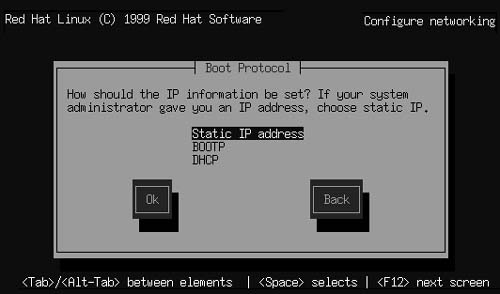
13. | If the installation program detected a network card, you will be asked to configure networking (Figure 1.13). See Chapters 3 and chapters 4 for more information. |
14. | Enter a password for root (Figure 1.14), also called the superuser. The root password must be at least six characters long. It gives access to the entire system—you should take care not to lose it and not to share it with any high-security-risk individuals. Figure 1.14. A Server-class installation deletes all the partitions on your hard drive.
|
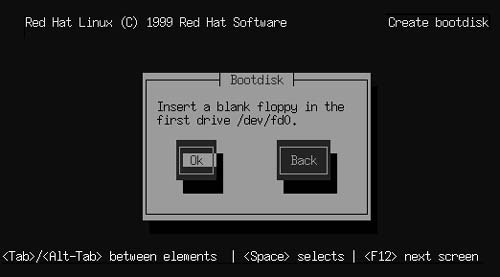
15. | You are given the opportunity to create a custom boot disk for the new system (Figure 1.15). Select Yes. Figure 1.15. You are given the opportunity to create a custom boot disk.
|
16. | At the prompt, insert a blank floppy disk (Figure 1.16) Figure 1.16. If you decide to create a boot disk, you must insert a floppy disk in your drive (drive A in Windows is /dev/fdo in Linux).
|
17. | You will be asked if you want X-Windows to start automatically at bootup. Select Yes. The installation program will attempt to identify your video adapter (Figure 1.17). Figure 1.17. The installation program will attempt to identify your video subsystem.
|
18. | Select your video monitor from the list (Figure 1.18) using the Tab key, the arrow keys, and the spacebar. If your monitor is not listed, you can specify horizontal and vertical refresh rates directly. This procedure is covered in more detail in Chapter 2. Figure 1.18. For the display to work properly, you'll need to identify your monitor
|
19. | Remove the floppy drive from the disk so the system can reboot. |


Tip
If your monitor isn't listed and you don't have refresh rate information, try choosing a Dell monitor in the right size.