
Working with GnomeCard
GnomeCard combines the functionality of an address book or contact management program with an electronic business card manager.
GnomeCard information is saved in the vCard format, which is a standard format used for automating the exchange of information in applications including email, personal information managers (PIMs), personal digital assistants (PDAs), digital wireless phones, and more. The Internet Mail Consortium is responsible for developing and promoting the vCard standard.
Figure 7.11. GnomeCard display the active card on the right and lists all cards on the left.

Essentially, the vCard format is a text-based standard that can easily be read and saved by many applications. For more information, open the Internet Mail Consortium's Web site, at http://www.imc.org/pdi/.
To open GnomeCard:
-
With the Gnome desktop running, select GnomeCard from the Applications menu Gnome main menu. GnomeCard will open (Figure 7.11).
Tip
GnomeCard always displays the full information for the active card on the right. A summary List view is displayed on the left. You can decide which columns will be displayed in the List view (described later in this chapter).
Tip
The first time you open GnomeCard, there will be no entries.
To add a card:
1. | With GnomeCard open, click Add on the GnomeCard toolbar. The Identity tab will open (Figure 7.12). Figure 7.12. A tabbed dialog box is used to add or edit card information.
|
2. | For the time being, leave the File As box empty. (The File As field becomes the Card Name field in GnomeCard List view.) |
3. | Enter first name, last name, organization, email, and any other information you'd like. You can click the Take from Name button to use the first and last name you entered in the File As field. |
4. | Click Apply to save the information. |
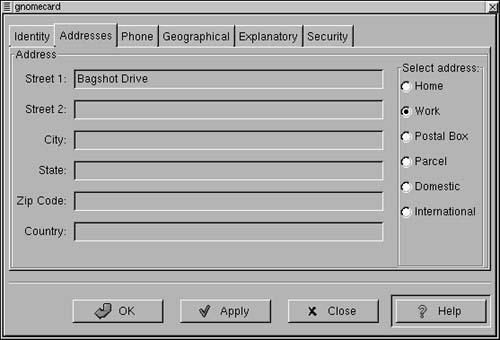
5. | Click Addresses to open the Addresses tab (Figure 7.13). Figure 7.13. The Addresses tab is used to enter information for multiple addresses.
|
6. | Enter home address information. |
7. | Select Work in the Address Selection frame on the right. The home address information that you entered will no longer be visible, and you will have a chance to enter work address information (Figure 7.14). Figure 7.14. You can enter many addresses on one card by using the choices in the Select Address frame.
|
8. | When you are through entering addresses, click Apply. |
9. | Enter other information on the remaining tabs. After you finish with each tab, click Apply to save the information. |
10. | When you are through, click Close. Your complete card information will be displayed on the right, with a summary on the left (Figure 7.15). Figure 7.15. The complete card information that you entered appears on the right, with a summary in a list on the left.
|


Tip
If you enter text in the Comment field on the Explanatory tab, it will appear in the active card display as a memo.
Tip
If you leave the default column headings in List view, Card Name—obtained from File As—is the primary sort field. (To change the default, see the sections that follow.) This means that if you left File As empty when you created a card, the card will appear to have no name in the alphabetic Card Name list.
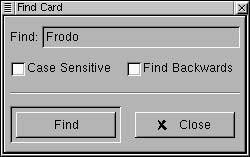
To search for a card:
1. | Click Find on the GnomeCard toolbar. The Find Card dialog box will open (Figure 7.16). Figure 7.16. You can search for a card by opening the Find Card dialog box.
|
2. | Enter the name you want to find. |
3. | Click Find. |
To delete a card:
1. | Right-click a card in List view. |
2. | Choose Delete This Item from the fly-out menu. |
Tip
You will not receive a confirmation message before the card is deleted. Once it is deleted, it is gone.
To edit a card:
1. | Right-click a card in List view. |
2. | Choose Edit This Item from the fly-out menu. The Identity tab will open, with current information for the card in place. |
3. | Change the information on the various tabs. |
4. | Save your changes by clicking Apply or OK. |
To change the primary sort field in List view:
-
Click the column header that you want to use as the new primary sort field. The items in List view will be rearranged so that they are alphabetically sorted using the entries in the new column.
To change the columns displayed inList view:
1. | Choose Preferences from the Settings menu. The Layout dialog box will open (Figure 7.17). Figure 7.17. The Layout dialog box is used to choose the columns you want displayed in List view.
|
2. | Use the buttons in the dialog box to select and arrange the columns you want displayed in List view. |
