
Seeing an Instant Slide Show
Here’s a scenario: You get back from a photo shoot and download your photos into the Organizer. You know you got some great shots and you just want to see them in a quick full-screen slide show. Nothing fancy. Just your photos, big onscreen. That’s where the Full Screen option comes in. FYI...we’ve provided a video (on the book’s companion website mentioned in the introduction) on how to show your work, where we look at how to create a rich, fully-featured slide show using another feature in Elements, but this one is a good trick to know.
Step One:
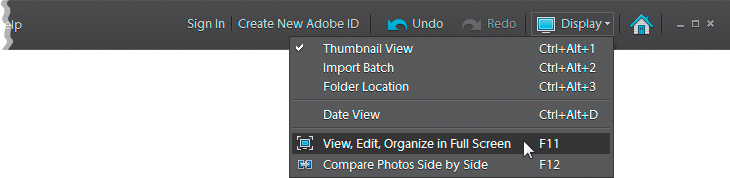
First, open the Organizer. Now press-and-hold the Ctrl (Mac: Command) key and click on each photo you want to appear in your slide show (if the photos are contiguous, you can click on the first photo, press-and-hold the Shift key, click on the last photo, and all the photos in between will be selected). Once the photos you want are selected, click on the Display button (on the right side of the Organizer’s menu bar) and choose View, Edit, Organize in Full Screen from the pop-up menu (or just press F11 [Mac: Command-F11]).
Step Two:
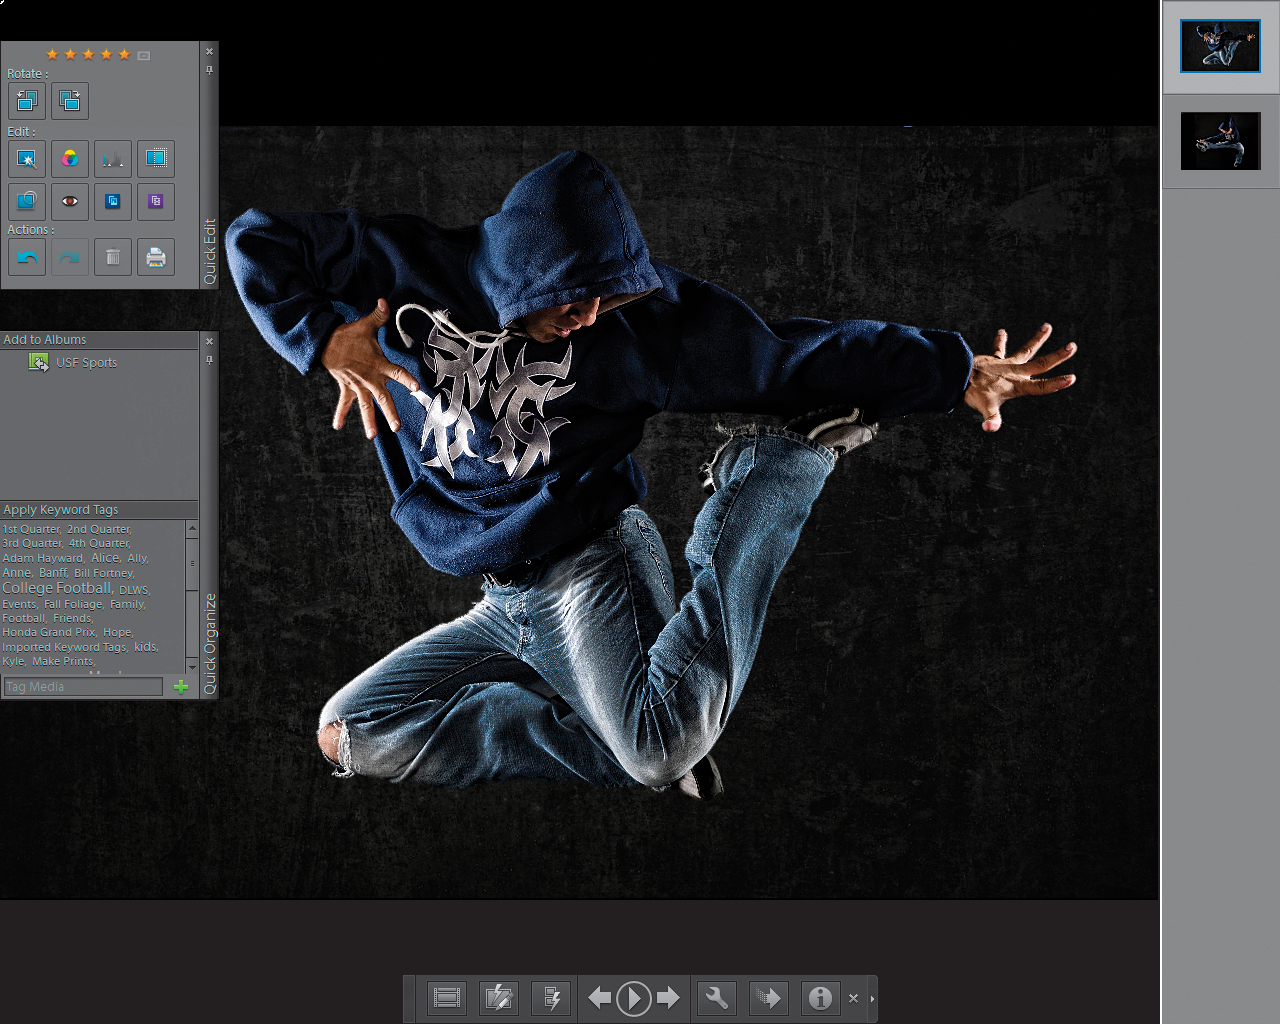
This brings you into Full Screen view, where you’ll see your photo large onscreen with a few pop-up palettes on the left and bottom of the screen and a filmstrip bar on the right. The Quick Edit and Quick Organize palettes on the left side will slide in and out of the screen as you move your cursor over them. They’re basically there in case you want to make some quick edits or organizational changes as you see your photos large onscreen during the slide show.
MATT KLOSKOWSKI
Your slide show won’t start until you click the Play button in the control palette at the bottom of the screen (or press the Spacebar, or F5). To stop your slide show (to pause), click the Pause button (the Play button toggles to the Pause button), and then to resume it, click Play/Pause again.

Step Four:
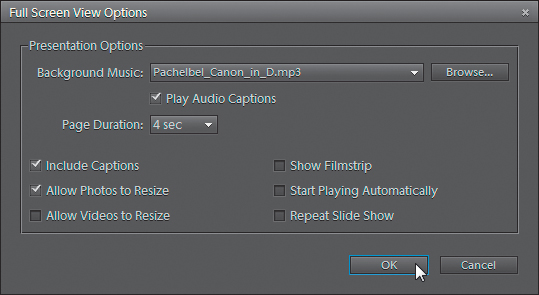
If you want to change the presentation options for your slide show, click the Open Settings Dialog button (the little wrench) in the control palette. This brings up the Full Screen View Options dialog, where you choose the music for your slide show from the Background Music pop-up menu and how long each photo will appear onscreen from the Page Duration pop-up menu. It assumes you want any captions included, but you can turn that off by clicking on the Include Captions checkbox, and you can also have your slide show loop when it reaches the end by turning on the Repeat Slide Show checkbox. Click OK to close the dialog when you’re done.
Step Five:
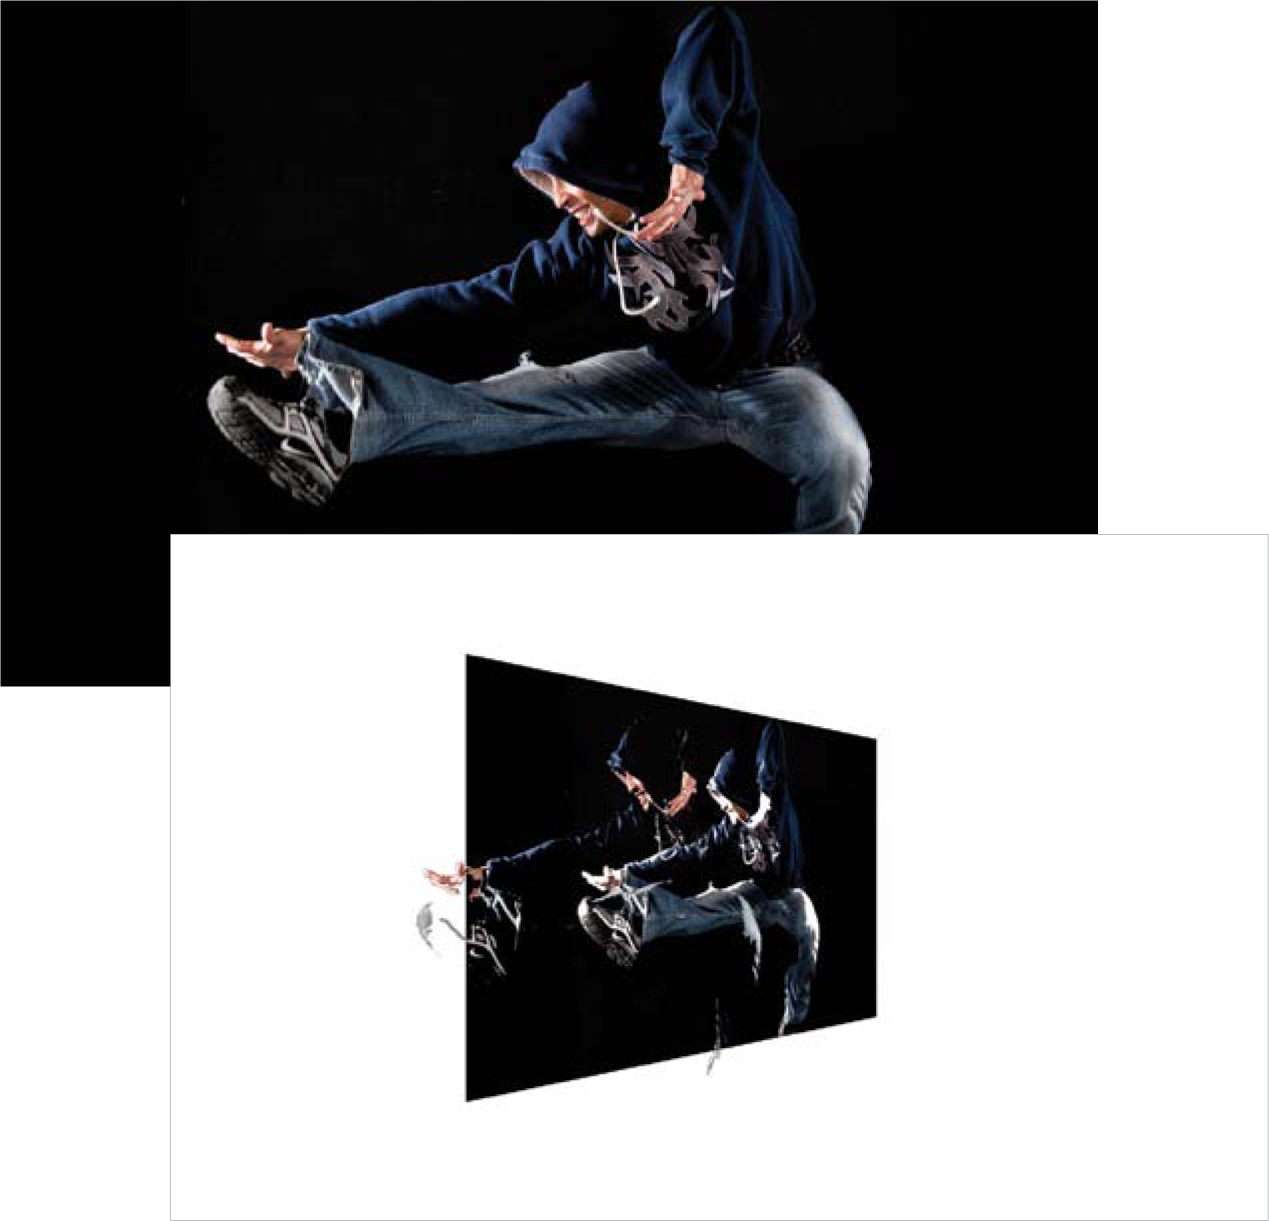
Okay, if you get anything out of this tutorial, this needs to be it: Next to the Open Settings Dialog button is the Transitions button. When you click the button, it opens the Select Transition dialog. The first three are pretty self-explanatory (to me at least) but if you want to see a quick preview of them, just hover your cursor over the thumbnail and you’ll see a quick animation of what the transition from slide to slide will look like. It’s the last one, 3D Pixelate, that’s crazy. You’ll have to see it full screen to really appreciate it, so go ahead and click on the 3D Pixelate radio button, and then click OK.
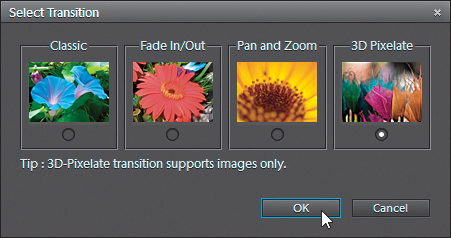
Now click the Play button or hit the Spacebar or F5 key to start the slide show. Then watch in amazement as one photo transitions to another. I gotta warn you, though, if you’ve been drinking (alcohol, that is) it’s really going to freak you out, and if you haven’t been drinking, well, it’s probably going to make you feel like you have been. After you kill an hour watching this (I’m serious, it’s mesmerizing), go ahead and press the Esc key to get out of slide show mode (if you chose the Pan and Zoom or 3D Pixelate transition) or click on the Exit (X) button at the right end of the control palette (if you chose the Classic or Fade In/Out transition) to go back to Full Screen view.
MATT KLOSKOWSKI
Step Seven:
There are extra controls at the right side of the control palette (click on the tiny left-facing arrow on the far right of the palette to reveal them) for comparing still images, but they are not used during your slide show. I usually keep them hidden and just display the slide show controls.

Step Eight:
To get out of Full Screen view and return to the Organizer, press the Esc key again on your keyboard, or click the Exit button in the control palette.
