The following procedure will guide you through the steps involved in upgrading a vCenter and PSC Windows pair to VCSA 6.7 and PSC 6.7 appliances:
Upgrade – Stage 1: Deploy vCenter Server: Deploy the target appliance:
- Mount the vCSA 6.7 Installer ISO onto a Windows machine.
- Run the installer from the source, that is, CDROM:vcsa-ui-installerwin32installer.exe.
- On the vCenter Server Appliance 6.7 Installer – Stage 1: Deploy Appliance screen, click Migrate.
- On the Introduction screen, click Next to continue.
- Accept the End user license agreement and click Next to continue.
- On the Connect to source appliance screen, supply the Source appliance details (Source FQDN/IP, SSO credentials, source appliance root password) and the managing ESXi/vCenterFQDN/IP and its credentials:

Accept the certificate warning, if prompted.
- On the Appliance deployment target screen, specify the details of the vCenter/ESXi the target appliance will be deployed on and click Next to continue.
- On the Set up target appliance VM screen, specify a name for the target appliance VM and set the target appliance's root password.
- On the Select deployment size screen, choose a deployment size (tiny, small, medium, large, or X-large). A default storage size is chosen based on the deployment type selected, but you could choose a non-default storage size if you so desire. Make a choice and click Next to continue.
- On the Select datastore screen, chose a location for the target VM, choose to thin provision if desired, and click Next to continue.
- On the Configure network settings screen, select a port group to connect the target VM to and specify the Temporary IP configuration. This will be used during the data transfer. Click Next to continue.
- On the Ready to complete stage 1 screen, review the settings and click Finish.
- Once the VCSA appliance has been successfully deployed, it will confirm the same and suggest that you continue to Stage 2. This can be done by clicking Continue or using the https://Temp-IP:5480 page.
Upgrade – Stage 2 vCenter Appliance:
- On clicking Continue, you will be taken to the Upgrade – Stage 2: vCenter Appliance wizard.
- On the Introduction screen, click Next.
- The Connect to Source screen will use prepopulated details to automatically start the pre-upgrade check. If it doesn't, enter the details when prompted and click Next.
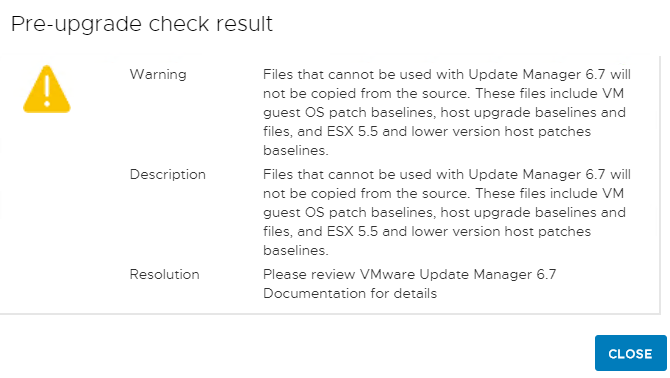
- Once the pre-upgrade checks are complete, you may be presented with a Pre-upgrade check result screen. If you are, click CLOSE to continue:
- On the Select Upgrade data screen, you can choose to transfer only the configuration or include historical data and performance metrics. By default, only the configuration is selected. Make the desired selection and click Next to continue:

- On the Ready to complete screen, review the settings and use the checkbox to confirm that you have backed up the source appliance. Then, click Finish:

Click OK on the Shutdown Warning indicating that the source appliance will eventually be shut down.
- Once the upgrade is complete, you will be presented with an Upgrade - Stage 2: Complete screen. Click Close to exit the installer.
This completes the upgrade of the vCSA.