
Simulating the Blossfeldt Effect
Kart Blossfeldt was born in Germany in 1865 and apprenticed in an iron foundry in Mägdesprung in the Selke valley of the Harz mountains. In his twenties, he worked as a decorative iron welder, and many of his designs were taken from nature.
Always interested in the broader world of art and design, Blossfeldt studied drawing, and began to use a camera to make reference images from nature for decorative ironwork. In the 1890s his interest in botany was encouraged when Blossfeldt was hired to do systematic photographic documentation of plant samples throughout Italy, Greece, and North Africa. Following this, in the early years of the twentieth century his photographs began to be published and appreciated as art in and of themselves. Starting in the 1920s he would become a respected art professor in Berlin, with his photographs exhibited in Berlin and around the world. Books of his photographs began to appear, were widely appreciated, and today he is recognized as a great botanical photographer.
Blossfeldt approached his botanical subjects in a very straightforward way, using a plain background and letting his subject matter speak for itself. He used a series of homemade cameras with magnifying lenses—what today we would call macro lenses—mounted on heavy-duty tripods. His primary interest in botanical photography was in the repeating visual patterns that can be observed when nature is observed up close. Blossfeldt’s photos have a very distinctive look, and once you’ve seen them it is impossible not to recognize them.
Crassula ovata—This succulent is commonly known the jade plant, lucky plant, money plant, or money tree. By whatever name, Crassula ovata grows in abundance in the neighborhood where I live. Photographing this specimen on the street, up-close and personal, it struck me that it looked rather like a decorative garland—and therefore, a good candidate for the Blossfeldt effect.
Nikon D850, Lensbaby 85mm Velvet macro, 1/1600 of a second at f/1.8 and ISO 64, hand held; processed to black in white in Photoshop, and simulated “Blossfeldt” effect added using LAB color, Topaz Simplify, and Silver Efex Pro.
As a longtime admirer of Blossfeldt’s work, one of my ambitions has been to create digital imagery that is an homage to his wonderful botanical work.
With most photography, the important part is in the choice of subject, arrangement, and camera techniques. To create Blossfeldtian imagery, the first step is to photograph subject matter that Blossfeldt would have appreciated using the same straight ahead macro-eye view that he liked. With the basic photography in place, a little post-production tweaking can get you the rest of the way there.
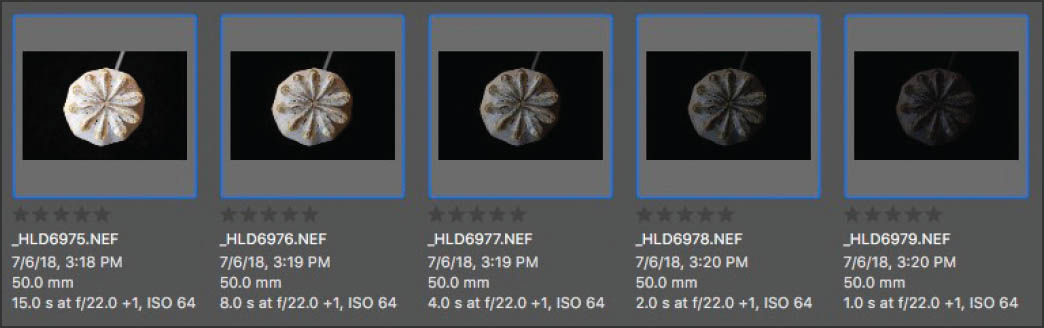
I started with a bracketed set of five exposures with shutter speeds ranging from 1 second to 15 seconds photographed on black velvet.

I used three of the images to start processing the image. I used the frame marked “6977,” the 4 second exposure, as the background. Then I used “6979,” the 1 second exposure, to even the lighting on the upper left using a mask. Next, I used “6977” a second time to even the lighting on the right side of the image. Finally “6976,” the 8 second exposure, was used to lighten the top of the papaver pod.
In the next step, I cropped the image so that it was square. Next, I wanted to add more detail to the center of the poppy pod.
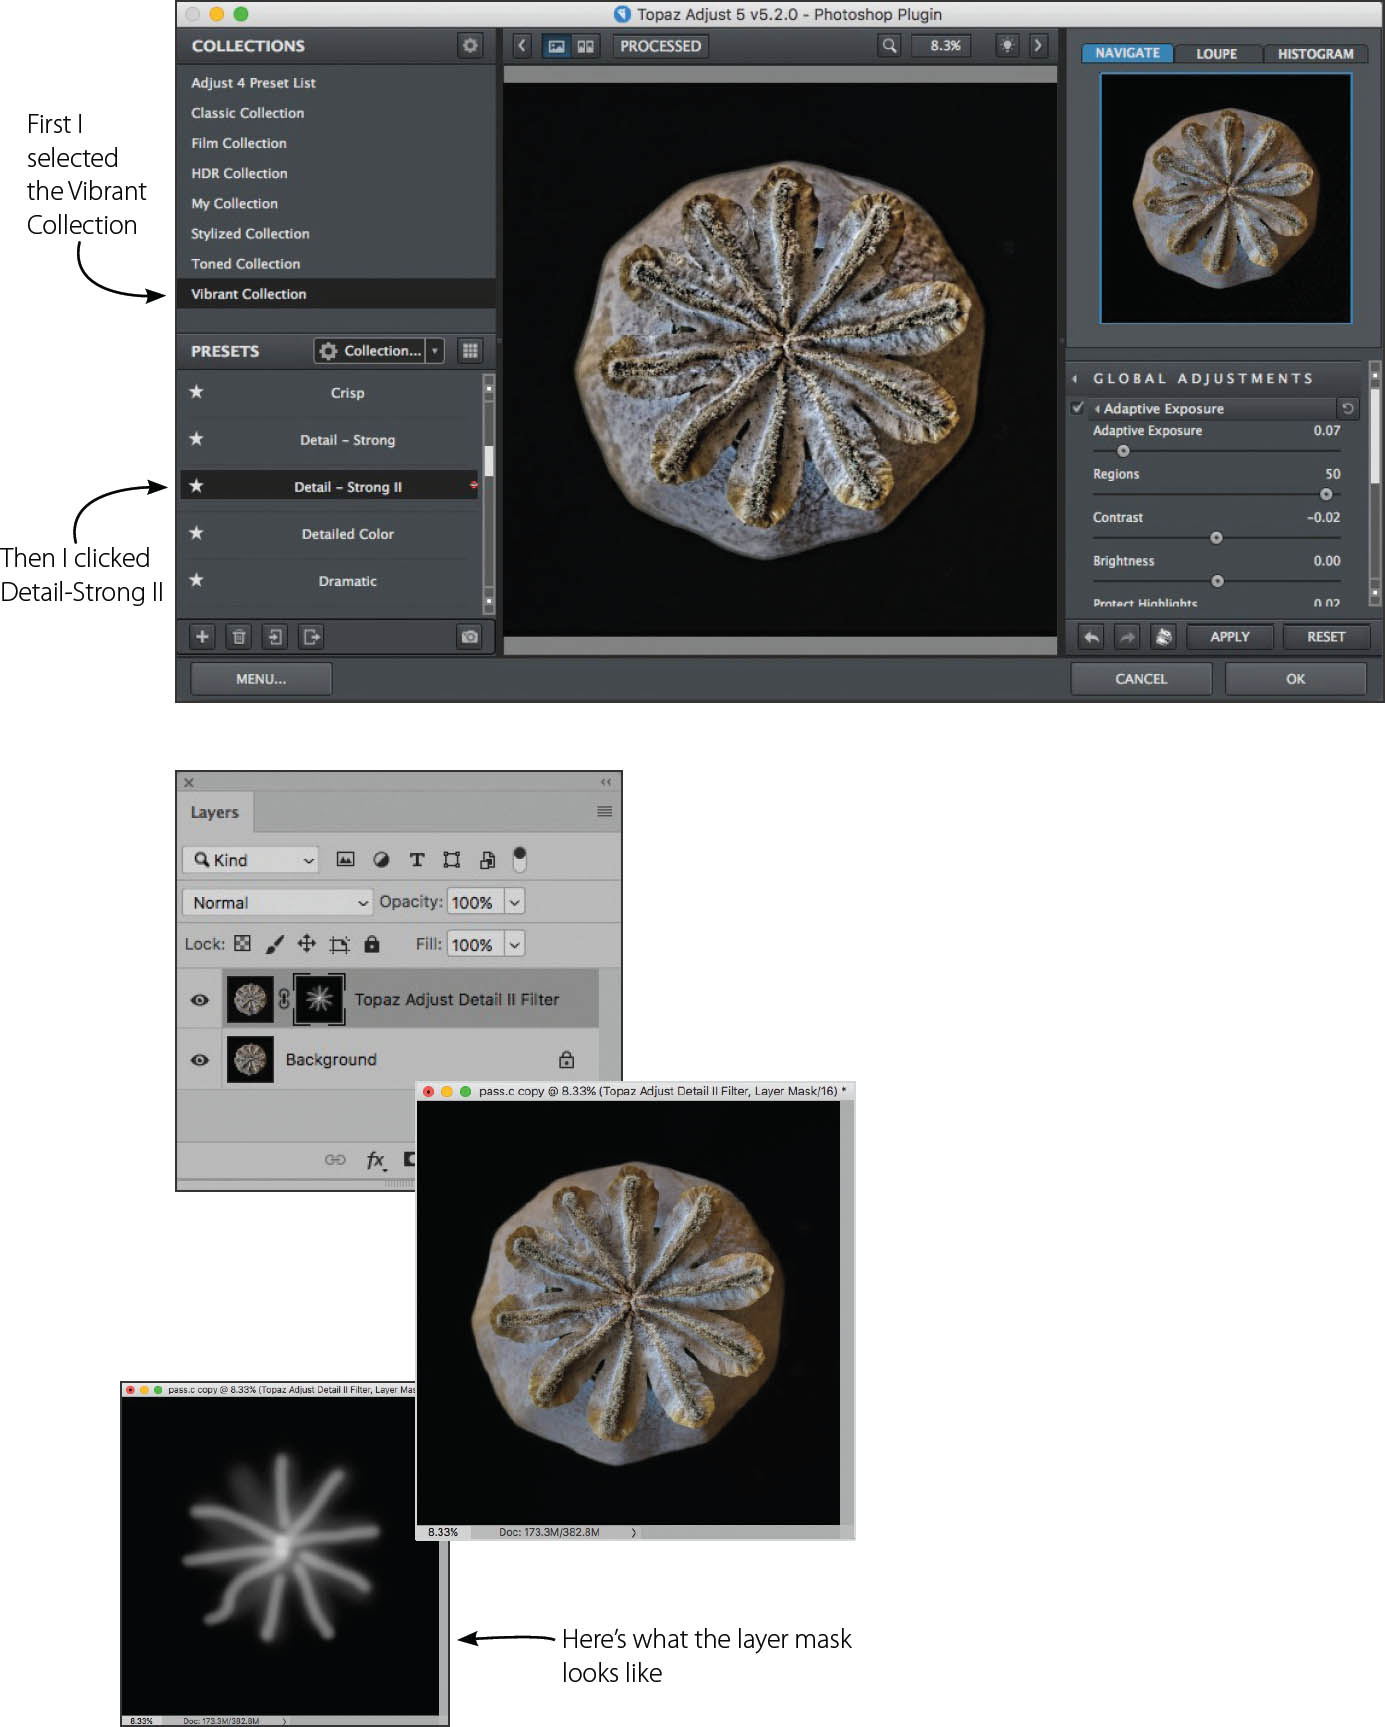
To do this, I duplicated the Background layer and renamed it “Topaz Adjust Detail II Filter.”
Next, I opened Topaz Adjust. I selected the Vibrant Collection on the upper-left side of the window, and then chose Detail-Strong II from the Presets list. As you can see above in the Topaz Adjust window, this preset added a hyper-sharpening to the center.
After clicking OK, I added a black Hide All layer mask to the Topaz Adjust Detail II Filter layer, and used the Brush Tool loaded with white at 50% opacity to paint in the center. You can see the layer mask to the left.
After flattening the layers, and saving an archived copy of the color version, I duplicated the color Background layer and named the duplicate “Silver Efex Neutral.” With this layer active, I converted the layer to monochrome using the Neutral (default) Preset in Silver Efex Pro (see pages 150–155).
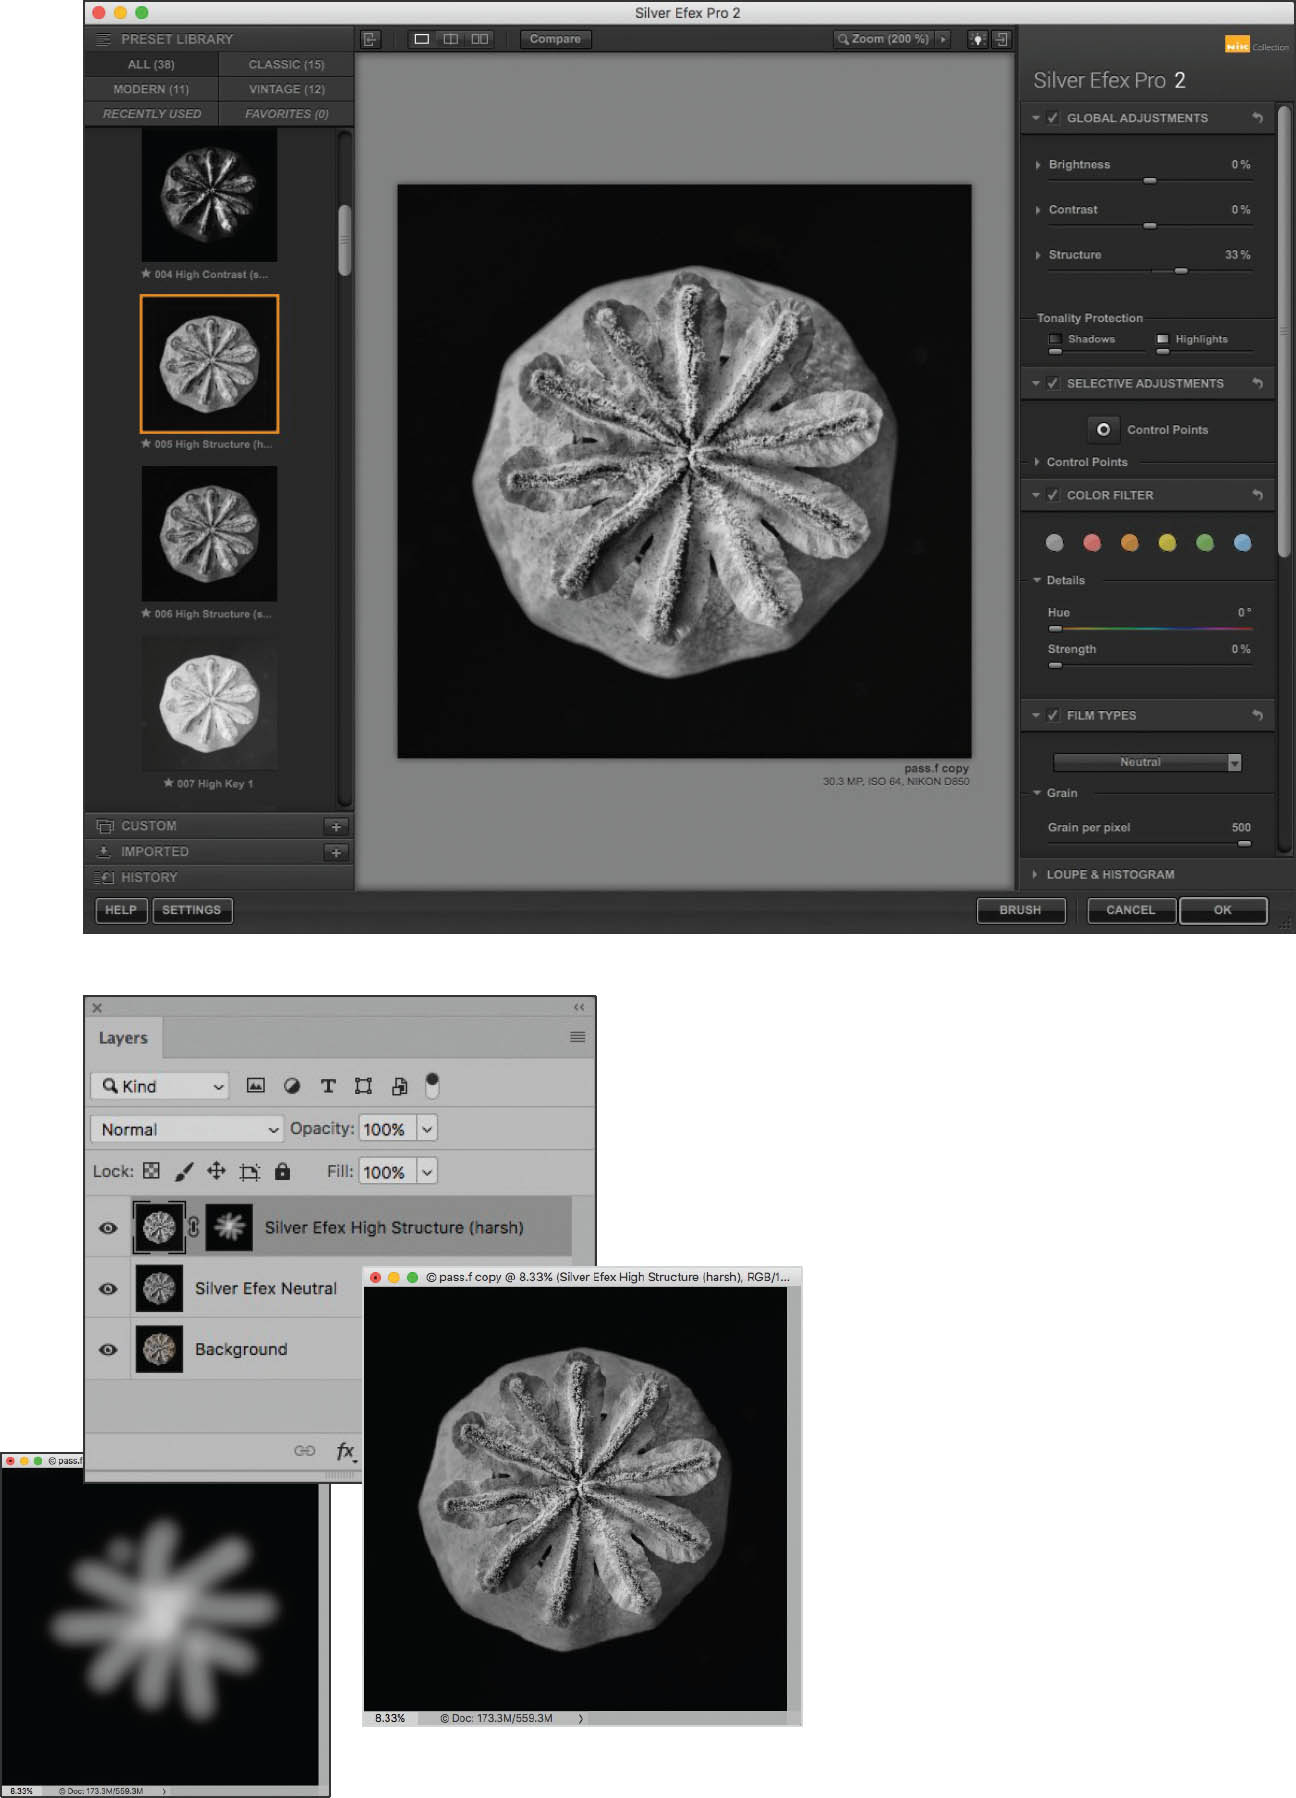
Next, I duplicated the color Background layer a second time. I moved the new duplicate to the top of the layer stack in the Layers panel, and then renamed the layer “Silver Efex High Structure (harsh).”
The layer name says it all: I opened Silver Efex Pro once again and used the High Structure (harsh) Preset to convert the layer to monochrome and add extra sharpening.
After clicking OK, I added a black Hide All layer mask, and using the Brush Tool loaded with white and set to 50% Opacity, I brushed in the center area. You can see the layer mask to the left.
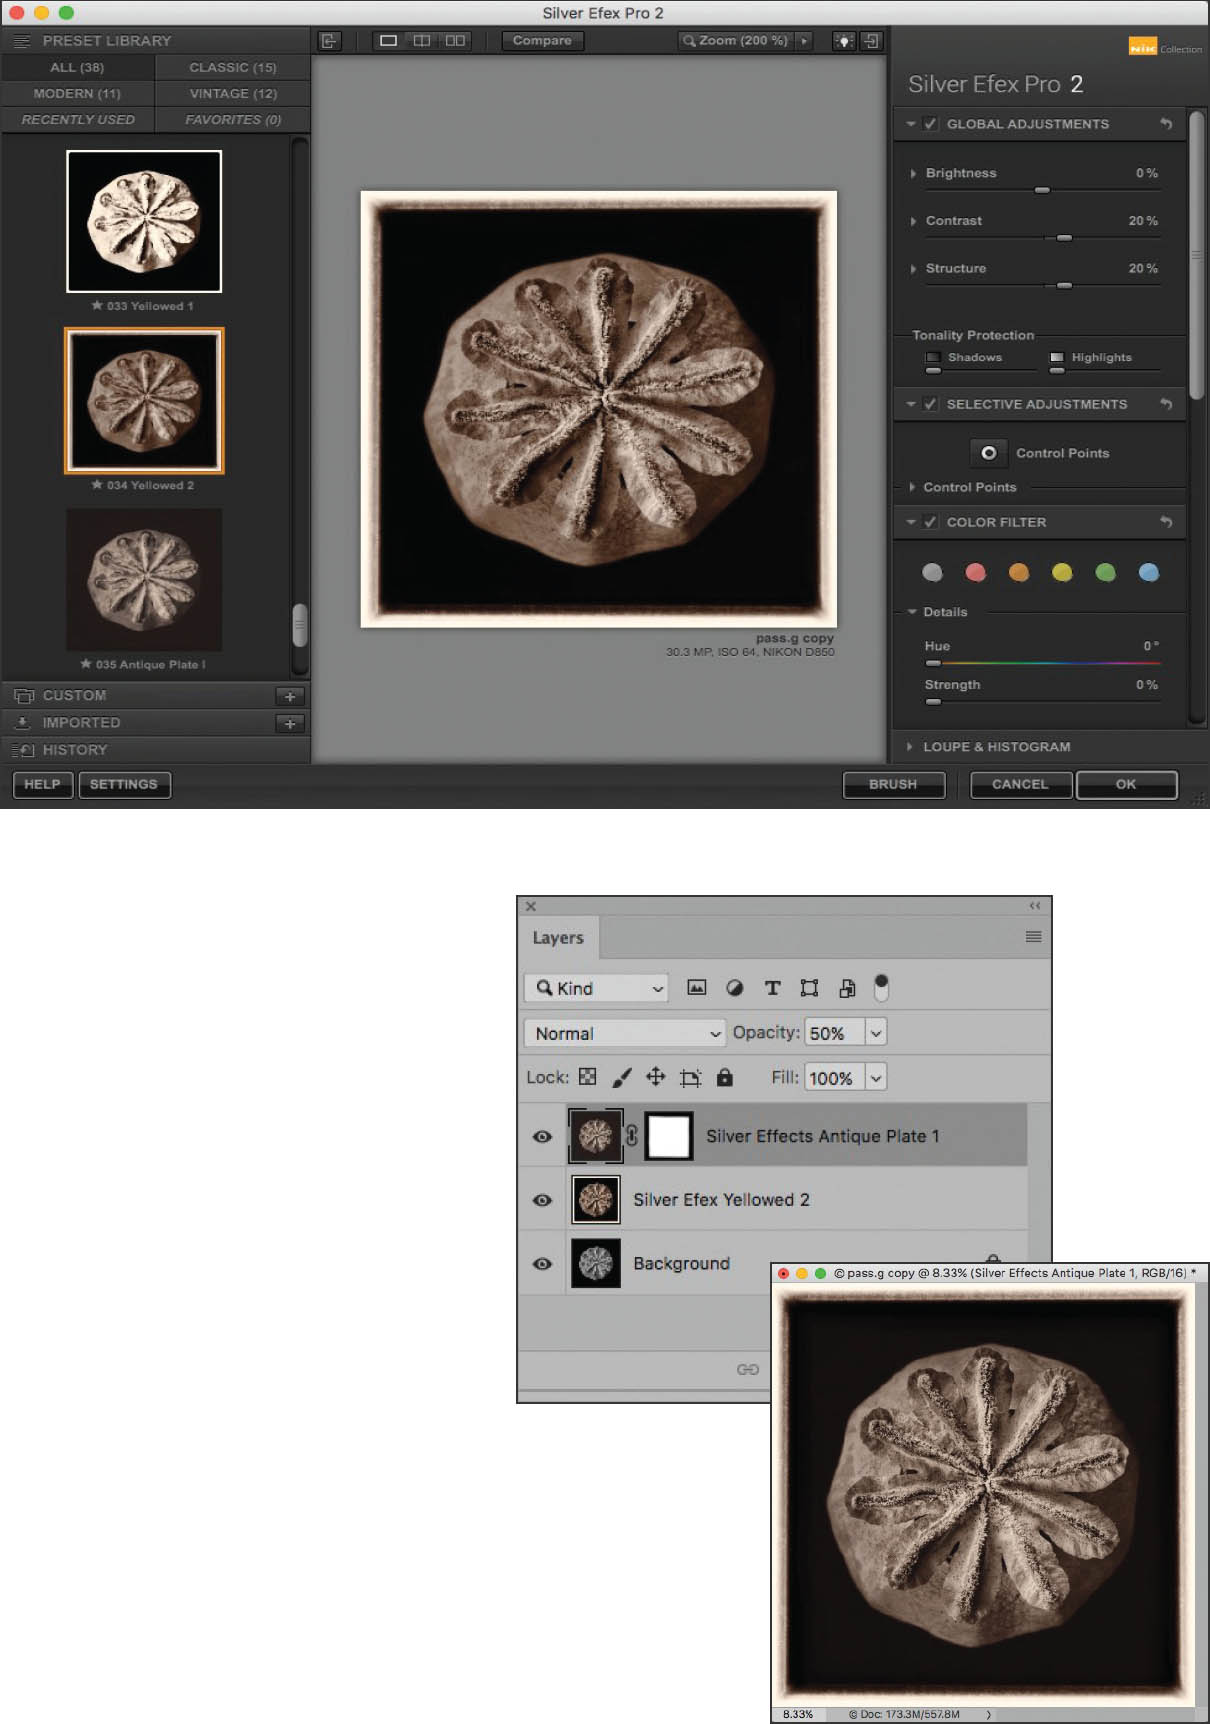
To complete the “Blossfeldt look” for the papaver pod, I added a tint and border. First, I flattened the image and archived a version of the sharpened monochrome poppy.
Then, I duplicated the Background layer, and renamed the duplicate “Silver Efex Yellowed 2.” I opened Silver Efex Pro and selected the Yellowed 2 Preset to give the image a lovely dark yellow tint. Then I clicked OK to close Silver Efex and return to Photoshop.
Finally, I duplicated the Background layer again, and moved the new duplicate layer to the top of the layer stack in the Layers panel. I named the new duplicate layer “Silver Effects Antique Plate 1.” Again, I opened Silver Efex Pro, and selected Antique Plate 1 which includes a border.

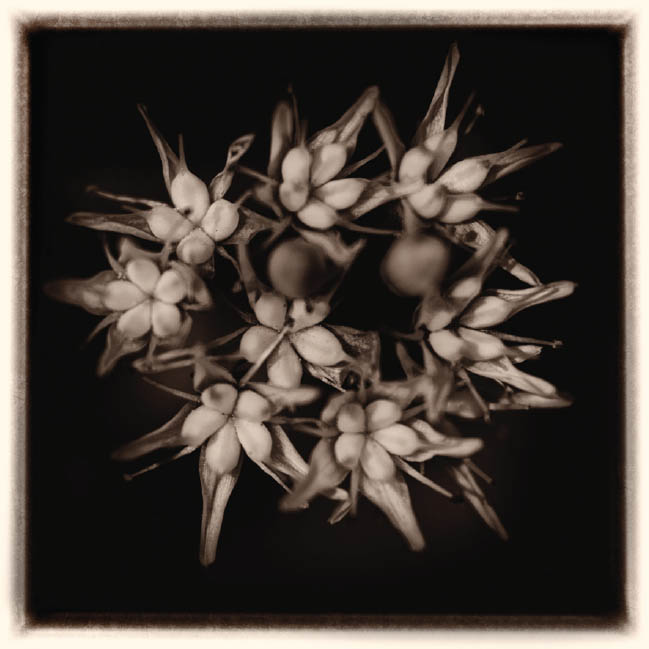
Papaver Pod—This is a photo from above of a poppy pod with the poppy positioned above a light box. In case you are wondering, the drug opium is made from poppy pods of the Papaver family like this one. The pod contains hundreds or thousands of seeds. These seeds are ground into a paste, often using a hand mortar and pestle. The paste is then refined into opium.
When I made this image, I was not thinking about opium. Rather, it occurred to me that the top of the poppy pod looked a little like a sea creature, perhaps a starfish. I thought this would make a delightful Blossfeldtian image.
Nikon D850, Zeiss 50mm Makro-Planar, 24mm extension tube, five exposures at shutter speeds ranging from 1 to 15 seconds, each exposure at f/22 and ISO 64, tripod mounted; processed to black and white in Photoshop, and simulated “Blossfeldt” effect added in Photoshop using Topaz Adjust, Topaz Simplify, and Silver Efex Pro.

Tulip Stem Detail—Many of Karl Blossfeldt’s early images were created as models for the curlicues on cast iron. Therefore, when I saw this pedestal of a tulip, I decided right away to apply the “Blossfeldt” effect.
Nikon D850, Zeiss 50mm Makro-Planar, 12mm extension tube, 6 seconds at f/22 and ISO 64, tripod mounted; converted to black and white in Photoshop, simulated “Blossfeldt” effect added using LAB color, Topaz Simplify, and Silver Efex Pro.
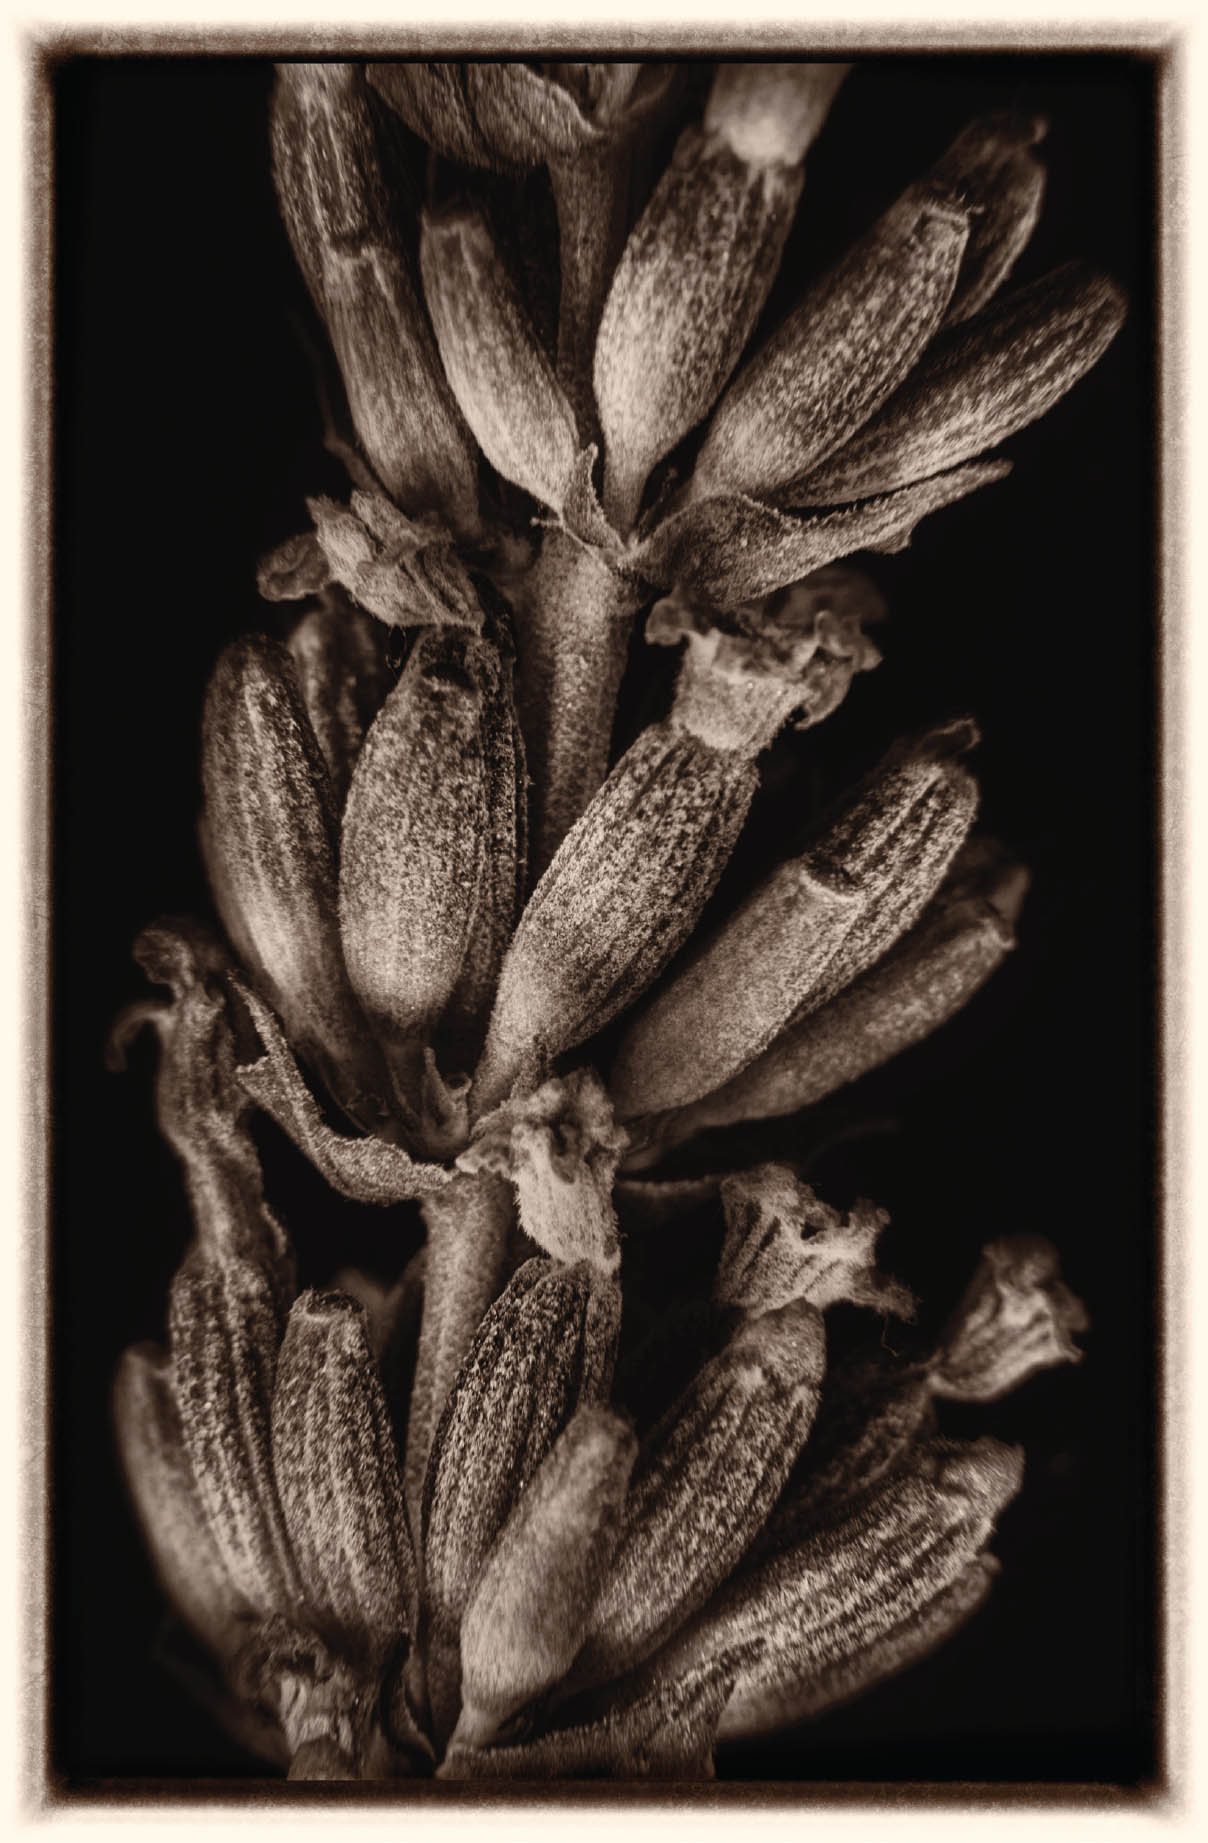
Lavandula—Lavender not only smells good, it also has a really interesting internal structure. My idea in exploring this lavender stem with my macro lens was to create an interesting pattern that shows lavender in a different way.
Nikon D850, 200mm macro, six exposures at shutter speeds ranging from 3/10 of a second to 13 seconds, each exposure at f/36 and ISO 64, tripod mounted; processed to black in white in Photoshop, and simulated “Blossfeldt” effect added using LAB color, Topaz Simplify, and Silver Efex Pro.