
Solarization
Solarization in photography reverses blacks and whites. It is also called the Sabattier effect after French photographer and scientist Armand Sabattier, who described the effect in 1862. In the chemical darkroom, solarization was achieved by re-exposing an already exposed negative or print to light before development was finalized.
Since solarization reverses—or partially reverses—dark and light tones, this effect will work well for images where the contrasts between blacks and whites are an important part of the overall composition.
Using LAB to Solarize an Image
In the Photoshop darkroom, there are a number of ways to achieve a simulated solarization effect. One of my favorites is to convert the image to LAB, followed by an inversion of the L channel. (See page 217 for more about inverting LAB channels.) This step should be taken prior to the conversion to black and white using your favorite method. For this example, a Black & White adjustment layer is used.

Step 1: Starting with the original color image, choose Layer ![]() Duplicate to make a copy of the layer. Name this duplicate layer “Inversion.”
Duplicate to make a copy of the layer. Name this duplicate layer “Inversion.”
Step 2: Convert the image to the LAB Color space by choosing Image ![]() Mode
Mode ![]() LAB Color from the Image menu (see Step 1 on page 215).
LAB Color from the Image menu (see Step 1 on page 215).
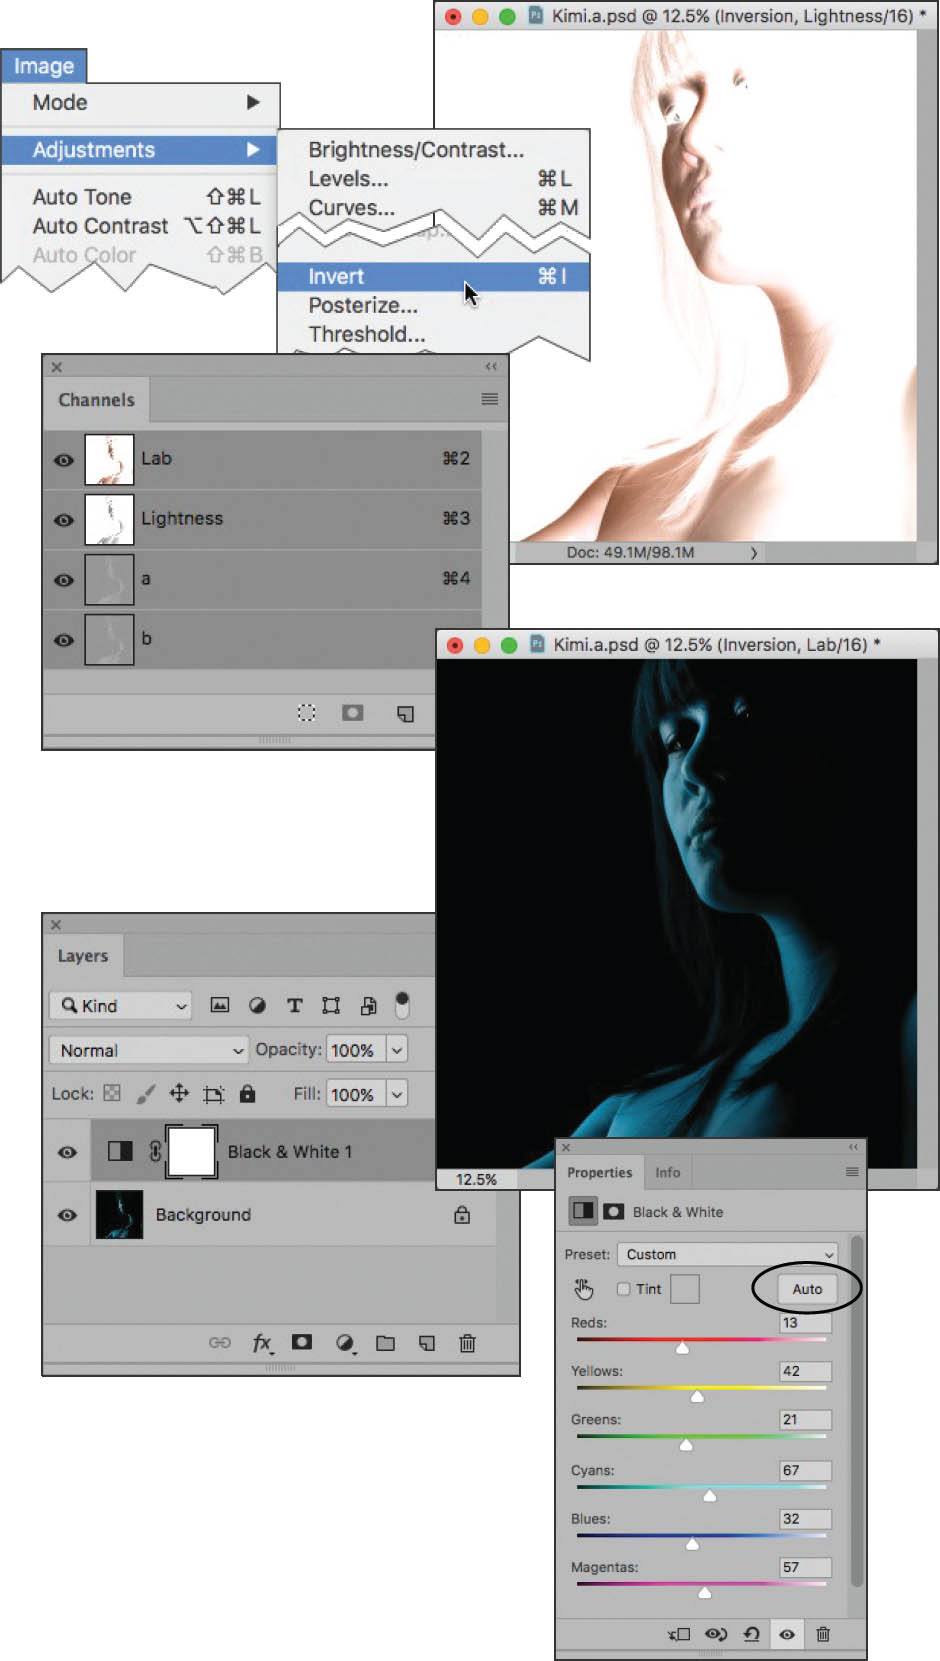
Step 3: With the “Inversion” layer selected in the Layers panel, click the Lightness channel in the Channels panel to select it, then click the eyeball next to Lab so all channels are visible.
Step 4: Choose Image ![]() Adjustments
Adjustments ![]() Invert to invert the Lightness channel. This creates a fairly conventional solarization effect.
Invert to invert the Lightness channel. This creates a fairly conventional solarization effect.
Step 5: Click Lab at the top of the Channels panel to select all the channels.
Step 6: Choose Image ![]() Adjustments
Adjustments ![]() Invert to invert all the channels.
Invert to invert all the channels.
This double inversion can be used as the basis for a partially solarized monochromatic image.
Step 7: Flatten the layers by choosing Layer ![]() Flatten Image.
Flatten Image.
Step 8: Convert the image back to RGB by selecting Image ![]() Mode
Mode ![]() RGB.
RGB.
Step 9: With the “Inversion” layer selected in the Layers panel, convert the layer to monochrome using a Black & White adjustment layer. Click the Auto button in the Adjustments panel to set the conversion values. (Turn to pages 144–149 for details on how to do this.)
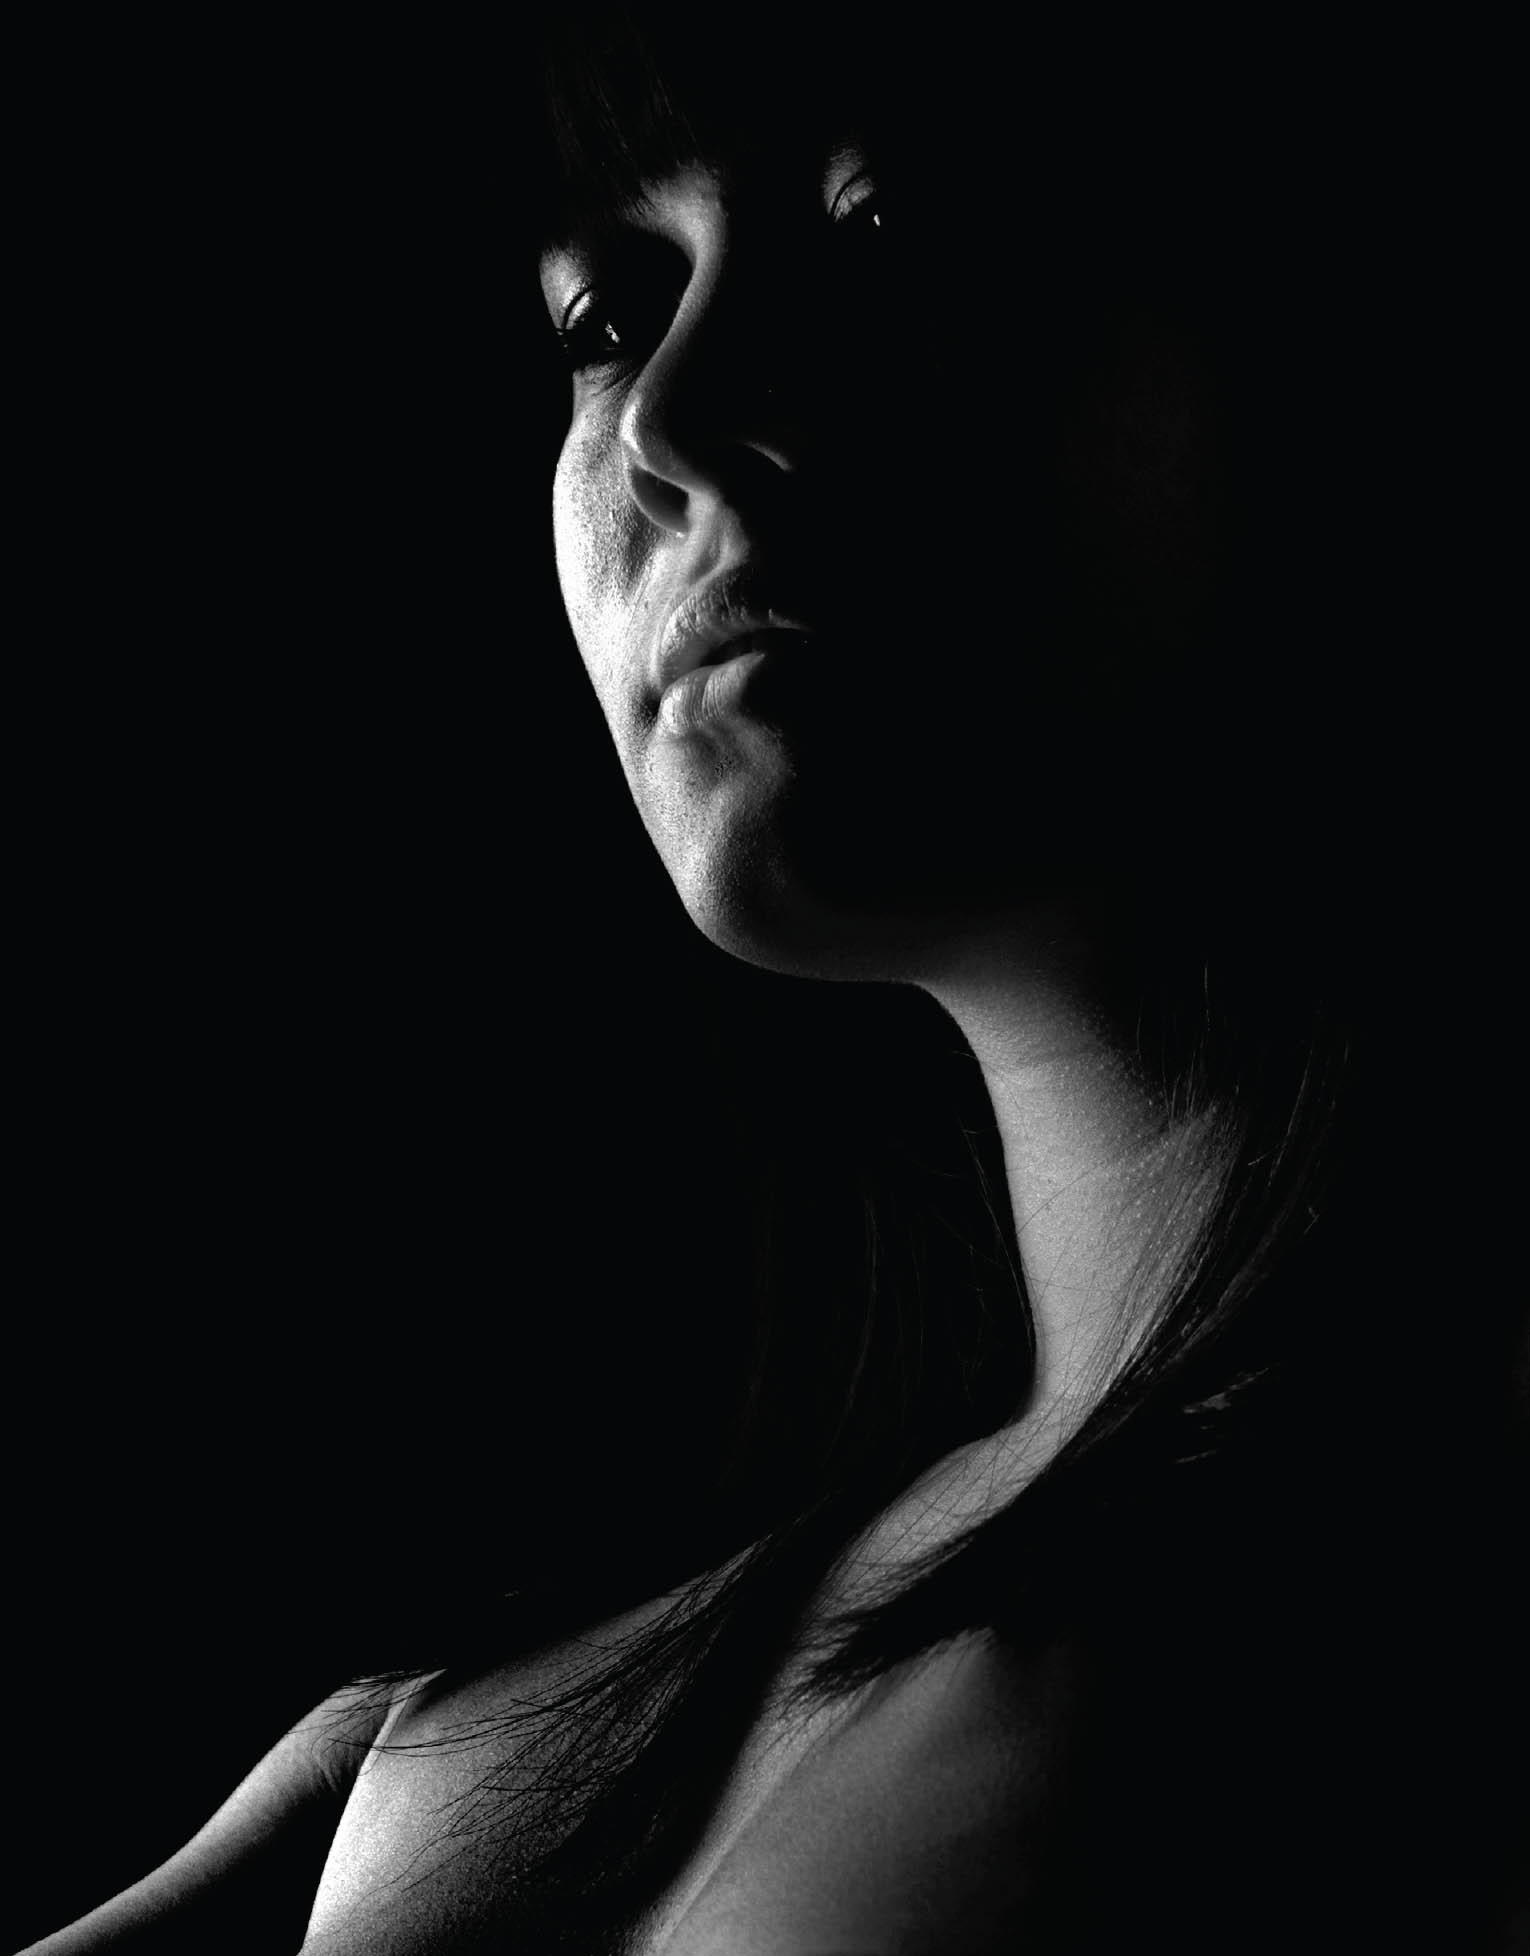
Kimi—Using studio lighting, I slightly underexposed the image to create a black background and extend the sense of abstraction surrounding the model. I created a partial solarization effect by inverting first the L channel in LAB color, and then inverting the entire image. Following the second inversion, I converted back to RGB and then converted to monochrome.
Nikon D300, 95mm, 1/200 of a second at f/9 at ISO 100, hand held; processed in Photoshop with simulated “solarization” using LAB color.
Using Curves to Solarize an Image
There are a number of other approaches to a post-processing solarization effect that you can experiment with besides LAB inversions. I do suggest you keep your image in color mode until after you have applied your solarization effect.
One of the easiest ways to solarize an image is to use the Photoshop Solarize filter by choosing Filter ![]() Stylize
Stylize ![]() Solarize.
Solarize.
While this filter gives you a perfectly decent Solarize effect, it doesn’t provide any options. A more flexible approach, and one that is fun to play with, is to use a Curves adjustment layer.

Step 1: Starting with the original color image, choose Layer ![]() Duplicate to make a copy of the layer. Name this duplicate layer “Solarize.”
Duplicate to make a copy of the layer. Name this duplicate layer “Solarize.”
Step 2: With the “Solarize” layer selected in the Layers panel, select Layer ![]() New Adjustment Layer
New Adjustment Layer ![]() Curves or click the Curves button on the Adjustments panel.
Curves or click the Curves button on the Adjustments panel.
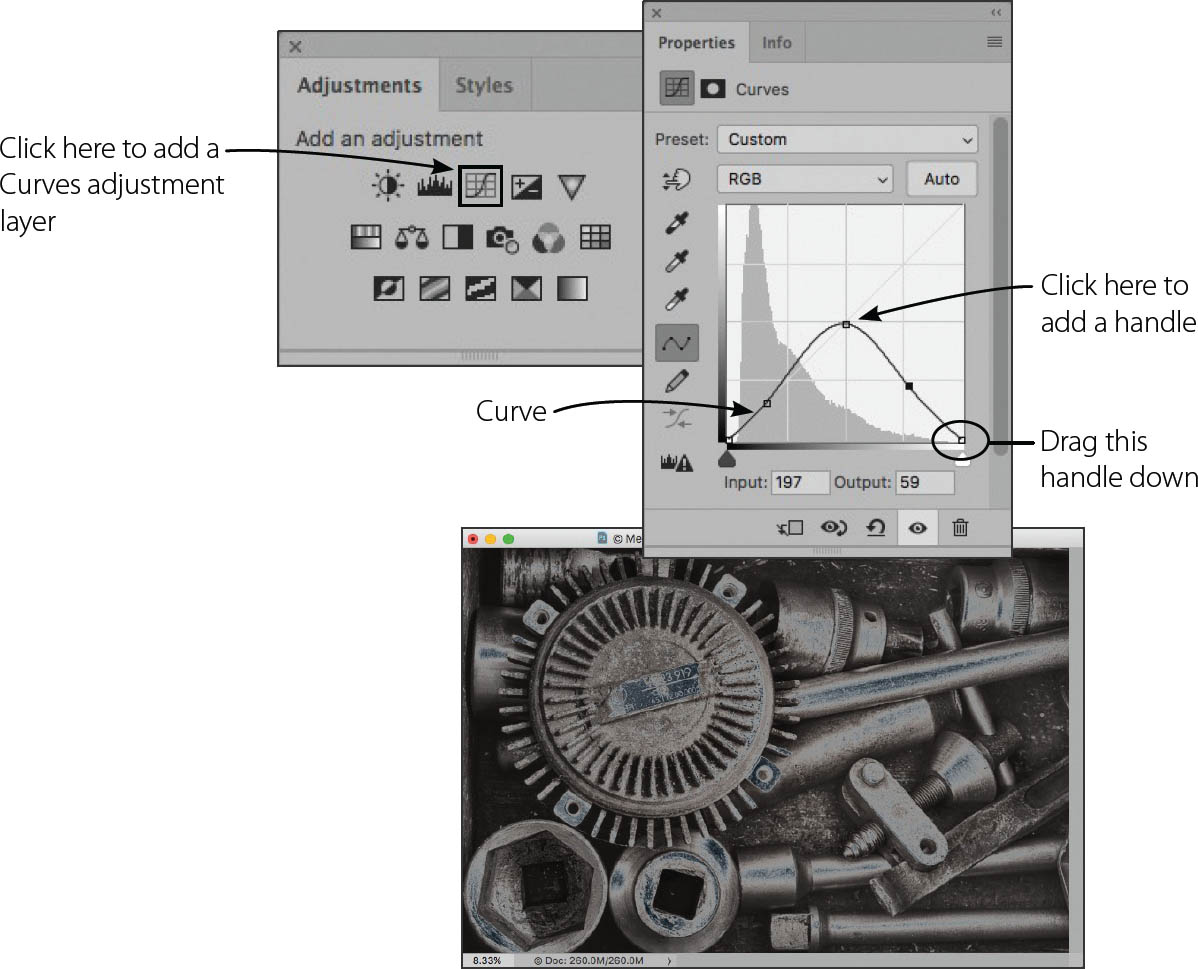
Step 3: Using the curves window in the Adjustments panel, drag the handle at the upper right corner down to the baseline. This is the end of the curve that adjusts the white point in the image. Make sure the middle of the curve hits the center of the window, so that a triangle along the bottom baseline is formed.
Step 4: Use a Black & White adjustment layer to convert the image to monochrome. (To find out how to use Black & White adjustment layers, turn to pages 144–149.)
The monochrome result is shown on pages 246–247.

Mechanic’s Drawer—Leading a workshop in Heidelberg, Germany, I visited a nearby mechanic’s garage to photograph the old cars and tools in the establishment. This image is of the tools and odds and ends in one of the mechanic’s drawers.
Nikon D850, Zeiss 50mm Makro-Planar, three exposures with shutter speeds 25, 30, and 60 seconds, all exposures at f/22 and ISO 64, tripod mounted; exposures processed and combined in HDR Efex Pro and Photoshop, with simulated “solarization” added using Photoshop curves.
Using Color Efex Pro to Solarize an Image
One very cool and easy way to “solarize” an image is to use the Solarize filter in Color Efex Pro. This filter gives you ten solarization options, using the Method drop-down list. Six of the choices on the drop-down list are color and six are monochrome.
Starting with a color image, if you want to end up with a black and white image, one reasonable workflow is to apply a color solarization Method from the Color Efex Pro drop-down list. At some subsequent point, the color image can be converted to monochrome.
In this example, to get right to the point, I skipped the color solarization step and moved straight to a black and white solarization from a color image by choosing the Color Efex Pro Solarization Method: Black and White #3 from the drop-down menu.
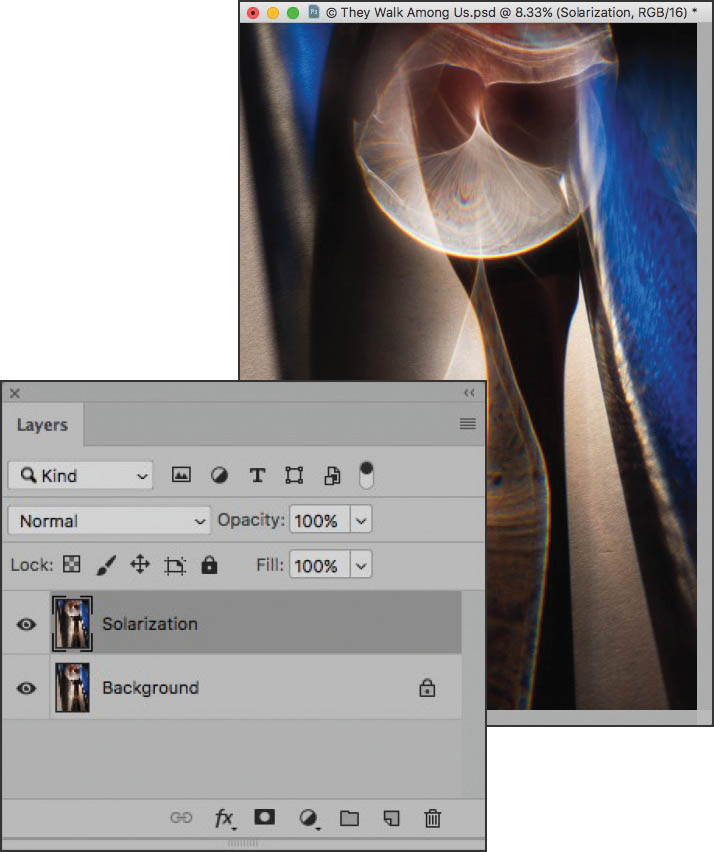
Step 1: First copy the Background layer by selecting Layer ![]() Duplicate Layer. Then rename the layer “Solarization.” Note that if Color Efex Pro is configured to duplicate the layer that it is operating on, this step happens automatically, so skip it.
Duplicate Layer. Then rename the layer “Solarization.” Note that if Color Efex Pro is configured to duplicate the layer that it is operating on, this step happens automatically, so skip it.
Step 2: Select the Color Efex Pro menu item from the Filter menu. Depending on which version of Color Efex Pro you have this might be on a submenu labled Nik, Google, or DxO. See the sidebar below for more about these sub-menus.
Where can I find Color Efex Pro?
Color Efex Pro is part of the same collection of Photoshop and Lightroom plug-ins as Silver Efex Pro, and has been known in the past as the Nik Collection, and was available for awhile from Google. If you are interested in the details of this history, see the sidebar titled “The long and winding road that brings Silver Efex Pro to your black and white door . . .” on page 151. Currently this software is collectively called the Nik Collection by DxO, and is available from DxO.com.

Step 3: In the Color Efex Pro window, choose Solarization from the Filter menu on the left of the window. The Solarization panel will appear at the right of the Color Efex Pro window.
Which solarization should I use?
In this section of Creative Black & White, I have outlined four different ways to create a virtual solarization effect using:
- LAB color on pages 242–244
- The Photoshop Solarize filter (mentioned on page 245)
- A curve adjustment on page 245
- The Color Efex Pro Solarize filter
The important thing to realize is that none of these effects are “real” solarizations. In other words, your final image may look great, but you didn’t just take a partially developed print out into the sunshine like Armand Sabattier did. If you are careful about your workflow, working in Photoshop means never having to say you’re sorry because you can always roll back your History panel or delete a layer. It also means that the choice of what effect to use is yours. No one is going to be able to tell you which flavor of solarization will work best on any specific image.
What I like to do is to try two or three of the solarization methods I have shown you and see which comes out best for a specific image. Usually, the Photoshop Solarize filter is a bust because there is no way to tweak it. Surprisingly, in my experience, the LAB L-channel solarization often yields a more impressive result than using the admittedly fun and extensive methods that are built into the Color Efex Pro Solarize filter.

Step 4: Using the Solarization panel at the right of the Color Efex Pro window, click the Method drop-down list to view the possible solarization filters. At the bottom of the Method list, there are six black and white solarization filters. For this example, I’m going to pick #3, but for your image, try them all and see which one you like best. You can also choose a color solarization Method from the drop-down list with the choice of converting it to black and white later in your workflow.
After selecting a Method, you can use the Saturation and Elapsed Time sliders in the Solarization panel to adjust the effect. The Elapsed Time slider essentially controls exposure, so if you drag the slider to the left, the image will be brighter and if you drag it to the right, the image will be darker.
When you are happy with the results, click OK to close the Color Efex Pro window.
They Walk Among Us—It’s a truism about photography that the only thing one can actually capture is light—light that is reflected or emitted by an object. Keeping this truism in mind, I set up a still life involving bottles of colored water and arranged them by a bright window, allowing sunlight to pass through the bottles. This created a fair amount of reflections and emissions between the various bottles. Using a macro lens, I studied the situation for interesting compositions and found what seemed to be a long-haired alien being constructed out of the reflections and refractions.
Nikon D850, 200mm macro, 1/25 of a second at f/36 and ISO 64, tripod mounted; processed in ACR and Photoshop; “solarized” and converted to black and white in Color Efex Pro.

Nautilus—To solarize the photo of the chambered Nautilus shell shown on page 17, I used the Solarization filter that is included in the Color Efex Pro filter pack. As you can see, the black background became white and the internal elements of the shell are rendered almost as chrome.
Nikon D200, 50mm macro, 8 seconds at f/32 and ISO 100, tripod mounted; processed to black in white in Photoshop, and simulated “solarization” added using Color Efex Pro.

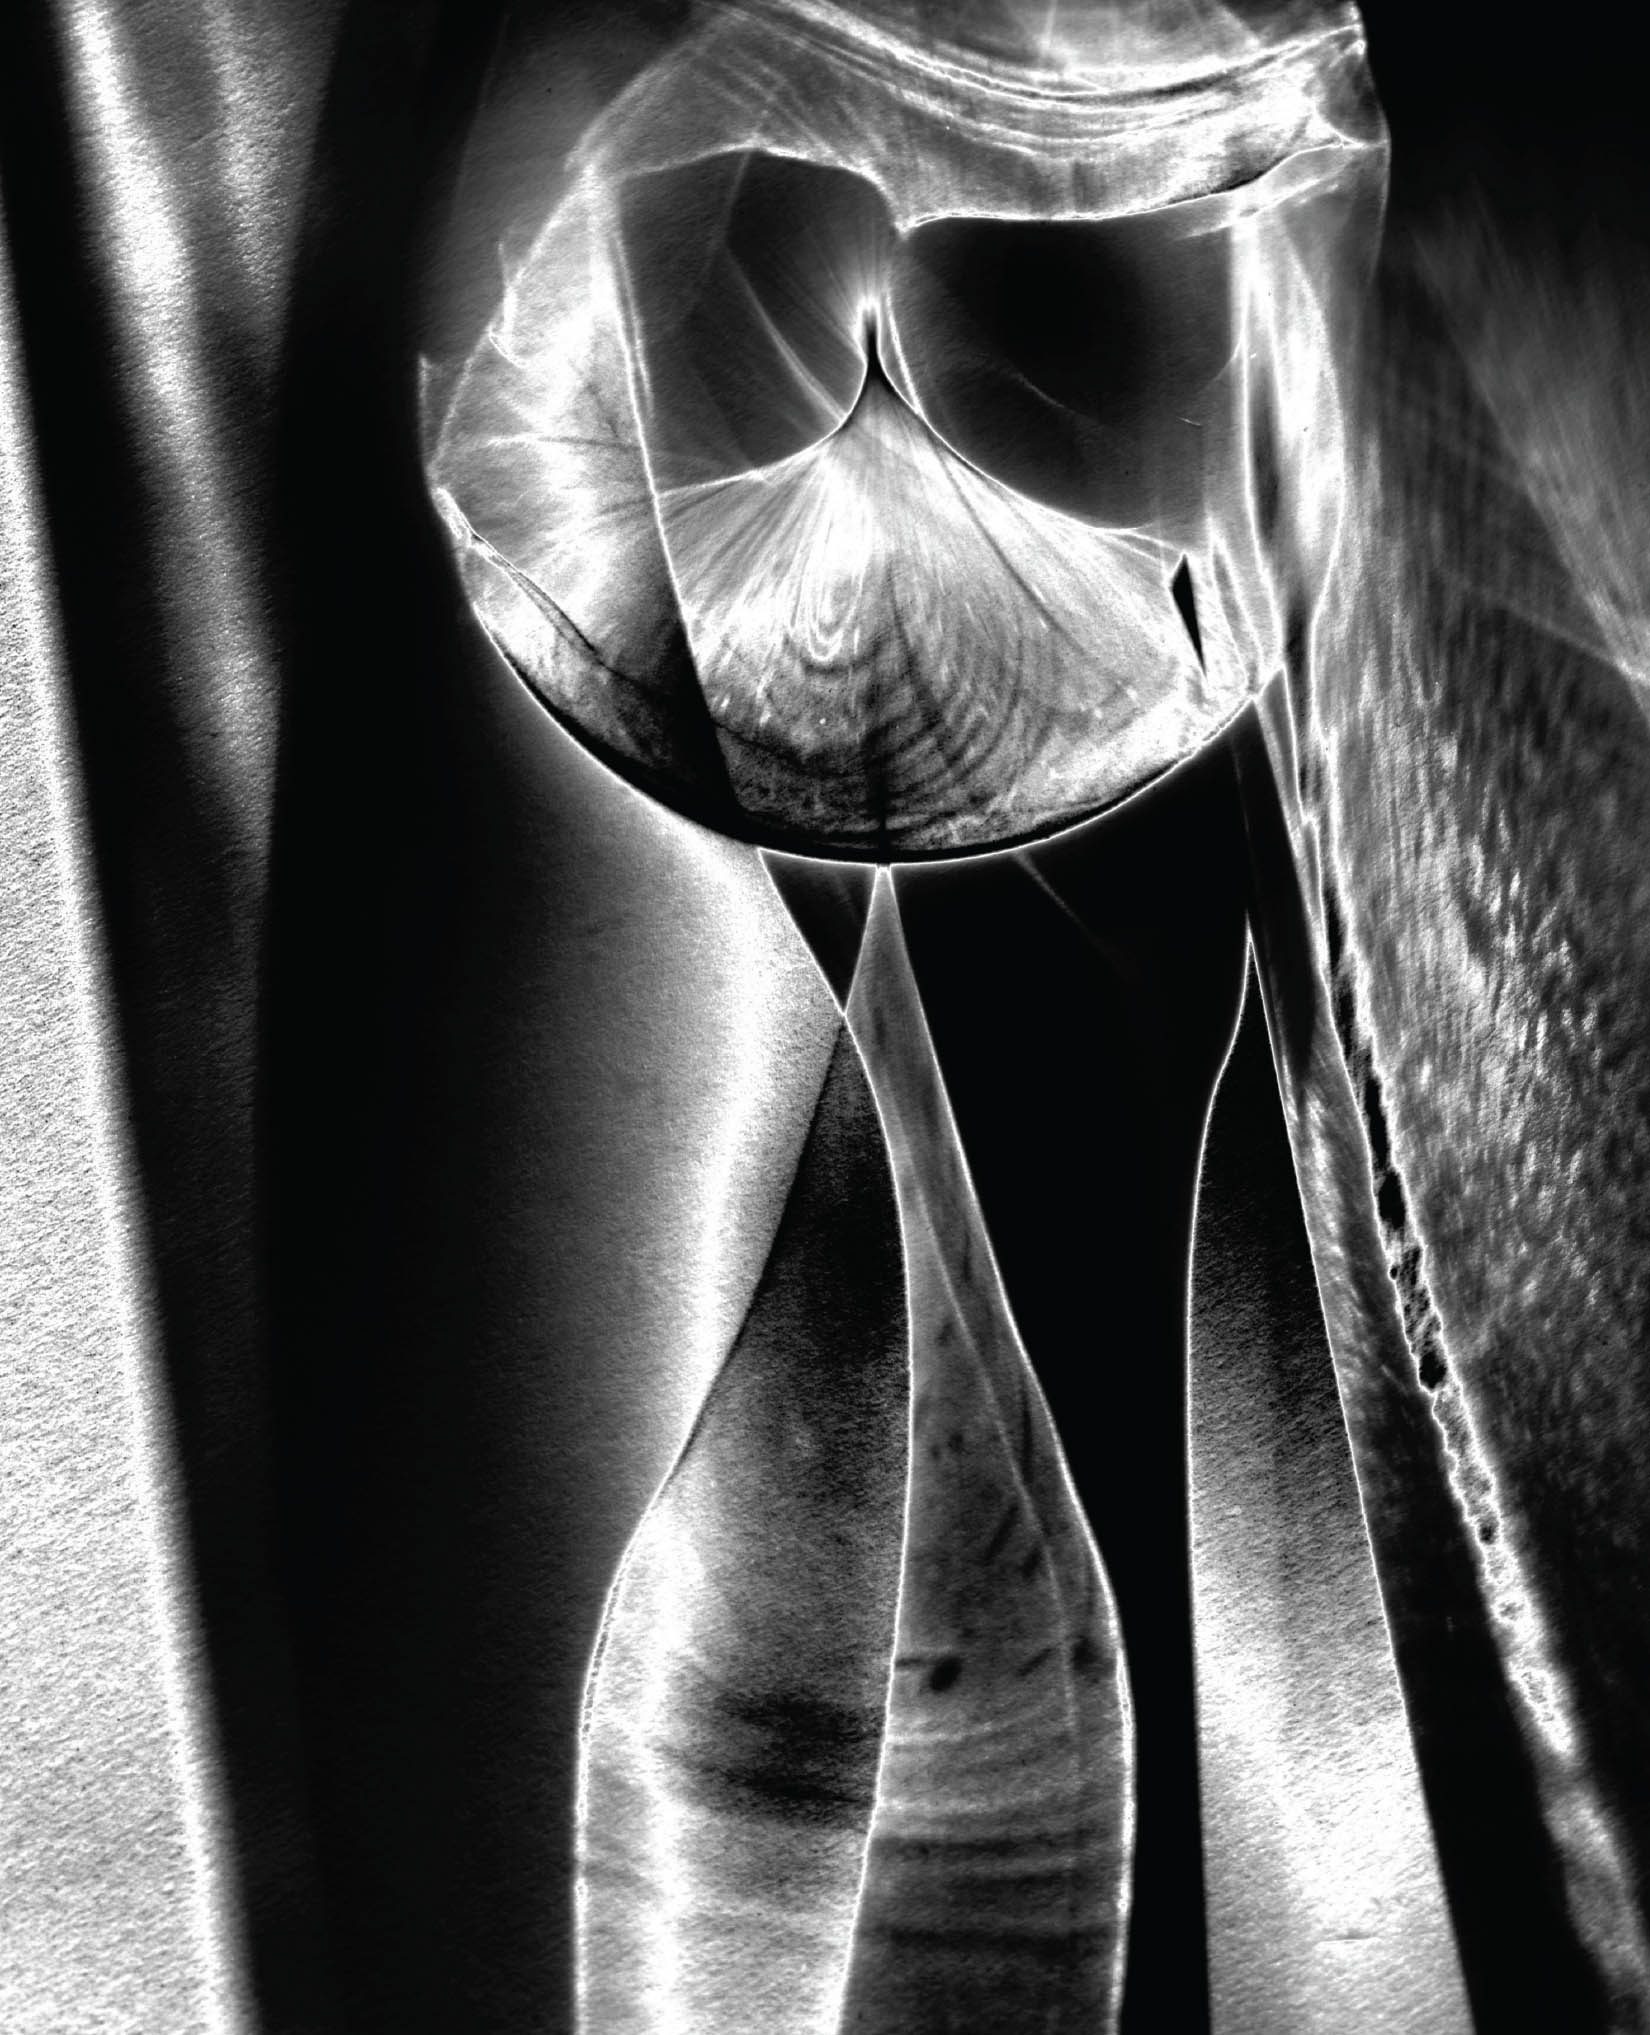
Hellebore—The complex and sensuous curves in this image of a small hellebore struck me as good candidates for solarization because the primary interest in the composition centered on the distinction between light and dark shapes.
Nikon D300, 100mm macro, 1.6 seconds at f/22 and ISO 100, tripod mounted; processed to monochrome using Photoshop, and simulated “solarization” added using LAB color.