
Using the Channel Mixer
The Channel Mixer provides a great mechanism for using color information to control the look and feel of your black and white photos when you convert them using Photoshop.
Before the introduction of Black & White adjustment layers with the CS3 version of Photoshop, the Channel Mixer was probably the premier way to control your black and white conversions. It remains an important tool—particularly in situations in which the precise mixture of information from each color channel that is used to form the black and white tones is an important aspect of the black and white conversion.
For example, hugely decreasing the contribution of the Blue channel while simultaneously boosting Red and Green channel contributions is known as the “Ansel Adams effect”—the look can be one of sumptuous, very black blacks in contrast to extreme whites. Using the Channel Mixer remains the best way to achieve this special effect.
The dramatic interplay between sky and mountains with Yosemite Valley as a backdrop made me think that this photo below was a good candidate for the Ansel Adams effect, applied using a Photoshop Channel Mixer adjustment layer.
Note that one implication of using color information to inform monochromatic conversion is that you can exaggerate the color to lead to more dramatic black and white. This is a path you will only want to follow if you are quite sure in advance that the image is best presented in black and white.
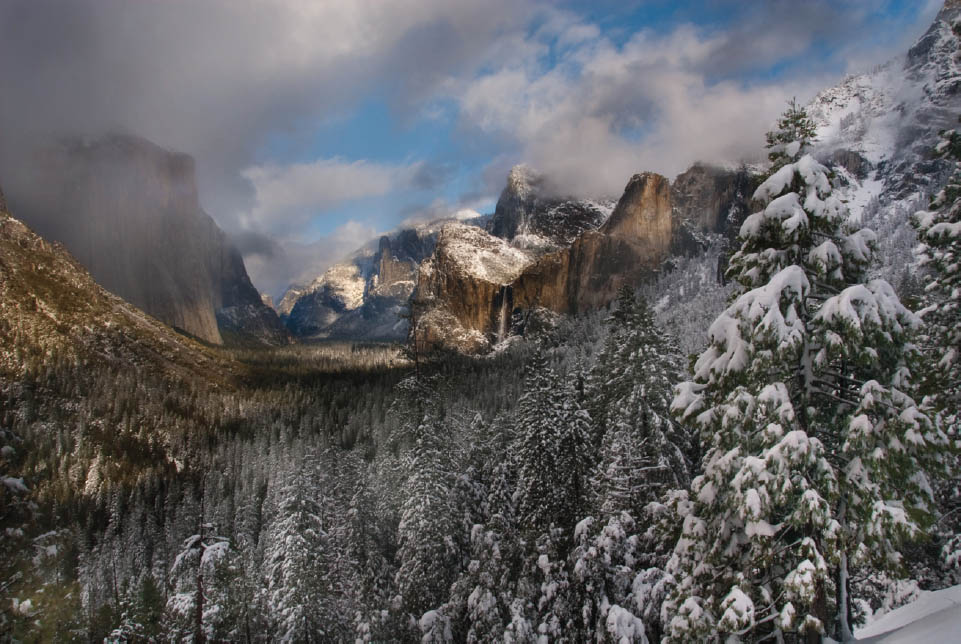
I thought this photograph of Yosemite Valley, Yosemite Falls, and a mist-shrouded Half Dome was a good candidate for a black and white conversion.

Step 1: Choose Layer ![]() Layer via Copy to duplicate the color Background layer. Name this duplicate layer “Channel Mixer–Ansel Adams.”
Layer via Copy to duplicate the color Background layer. Name this duplicate layer “Channel Mixer–Ansel Adams.”
Step 2: With the “Channel Mixer–Ansel Adams” layer selected in the Layers panel, click the Create new fill or adjustment layer button at the bottom of the panel. Next, choose Channel Mixer from the drop-down list.
(Alternatively, you can add a Channel Mixer adjustment layer using the Adjustments panel or by choosing Layer ![]() New Adjustment Layer
New Adjustment Layer ![]() Channel Mixer.)
Channel Mixer.)
The Channel Mixer adjustment layer appears above the “Channel Mixer–Ansel Adams” layer in the Layers panel and default Channel Mixer settings appear in the Adjustments panel.
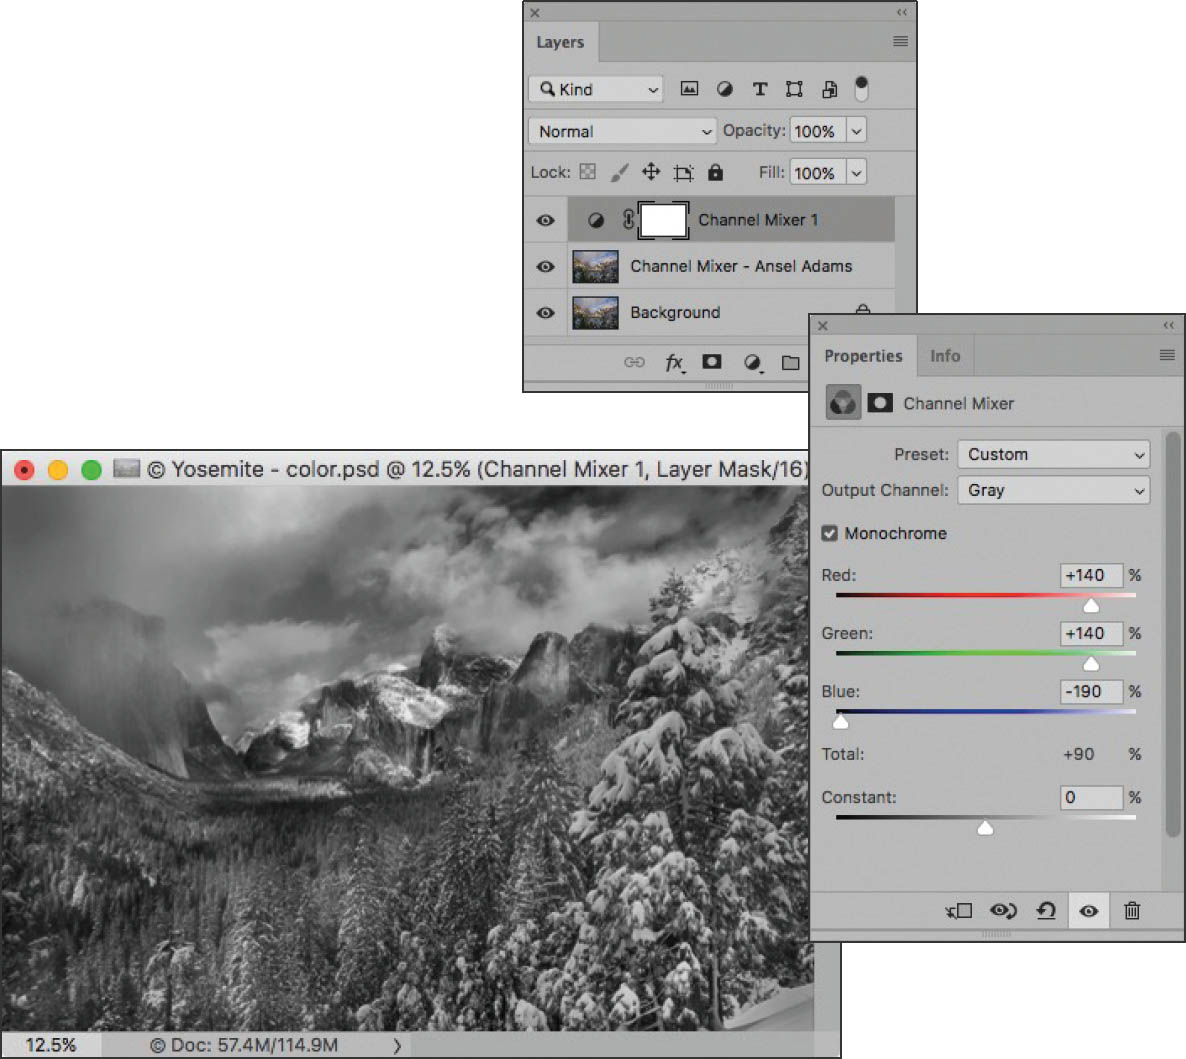
Step 3: In the Adjustments panel, make sure Monochrome is checked.
Step 4: Use the sliders to set up the Ansel Adams effect: set Red to +150; set Green to +140; and set Blue to–190.
Notice that if you add these values up they equal 100%. When using the Channel Mixer sliders, the values for the three channels should total 100%.
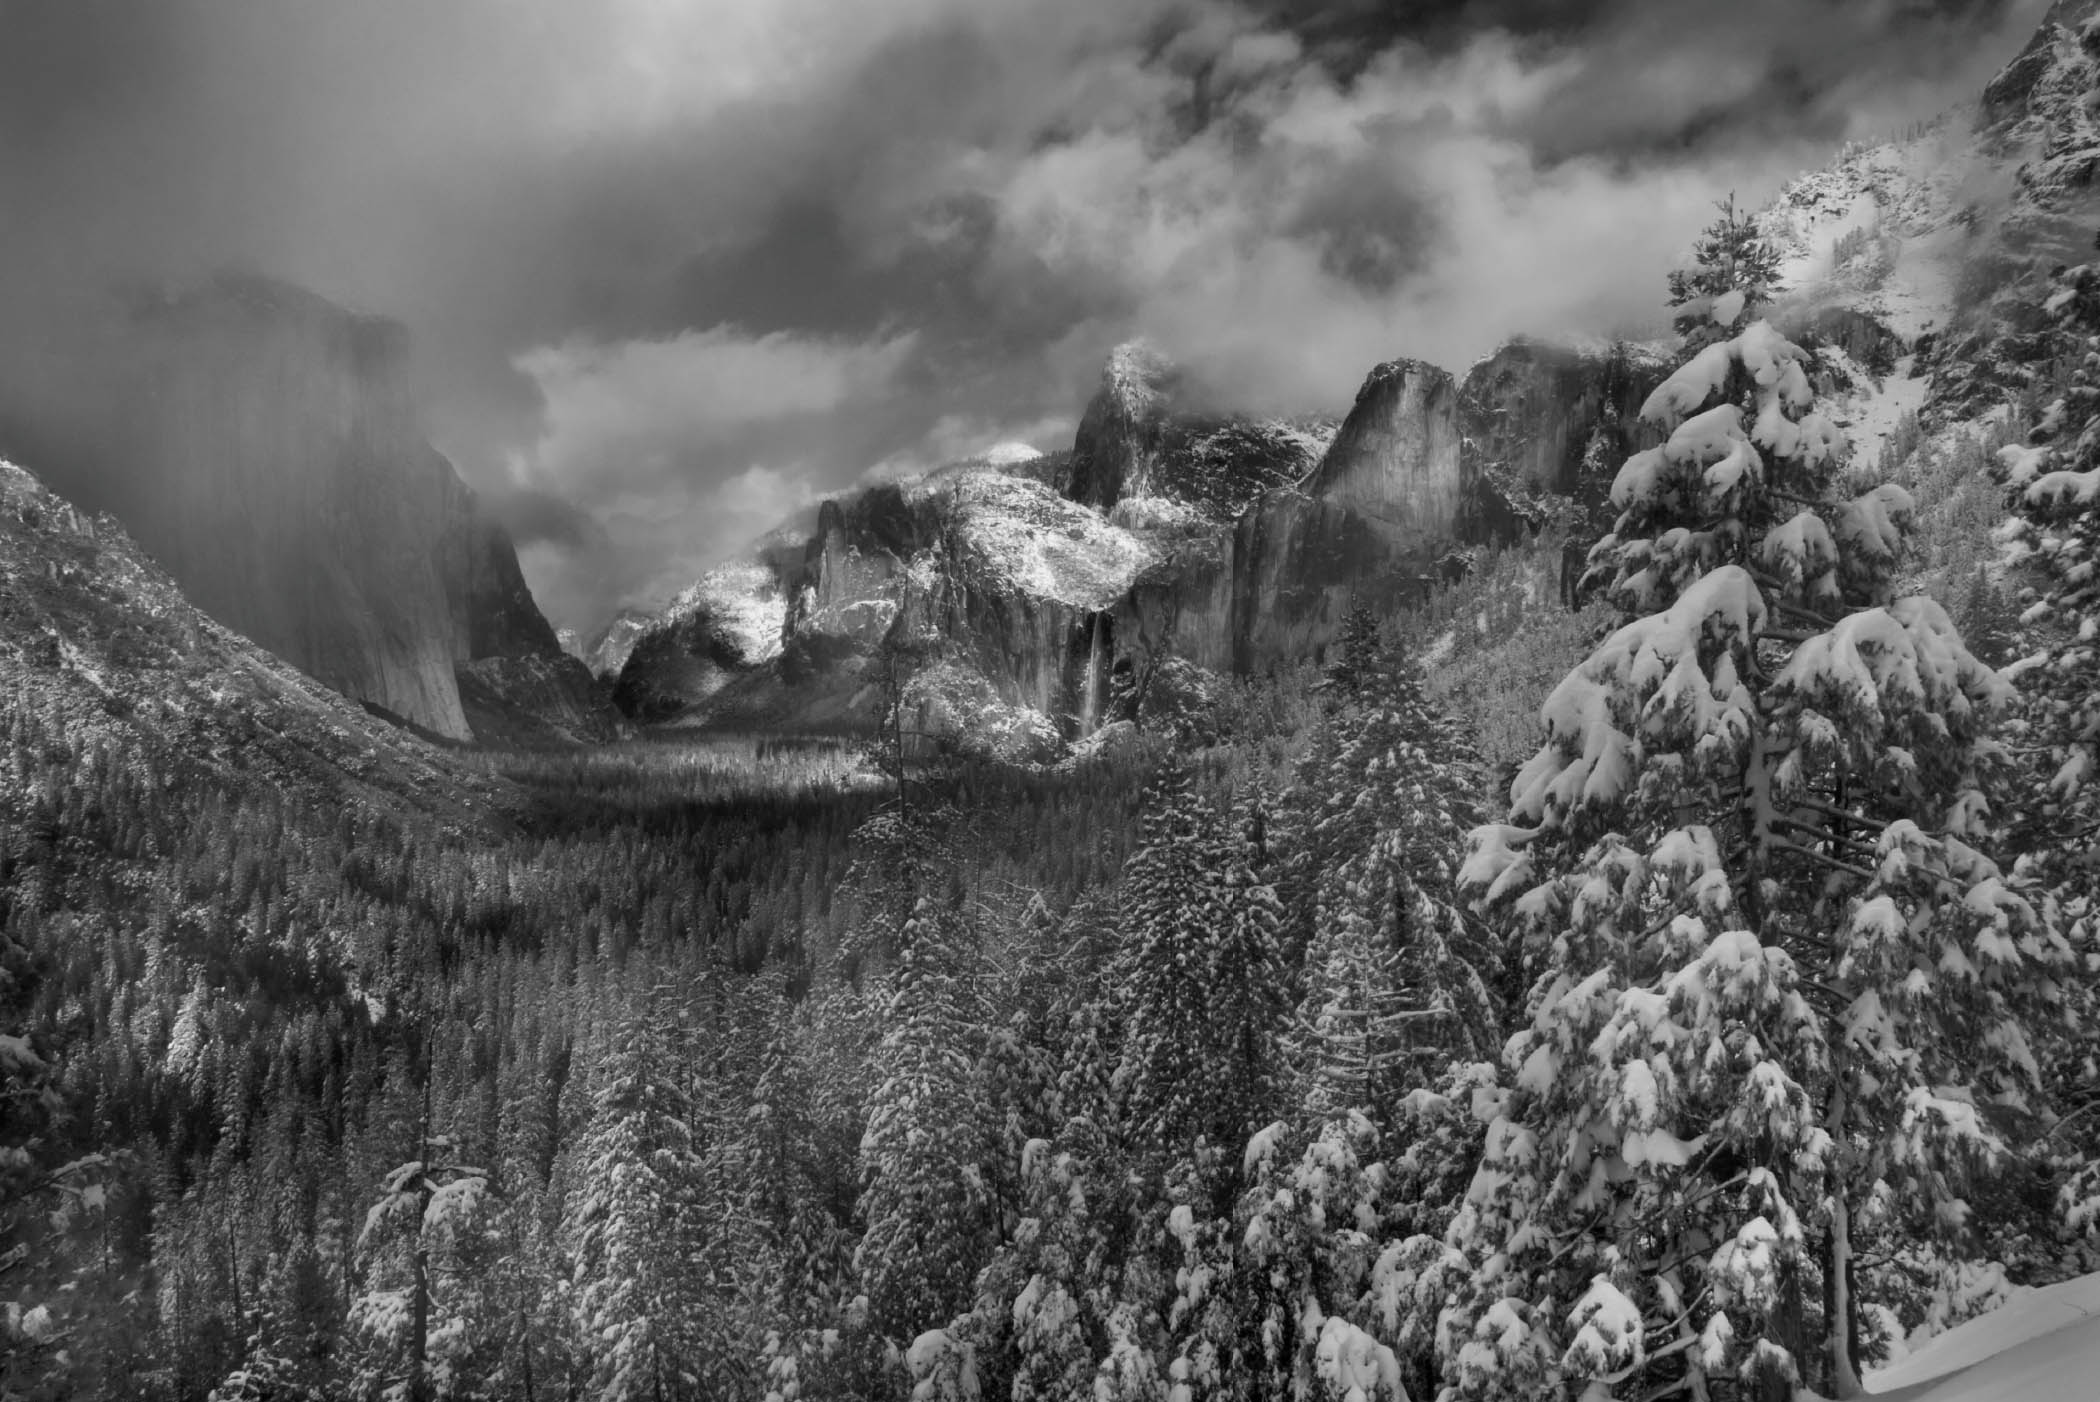
Yosemite View—Photographing during a clearing winter storm in Yosemite, I worked hard to find a slightly different angle to frame the marvelous vista that opened before me. It was hard to see this view without thinking of the sumptuous Ansel Adams photography of Yosemite and the Sierra Nevada mountains, so naturally I wanted to create a photo that could be successfully converted to black and white.
To achieve this goal, I knew that I would need to have a sense of crispness across the entire image. This meant that I would need maximum depth-of-field. So I stopped my camera all the way down to f/22 and used a wide angle setting to achieve as much depth-of-field as possible.
Nikon D200, 20mm, 1/40 of a second at f/22 and ISO 100, tripod mounted; converted to black and white using Photoshop’s Channel Mixer and the “Ansel Adams” effect.