
Black and White in Adobe Camera RAW
One of the easiest ways to gain much of the power of RAW without having to go to a great deal of trouble is to use the Adobe Camera RAW (ACR) grayscale conversion feature. This works best on images that don’t have a huge range of color or tonal range, and are a fairly easy target for black and white conversion.
By way of comparison, I sometimes set my camera to shoot both JPEG and RAW, then drop the color information from the JPEG file (see the examples on this page and the next). This shows me what I don’t want my final black and white image to look like. You can get far better results from ACR with a few simple manipulations.

The in-camera JPEG version of this photo isn’t bad, but it doesn’t have as much brightness and tonal range as it could. Depending upon what you are going to do with the image, the in-camera JPEG might be satisfactory. It certainly takes no effort at all. However, using a JPEG generated by your camera means that you have no control over the aesthetic choices involved.
The point here is that there are many ways to formulate black and shades of gray. Using the sliders in ACR, you can determine how the colors in your photo are combined to create these blacks and grays. In many situations, this will give you the control you need to create interesting black and white images—particularly if you are not looking for an extended tonal range. In situations where you do need a dramatic range of tones in your photo, it does take a little more work. You’ll need to use the tools available in Lightroom Classic and Photoshop to extend the dynamic range of your color image before you begin the black and white conversion process.

For comparison purposes, this shows the in-camera JPEG version with the color information simply dropped. Yes, it is a black and white image, and it’s actually not bad, but it certainly doesn’t have a great tonal range—for example, the image has a muddy quality and there is little distinction between the tonal range of the buildings and the sky.
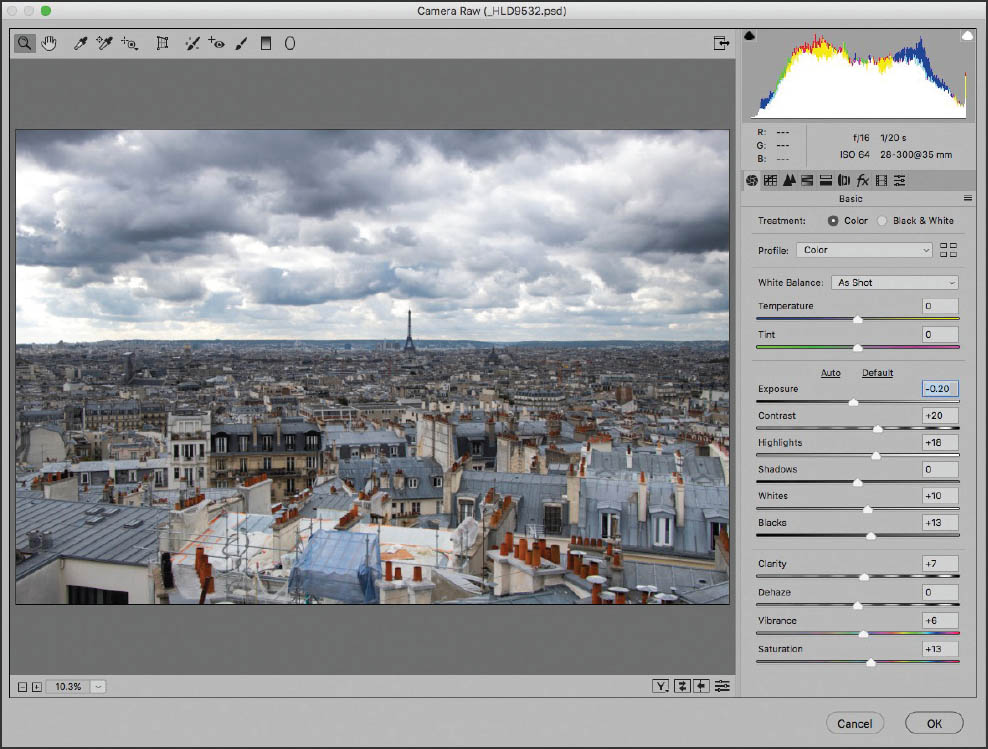
Step 1: To convert a capture to black and white in ACR, start by opening your RAW file in Photoshop. This will automatically open the file in Adobe Camera RAW (ACR), which “under the covers” is a quasi-detached part of Photoshop.
Step 2: On the Basic tab in the ACR window, use the Temperature, Tint, Exposure, Contrast, and Saturation sliders to enhance the color and contrast in the image. If you compare the first in-camera JPEG version of the image shown on page 96 with the color version shown here in ACR, you’ll already see improvement.

Step 3: Right at the top of the Basic tab in the Treatment area, choose Black & White.
Note that the color conversion information entered in Step 2 is taken into account and enhances this monochrome conversion. If you compare this black and white conversion with the in-camera JPEG conversion on page 97, you’ll see that it is already enhanced.
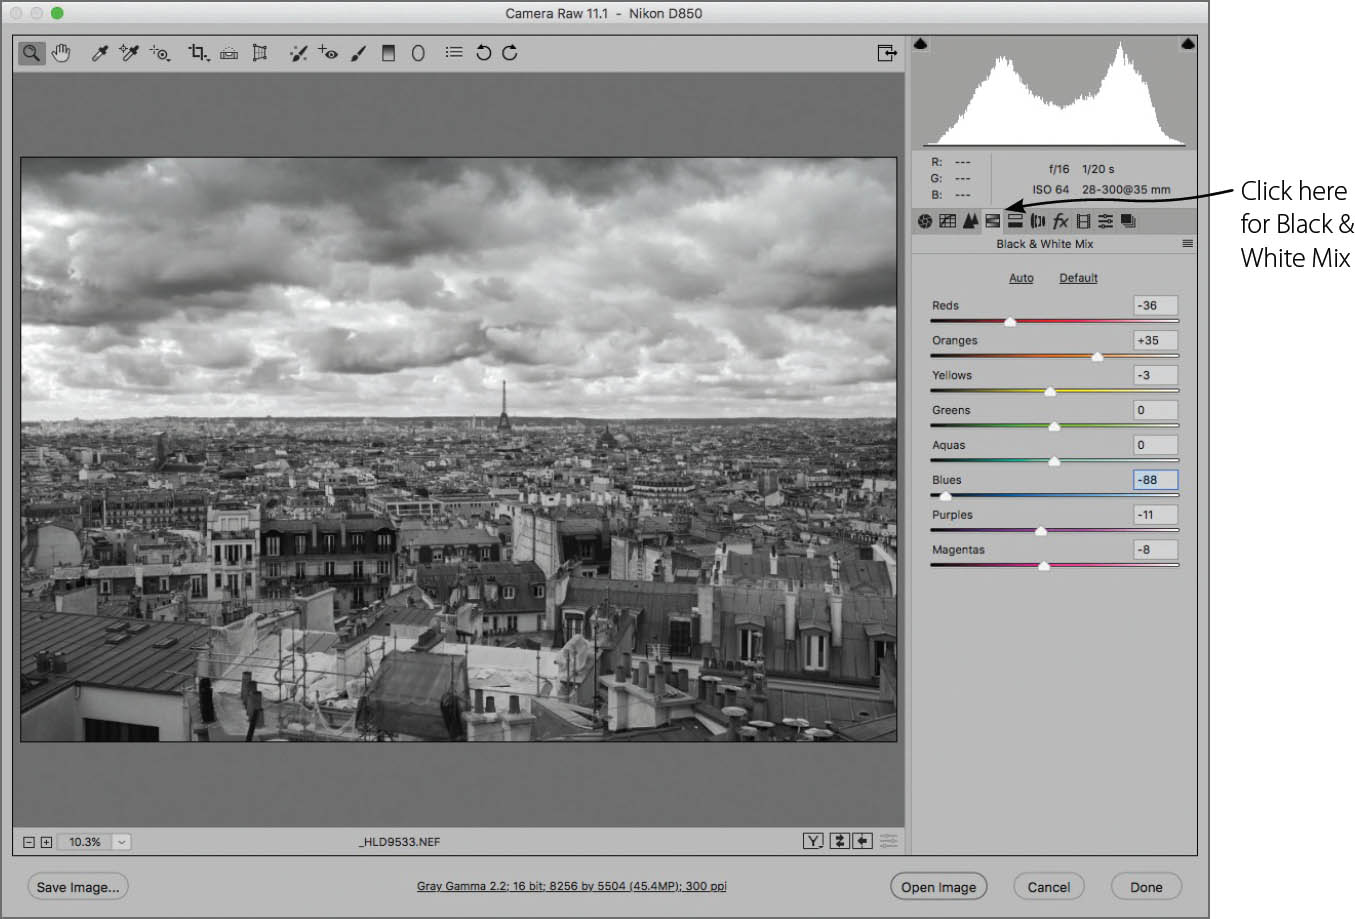
Step 4: You can now tweak the monochrome conversion using the Black & White Mix tab. One possibility is to click Auto at the top of the tab to let your computer optimize the settings. The color information that you put in the slider is applied during grayscale conversion. Here I increased the tonal range in the clouds primarily by pushing the Red slider to the left. This increased the impact of red (which is often heavy, if unseen, in cloud cover) during the image conversion.
When you are pleased with your settings, click Done. The converted grayscale image will open in Photoshop. You can then further enhance your black and white photo, although you may have to convert from Grayscale to RGB by choosing Image ![]() Mode
Mode ![]() RGB to access all the functionality of Photoshop.
RGB to access all the functionality of Photoshop.
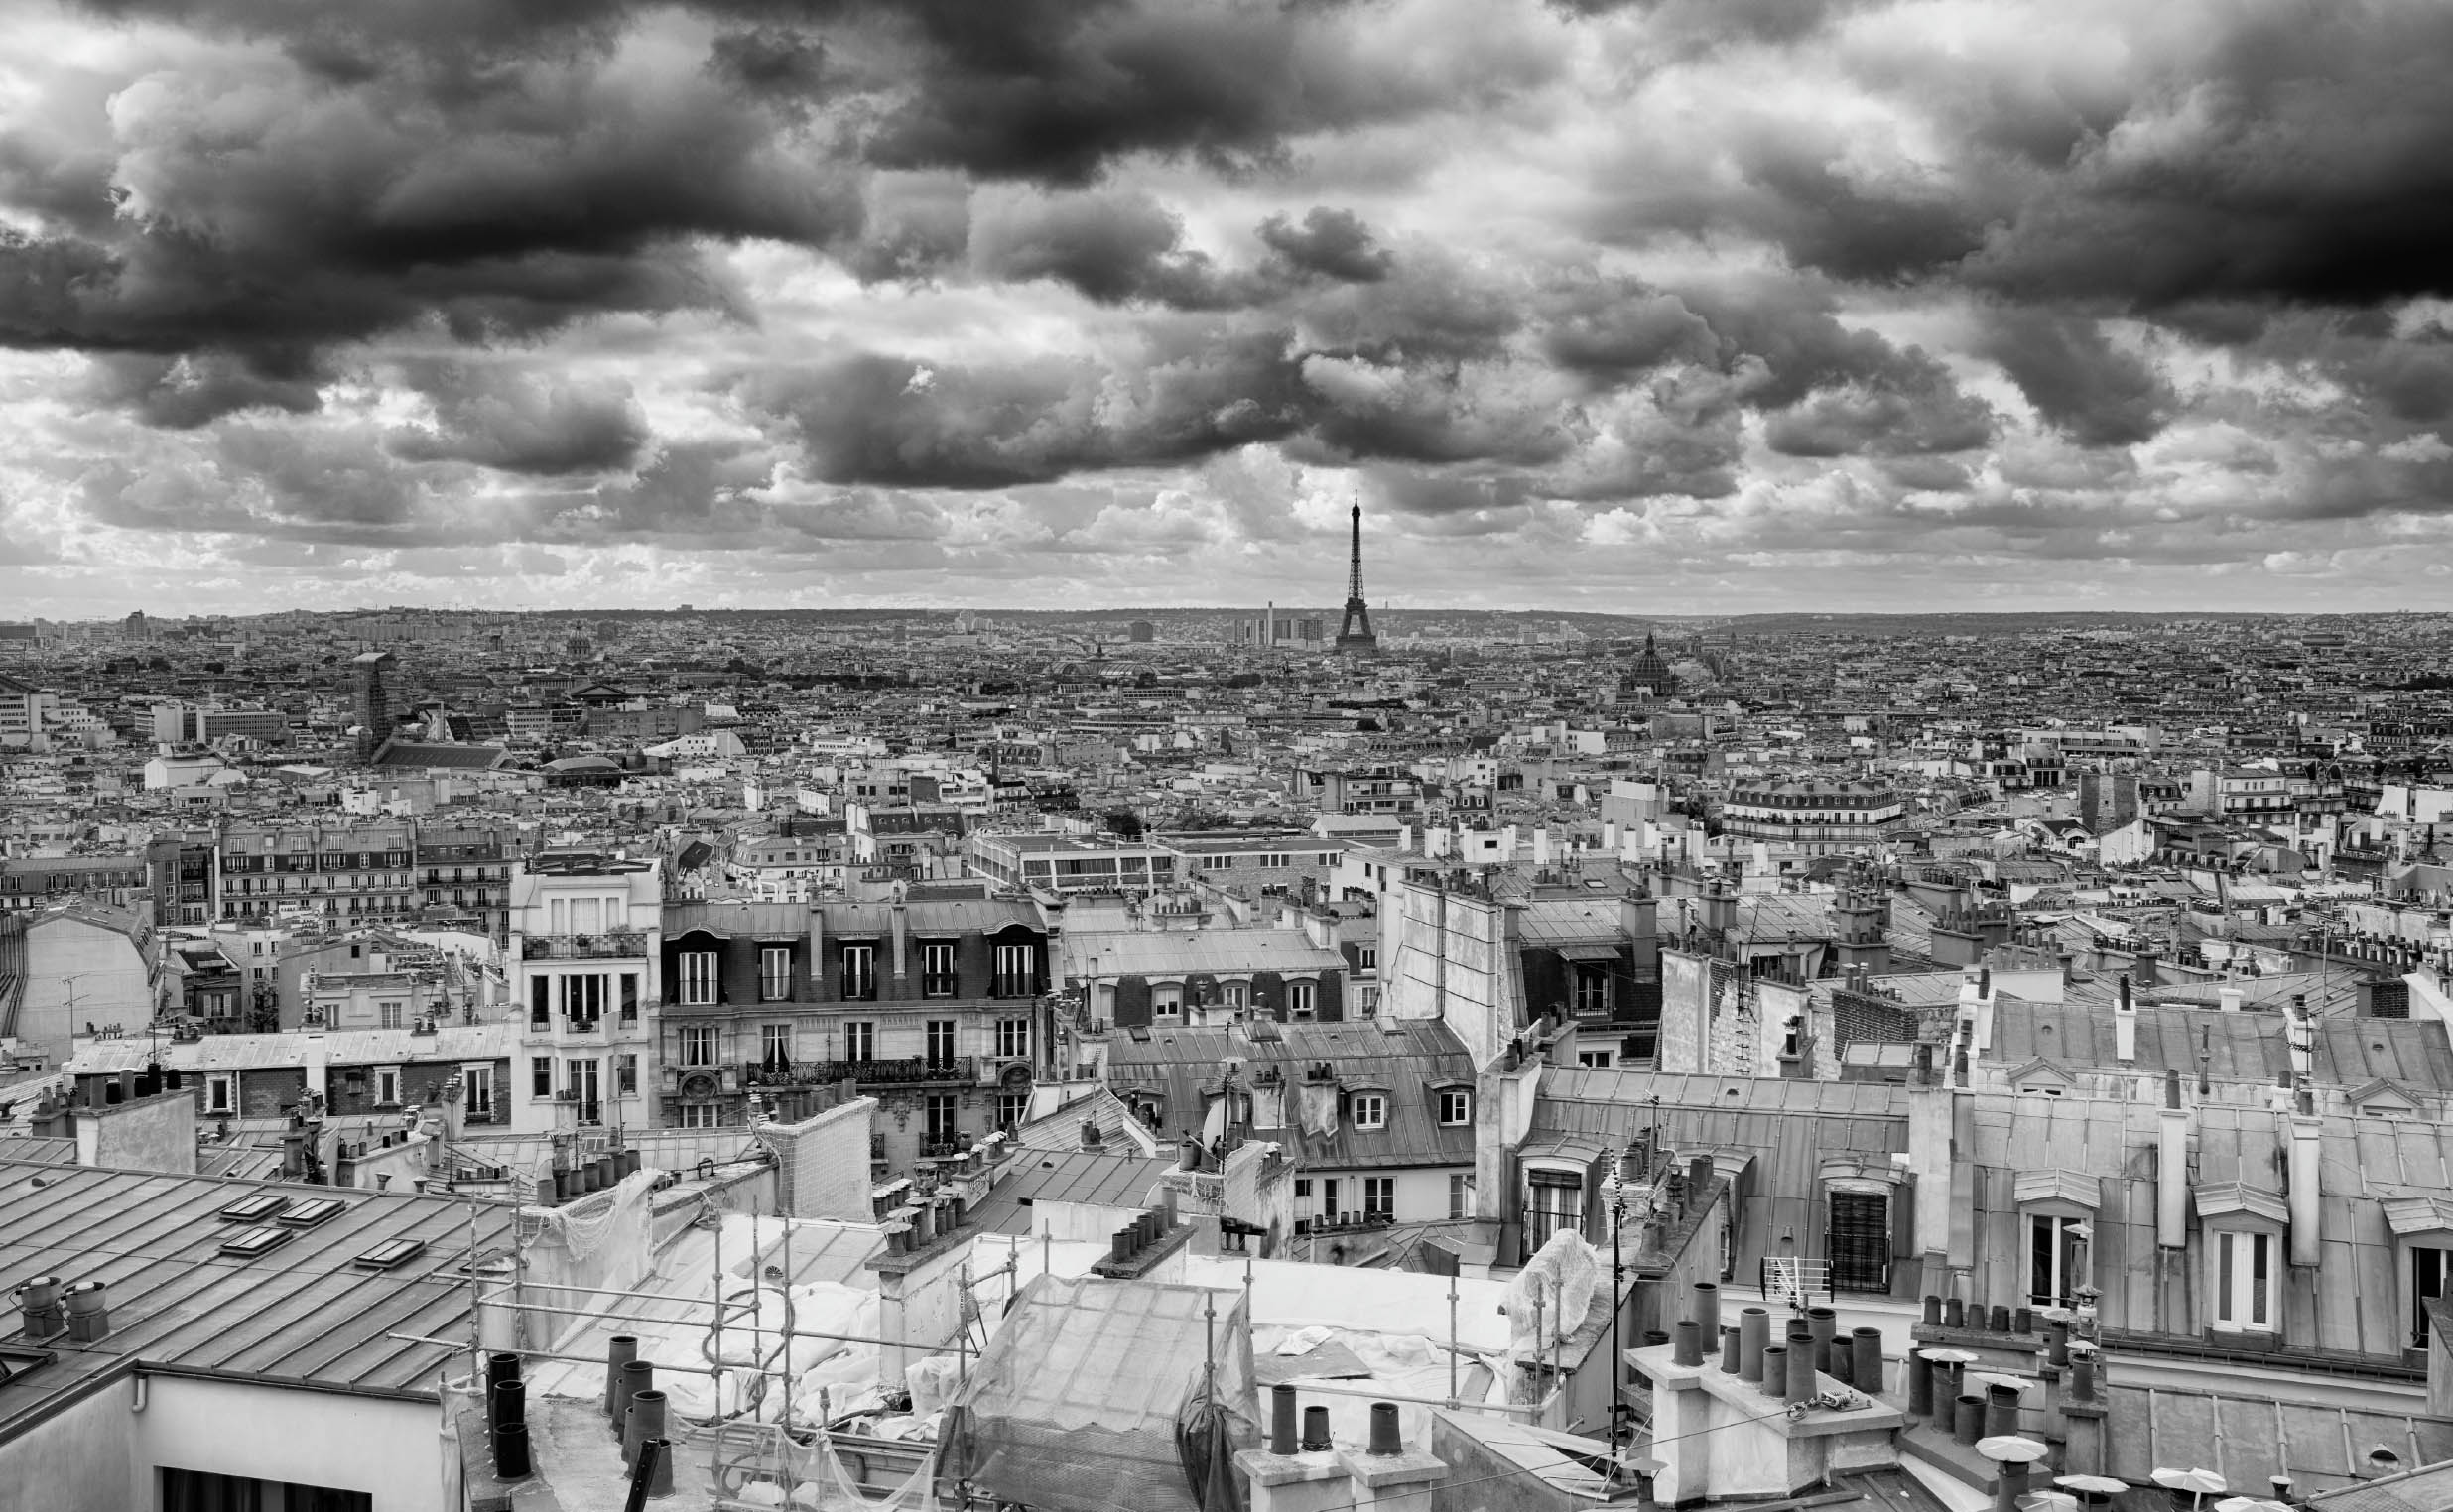
Paris from Montmartre—During a recent visit to Paris, I decided to spend some time in an area I didn’t know very well, Monmartre. My garret room in Monmartre was part way up the hill to Sacré-Coeur. While I could hardly stand up under the eaves of the roof in my room, the small size of the room was more than compensated for by a wonderful view out over Paris in the ever-changing light.
I used ACR to brighten the image and increase the contrast, then worked with the ACR grayscale conversion feature to improve the rendition of the image in monochrome. After I converted the image to grayscale using ACR, I worked on the image in Photoshop to increase its drama and tonal range, with the results shown here. Compare the rather dull looking in-camera black and white JPEG shown on page 97 with the sharp, dramatic quality of this processed image.
All: Nikon D850, 35mm, 1/20 of a second at f/16 and ISO 64, tripod mounted; converted to black and white using ACR and Photoshop.