
X-Ray Imagery
In 1895 Wilhelm Conrad Röntgen, a mechanical engineer and physicist, was working in his lab in Würzburg, Germany. Röntgen was testing the electrical discharges from newly developed vacuum tube equipment made by a variety of manufacturers. He noticed something very strange. One of the vacuum tubes was covered with a cardboard shield, so that it could emit no light. The point was to protect the sensitive aluminum that the tube was made of. Although the tube was completely covered, when it was turned on, it created a fluorescent effect on a screen painted with barium.
Röntgen had no idea what was causing this mysterious “exposure,” so he named the emanation an “x-ray,” with the “x” the unknown, as in an algebraic equation.
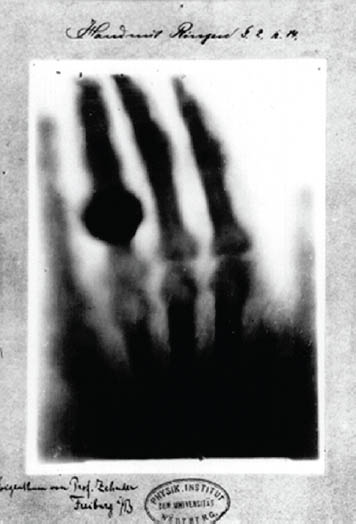
Further investigation confirmed that radiation beyond the visible spectrum was being emitted, and within two weeks Röntgen had made the first picture using x-rays of his wife, Ana Bertha Ludwig’s, hand, reproduced to the left.
Röntgen, who was considered the father of diagnostic radiology, would go on to win the Nobel prize in physics for his discovery, and later to see his Nobel prize money and inheritance disappear in the hyperinflation following the end of World War I. He died in 1923 of stomach cancer.
I made the x-ray imagery shown in this section using modern diagnostic x-ray equipment, specifically a mammography machine, in collaboration with the radiologist and physicist Dr. Julian Köepke.
In a photogram, objects are placed on top of a photosensitive medium with the exposure capturing the shape of the objects. The process of making these x-rays was more like making a photogram than like making a photo with a conventional camera. The flowers were arranged on top of a tray containing a digital sensor, and then exposed to the x-rays. The exposure to the x-ray worked in the same way that a photogram exposure does—except that the exposure was to x-radiation, not to visible light. Another difference is that the radiation from an x-ray behaves like a burst from a single point, whereas continuous rays from the sun expose a photogram in parallel.
Visible light ranges from 400 nanometers (nm) to 750nm in terms of wavelength. In comparison, the x-rays used in these images had a wavelength of roughly 0.04nm—shorter in wavelength by a factor of about 10,000 than visible light. While the process of making x-ray images has a great deal of similarity to photography, namely each is a form of capturing the data generated by exposure to the radiation from an electromagnetic wave, the properties of x-radiation is a bit different than that of visible light because x-rays scatter and decay in a way that visible light does not. So it took some trial and error to understand the best way to arrange and expose these flowers on the mammography platform.

Campanulas—Digital x-ray capture using Holographic mammography machine at a wavelength of roughly 0.04nm; Digital Imaging and Communications in Medicine (DICOM) file processed and toned using Photoshop.
With the correct exposure values in place, I was able to access the Digital Imaging and Communications in Medicine (DICOM) formatted files that the x-ray equipment generated. For example, below is the DICOM file from the capture of the sunflower shown on page 288 as rendered when opened in Photoshop.
Note that once opened in Photoshop, the DICOM rendering has several issues: it is in grayscale, and it is low resolution. Both of these limitations can be overcome. It’s easy to change an image from grayscale into any other color space in Photoshop by selecting, for example Image ![]() Mode
Mode ![]() RGB Color.
RGB Color.
Modern software makes interpolation and up-sampling of image resolution surprisingly seamless and high quality. My favorite program for increasing image size and resolution is Topaz Lab’s A.I. Gigapixel.
Once your x-ray image has been properly sized, you will likely need to add contrast and dynamic range. My favorite way to achieve this is to use a curve adjustment in LAB color (see page 221).
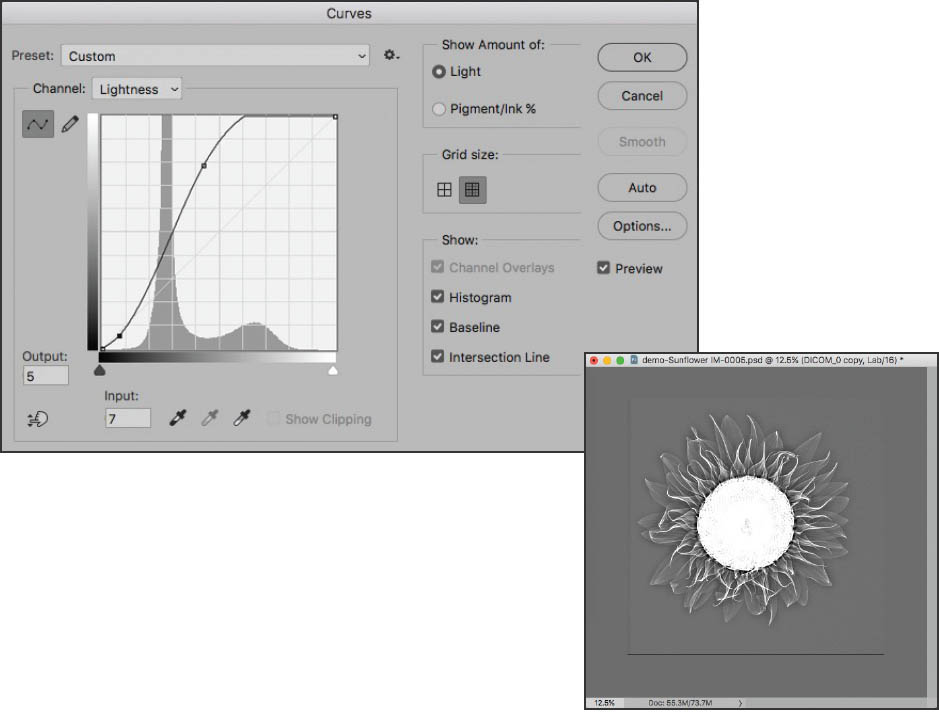
For example, the DICOM file of the sunflower shown to the left needs to have the petals brightened. The steps here begin with putting the image into LAB color, duplicating the Background layer, and applying a curve adjustment to the duplicate layer to brighten the petals (the curve is shown on the facing page). A layer mask is used to paint in the brighter petals, leaving the center in its original state.
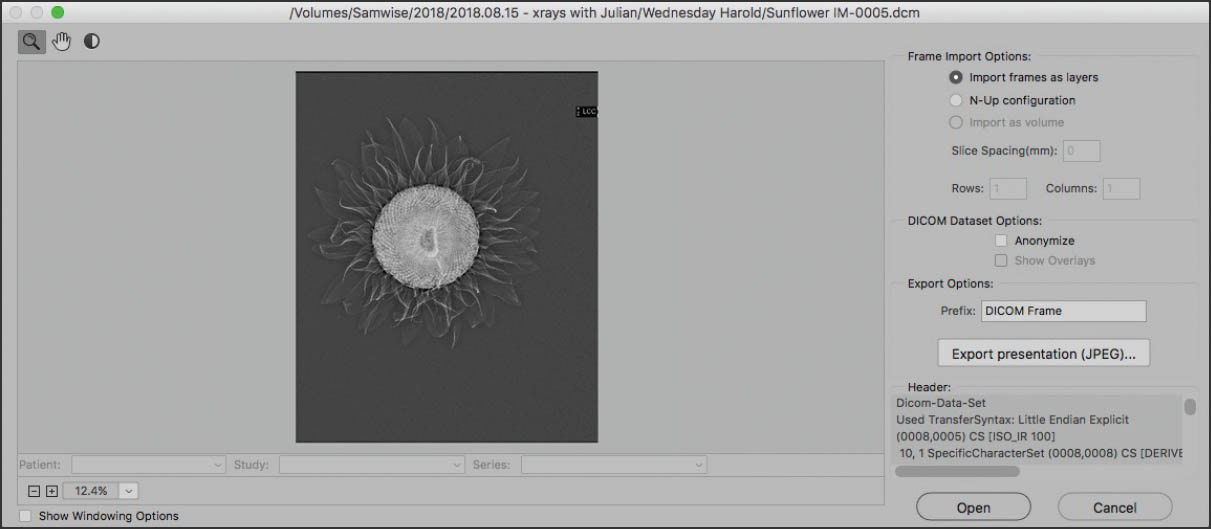
Opening a DICOM rendering of a sunflower x-ray in Photoshop. This viewer is equivalent to the ACR window that is used for RAW files, but it is for DICOM images.
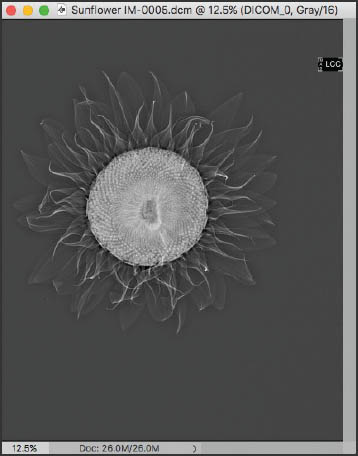
After clicking OK in the DICOM viewer, the image opened in Photoshop in the grayscale color space. For my workflow, I needed images in RGB so I would be able to use them for printing and the web. So that was the first order of business for me: converting the image to the RGB color space.
A DICOM image is also at a low resolution—72 ppi—so it needed to be resized to 300 ppi and enlarged. For this task, I used my favorite resizing program A.I. Gigapixel.
The next thing I needed to do was remove the LCC label at the upper right of the image, then I saved the image as a PSD file.
I wanted more contrast in the sunflower petals, so I duplicated the original DICOM layer. Then I converted the image to LAB color. Next, I opened the Curves dialog box (Image ![]() Adjustments
Adjustments ![]() Curves), chose the Lightness channel from the Channel drop-down list, and increased the whiter tones in the image. The center of the flower became blown out, but that didn’t matter. No one would see it once I applied a layer mask.
Curves), chose the Lightness channel from the Channel drop-down list, and increased the whiter tones in the image. The center of the flower became blown out, but that didn’t matter. No one would see it once I applied a layer mask.

I added a black Hide All layer mask to the DICOM_0 copy layer. Then, with white set as the Foreground color, I used the Brush Tool to gently paint in the petals to add more contrast. I didn’t paint in the middle of the sunflower because I liked the way the center looked.
After I finished painting in the petals, I flattened the image and converted it back to RGB.
The finished version is shown on page 288.

Campanulas on Black—Digital x-ray capture using Holographic mammography machine at a wavelength of roughly 0.04nm; Digital Imaging and Communications in Medicine (DICOM) file processed and inverted using Photoshop.
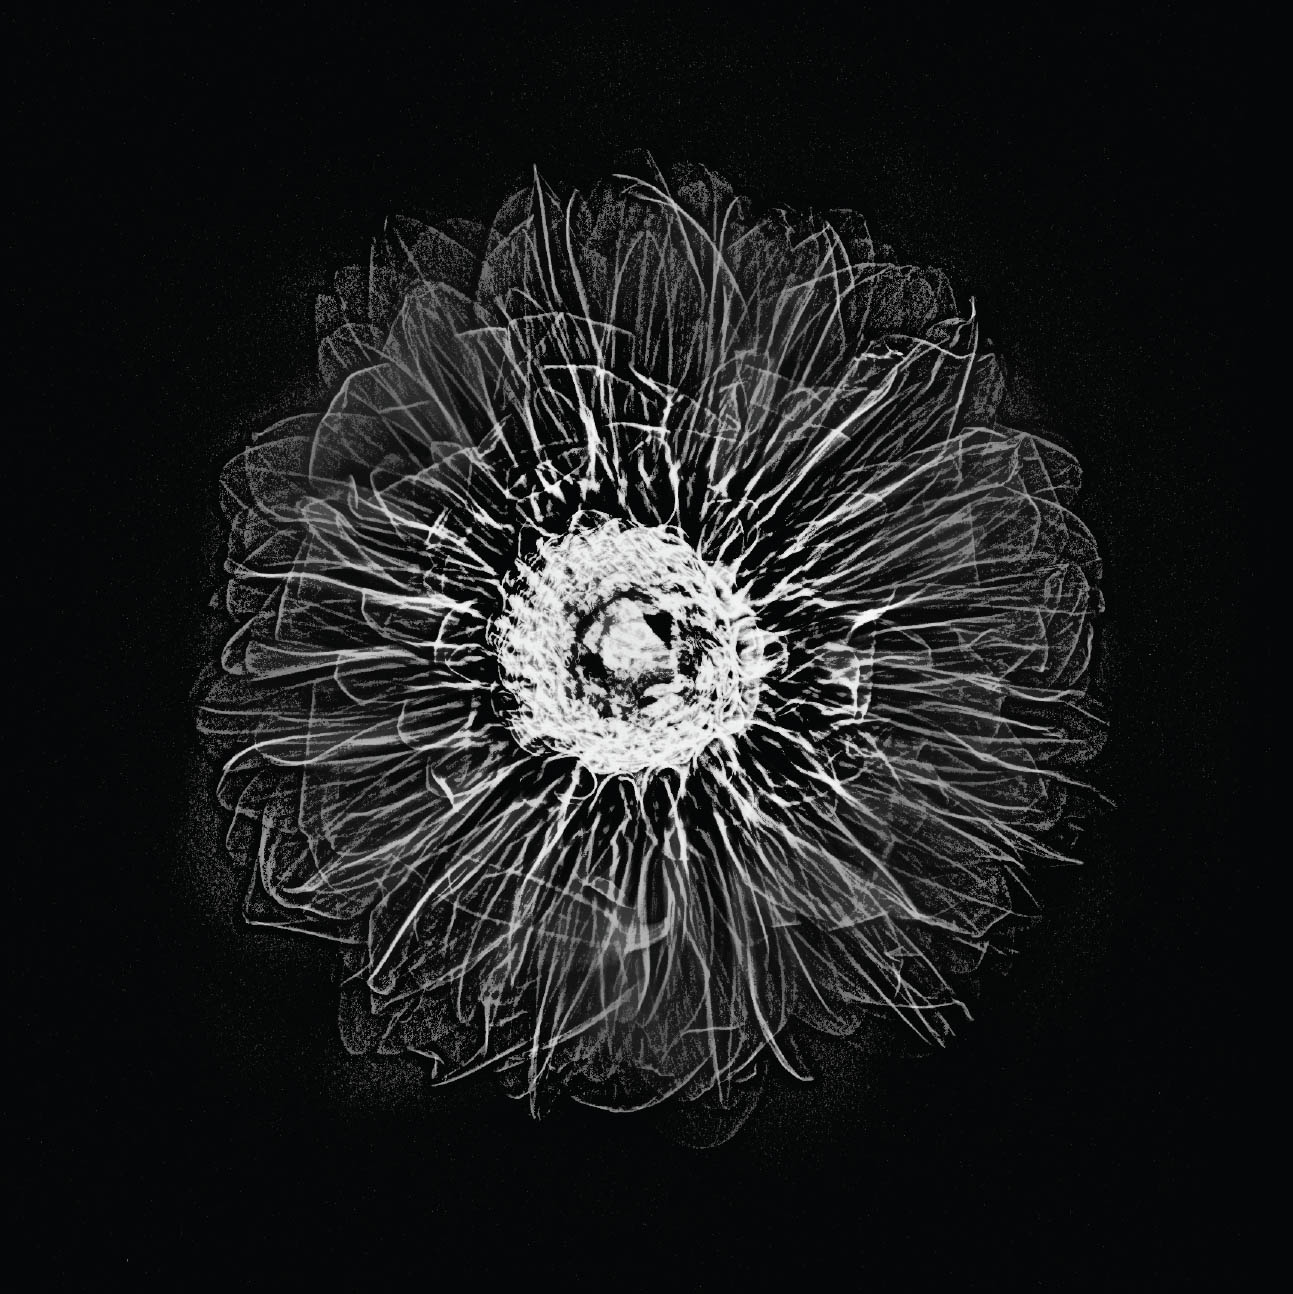
Dahlia—Digital x-ray capture using Holographic mammography machine at a wavelength of roughly 0.04nm; Digital Imaging and Communications in Medicine (DICOM) file processed and inverted using Photoshop.
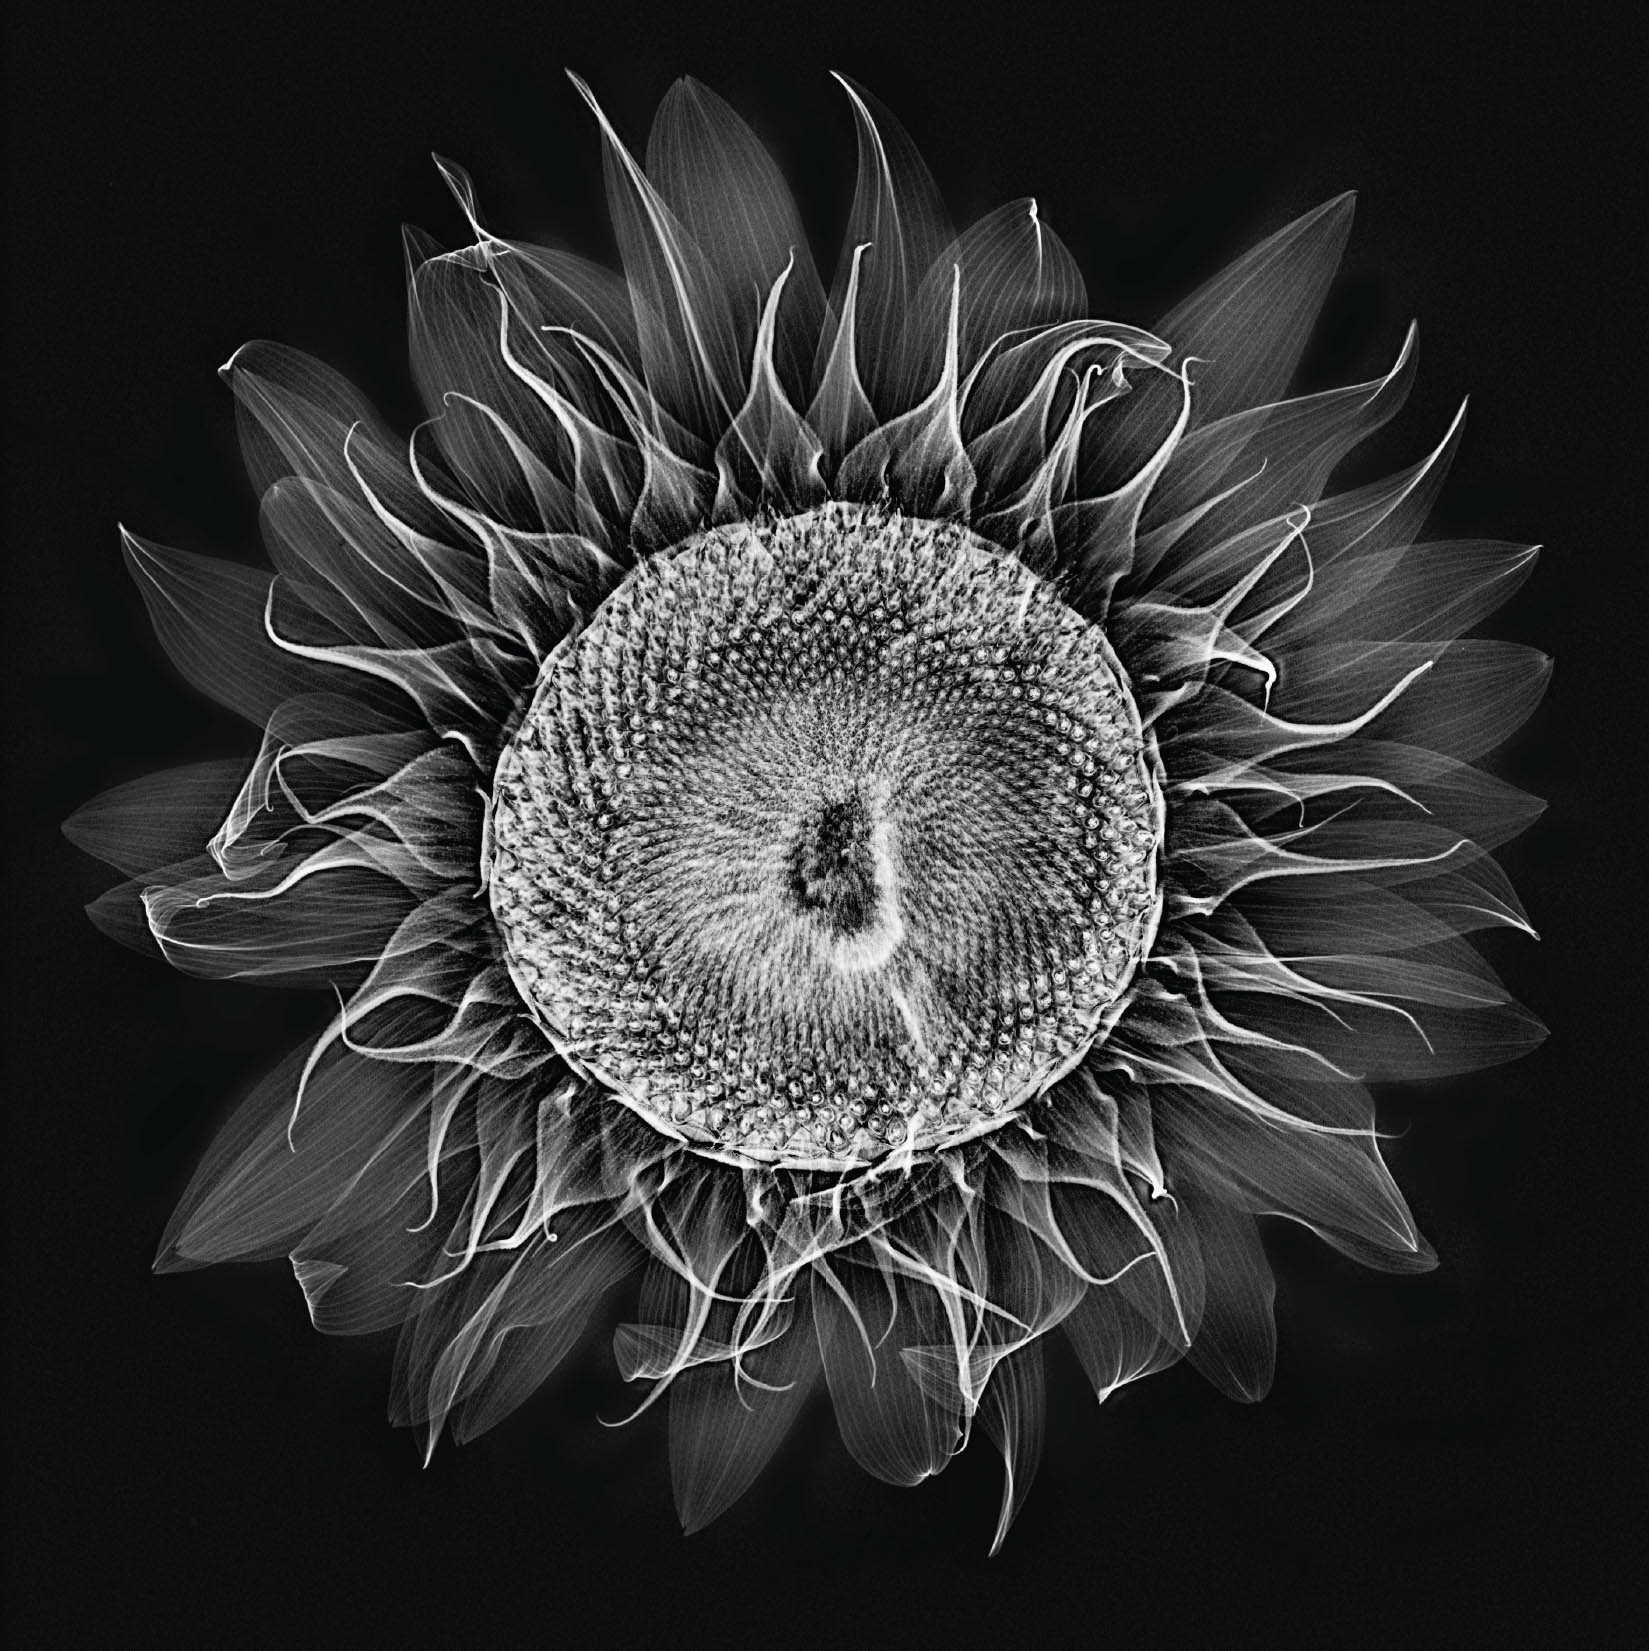
Sunflower—Digital x-ray capture using Holographic mammography machine at a wavelength of roughly 0.04nm; Digital Imaging and Communications in Medicine (DICOM) file processed and inverted using Photoshop.

Roses—Digital x-ray capture using Holographic mammography machine at a wavelength of roughly 0.04nm; Digital Imaging and Communications in Medicine (DICOM) file processed, inverted, tinted and toned using Photoshop.
Can you create x-rays at home?
It is not practical to create x-ray exposures at home, unless you happen to have medical diagnostic equipment that costs in the neighborhood of $250,000 in your home. Most of us don’t!
If you do have access to x-ray equipment, the good news, as you can see in these pages, is that it is fairly easy to open the output files made by digital x-ray equipment in Photoshop, although these files tend to be fairly low resolution. On the other hand, keep in mind that the size capture you can make will be limited by the platform and fall-off of the diagnostic equipment.
For example, access to dental diagnostic gear may be more practical than larger equipment (maybe there are a few dentists who might be okay with giving time on their diagnostic gear), but the size of your capture would be roughly limited to the size of a set of teeth.
If you get your hands (or teeth) on x-ray equipment, it makes sense to follow safety protocols and be sure that you are properly shielded from the x-rays, as medical technicians (and patients) should be.