
HDR in Black and White
HDR—High Dynamic Range—photography means creating photos with a greater variation in tone from lightest to darker than is normally possible in a single digital capture (or a frame of film, for that matter).
The human eye is capable of perceiving a much greater tonal range than is normally captured in photography. To see this is true, try staring at the shadows in a dark room that is illuminated in one area by a shaft of strong sunlight. As your eyes adjust, you’ll be able to see details in both the dark areas and in the bright sunshine. No conventional photo can do as much.
Digital photos with an extended tonal range can render an even greater gamut from light to dark of tonal values than even the human eye. This can sometimes cause these photos to look unnatural and almost unreal—which, depending on the context and the intention of the photographer is either good, or bad.
When it comes to digital black and white photography, there are a number of possible strategies for extending dynamic range:
- Multi-Raw processing (pages 130–135)
- Combining black and white conversions (pages 168–173)
- High Dynamic Range (HDR) photography
You’ll find examples of photos that use these different strategies throughout this book; this is generally explained in the caption information for each image.
To create an HDR image, start by shooting multiple captures at different exposure settings. The multiple captures are combined in post-processing to create a single image.
Hand HDR involves putting the captures together in Photoshop using layers and masking. Automated HDR uses automatic software to do this compositing. Lightroom and Photoshop provide an automated HDR features, but some photographers prefer to use third-party plug-ins.
Color images created using automated HDR can look garish. In black and white, no colors mean no problem. I think you’ll find that using an automated HDR program can open a whole world of new possibilities in your creative black and white work.
Shooting for HDR
Whether you use Lightroom Classic, Photoshop, or HDR Efex Pro, or some other tool, here’s what I’ve found to work best when shooting for HDR:
- The camera shouldn’t move between captures, so I almost always use a tripod.
- The automated HDR process can inherently add noise. Therefore, I keep my ISO fairly low, probably less than 400. Otherwise, my HDR composite is likely to get very noisy.
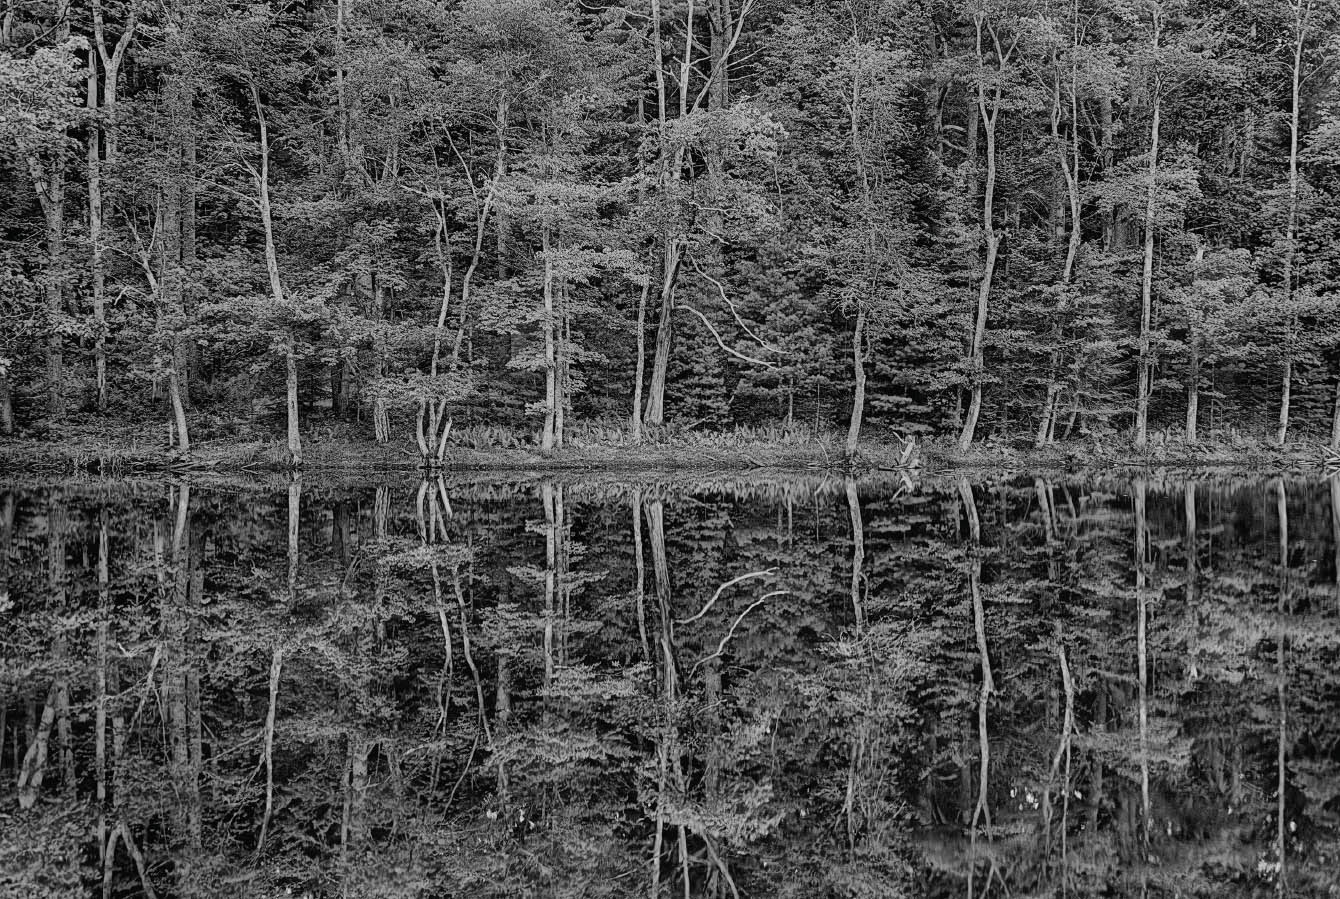
Reflections in a Maine Pond—Henry David Thoreau extolled “the calmness of the lake when there is not a breath of wind,” likening the stillness of the lake to understanding the depths of one’s own personality. Mindful of the power of reflections in this beautiful lake in the Maine woods, I was also all too aware of the buzzing mosquito activity. I ignored these pests, excepting a certain amount of discomfort as the price to pay for being a peripatetic photographer, and held still long enough to make a bracketed sequence of exposures.
Nikon D810, 38mm, 5 exposures with shutter speeds ranging from 1/2 of a second to 4 seconds, each exposure at f/9 and ISO 200, tripod mounted; processed in ACR, Photoshop, Silver Efex Pro, and Topaz Simplify.
- It’s better to vary the shutter speed than the aperture. If you change apertures between captures, you may change the depth-of-field between images—which could make the final HDR composite look off-balance and simply weird—because the in-focus areas wouldn’t be the same from image to image.
- Assuming you are bracketing the shutter speed, you should have no fewer than three captures. You may get better results with more captures; 5–10 is a good range.
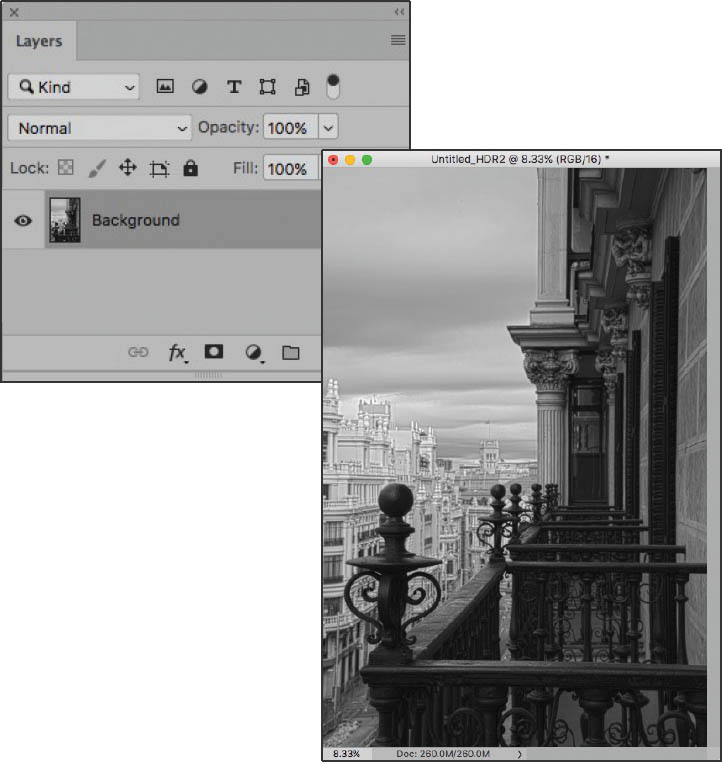
I tend to bracket at about 100% shutter speed increments, calculating my exposures manually rather than using an in-camera bracket program. For example, I shot the four images of an ornate balcony outside my hotel window (below) with shutter speeds ranging from 0.5 of a second to 2.5 seconds.
HDR in Photoshop
There are two parts to creating an automated blend in almost every HDR program. The initial step is to select the images you want to use and then combine the different exposures. Next, refinements are applied. This adjustment step is called “applying a tone curve in some software,” but is more often presented as applying a “Preset.”
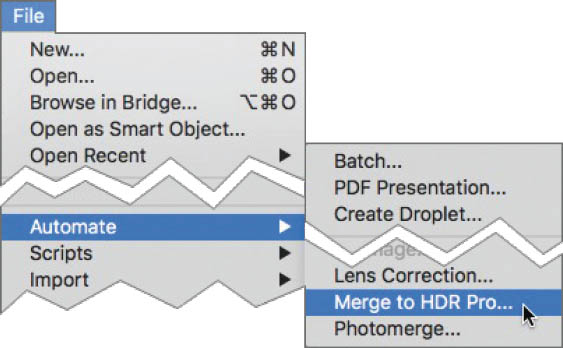
Using the first part of Photoshop’s Merge to HDR Pro couldn’t be simpler. You fire up Photoshop, and then choose File ![]() Automate
Automate ![]() Merge to HDR Pro (Step 1). From there, you choose the images you want to blend (Step 2), and then use the settings sliders and curves to create a custom blend (Step 3). When you are happy with what you have, click OK to open the blended image in Photoshop (Step 4, page 192).
Merge to HDR Pro (Step 1). From there, you choose the images you want to blend (Step 2), and then use the settings sliders and curves to create a custom blend (Step 3). When you are happy with what you have, click OK to open the blended image in Photoshop (Step 4, page 192).

These four images of an ornate balcony above the Gran Via in Madrid, Spain, were shot using a tripod at exposures ranging from 0.5 of a second to 2.5 seconds. Here the four RAW captures are shown in Adobe Bridge. I’m going to process them in Photoshop to show you how HDR blending works.
Step 1: Launch Photoshop, and then select File ![]() Automate
Automate ![]() Merge to HDR Pro . . . to open the Merge to HDR Pro window that you will use to select the images for your HDR blend.
Merge to HDR Pro . . . to open the Merge to HDR Pro window that you will use to select the images for your HDR blend.

Step 2: This step is used to add the files you want to combine. Click the Browse button to add image files from your computer. Alternatively, if the files are open, click Add Open Files.
If the images were carefully aligned using a tripod when they were shot (as I recommend), make sure the Attempt to Automatically Align Source Images is not checked.
When you have added all the files you want to merge to HDR, click OK.
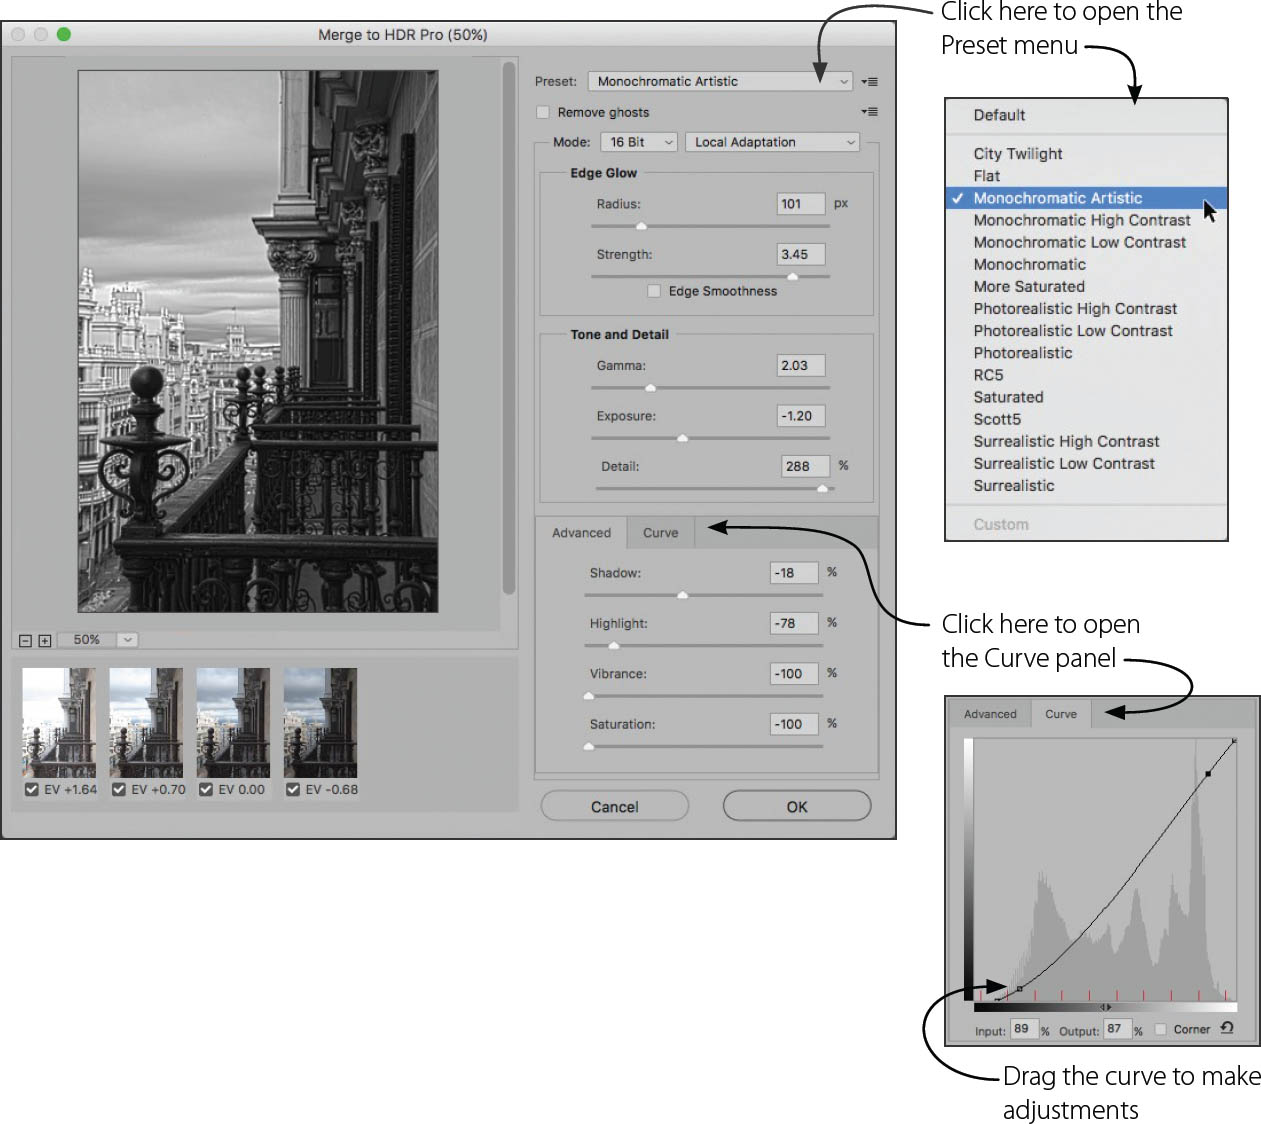
Step 3: Once the images have been combined, a new window opens. This window shows the composite image and gives you many options as to how you would like to process it. Generally, I recommend as the first step to choose a preset from the Preset drop-down list (Monochromatic Artistic is shown selected here). You can also use this window to tweak settings, decide to exclude exposures from the blend, and apply a curve to the results, using the Curve tab.
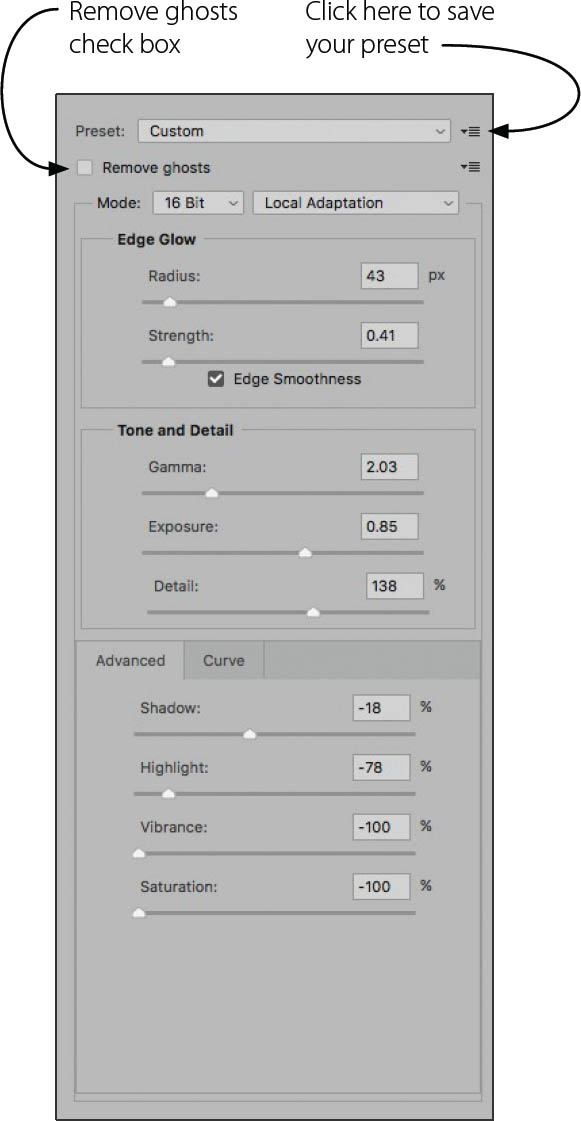
Step 4: After you have selected the Preset, and have tweaked the settings—for example, by applying a curve, and changing the Exposure slider—the Preset name will now be listed as “Custom.” If you would like, you can save your custom settings to apply them to other HDR image sets by clicking the drop-down menu to the right of the Preset drop-down list.
Note the “Remove ghosts” check box at the upper left of the Preset panel. This setting is designed to take care of the situation in which a portion of the subject—for example a pedestrian “ghost”—appears in one of the images but not the others.
Even when there is motion between the frames of an HDR blend, it is sometimes best to leave the Remove ghosts box unchecked. For example, I chose not to use this setting even though the clouds clearly moved between the frames.
Step 5: Once you are pleased with the results, click OK to open the HDR composite in Photoshop.

Above the Gran Via—I always try to book hotel rooms that seem likely to have interesting views to photograph. For instance, when I visited Madrid, Spain, I booked a room with a balcony facing the famous Gran Via, one of Madrid’s fabled avenues. Unfortunately, when my ride pulled in from the airport, it was clear that Madrid was socked in with bad weather and I could barely see across the Gran Via. I unpacked and took a shower, and when I next looked out the window, the storm had started to clear. I got out on the balcony with my camera and tripod, perched in a corner of the decorative ironwork above the Gran Via, and made the image using bracketed exposures that you see on the facing page.
Nikon D850, 72mm, nine exposures combined in Photoshop and HDR Efex Pro at exposure times from 1/50 of a second to 2.5 seconds, each exposure at f/22 and ISO 64, tripod mounted; converted to monochrome using Photoshop and Silver Efex Pro.
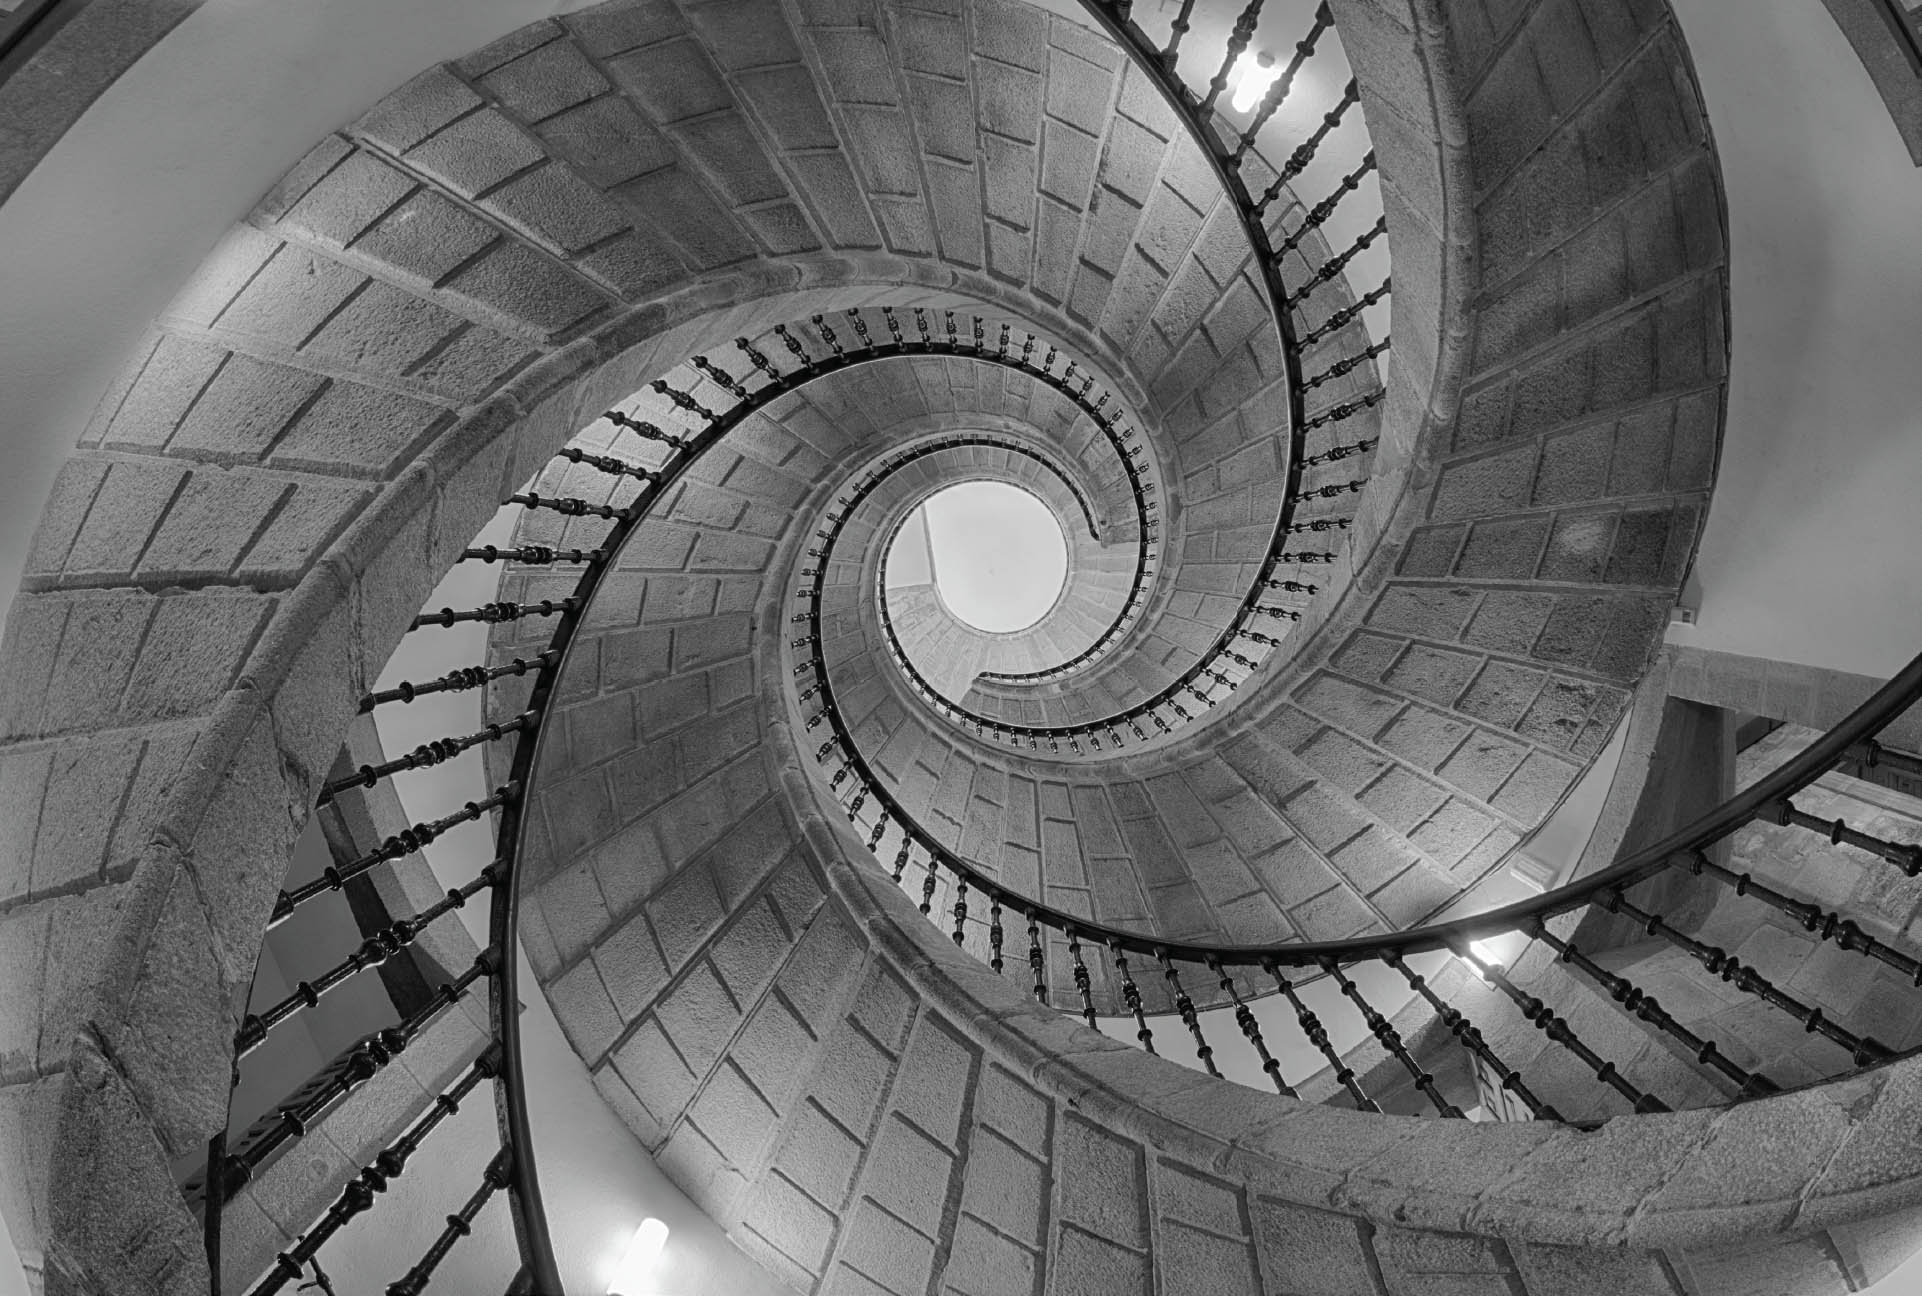
Triple Spiral Stairs—It turns out that there are many double spiral staircases in the world, but very few triples (I know of only two worldwide). There’s a good reason for this: the third strand in the spiral is not practical and is there for essentially decorative reasons.
Therefore, I was very excited when I arrived in Santiago de Compostela, Spain, at the end of my pilgrimage on the famous Way of Saint James to learn about a triple spiral staircase housed in a historic convent. I made a point of tracking down this staircase with my camera and tripod; the view you see here was taken looking up so you can distinctly see the three strands in the spiral.
Nikon D850, 15mm horizontal fisheye, six exposures at shutter speeds ranging from 1/2 of a second to 13 seconds, each exposure at f/22 and ISO 200, tripod mounted; exposures processed in HDR Efex Pro and Photoshop, and converted to black and white using Photoshop and Silver Efex Pro.

Rice Paddies with Tree Reflection, Vietnam—In the rugged corner of northern Vietnam where Vietnam meets Laos and China, the mountains are commonly known as “Dragon’s Teeth,” and life itself depends on terraced rice farming the old-fashioned way with water buffaloes.
I was fascinated with the regular but curvilinear shapes of the rice paddies, and thought that the reflection of a tree in one of the paddies made a very interesting and somewhat unusual composition.
Nikon D810, 190mm, six exposures with shutter speeds ranging from 1/15 of a second to 2.5 seconds, each exposure at f/16 and ISO 64, tripod mounted; exposures processed in Photoshop, and On1 Perfect B&W.