Hand Coloring
Ever since the earliest days of photography people have been painting by hand in color on black and white photos. Originally this was a laborious process that started with a finished black and white print and added color with the idea of adding realism to the image. When color photography came along, some photographers continued hand painting their monochromatic prints for the value of the aesthetic statement they could make by applying a paint brush to their finished prints.
With digital monochrome, it’s easily possible to add a hand color effect without having to be particularly good at painting.
As I’ve mentioned, a black and white digital photo is a kind of virtual monochromatic image that dispenses with colors for aesthetic purposes. Imagine: creating a hand color effect on top of a monochromatic image is doubling the simulated nature of the ensemble. First, the monochromatic image is abstracted from a color file. Next, digital tricks are used to add back in some color, but this digital color looks intentionally applied—a digital artifice added to an already artificial construct. What fun!
That said, the best monochromatic images for hand coloring are those that will exhibit internal visual cohesion and logic when the color is applied. Hand colored black and white photos may be intentionally “retro” but they needn’t be gauche. Look for imagery that has an antique look before hand coloring is applied, be selective about the application of color, and try to extend the anachronistic appeal of your hand-colored photo.

I created the hand-colored effect by dragging the color version of the image back over the monochromatic version, adding a Hide All layer mask, and painting-in the model at reduced opacity. I did this twice, once with the layer blending mode set to Overlay and the second time with the blending mode set to Screen.
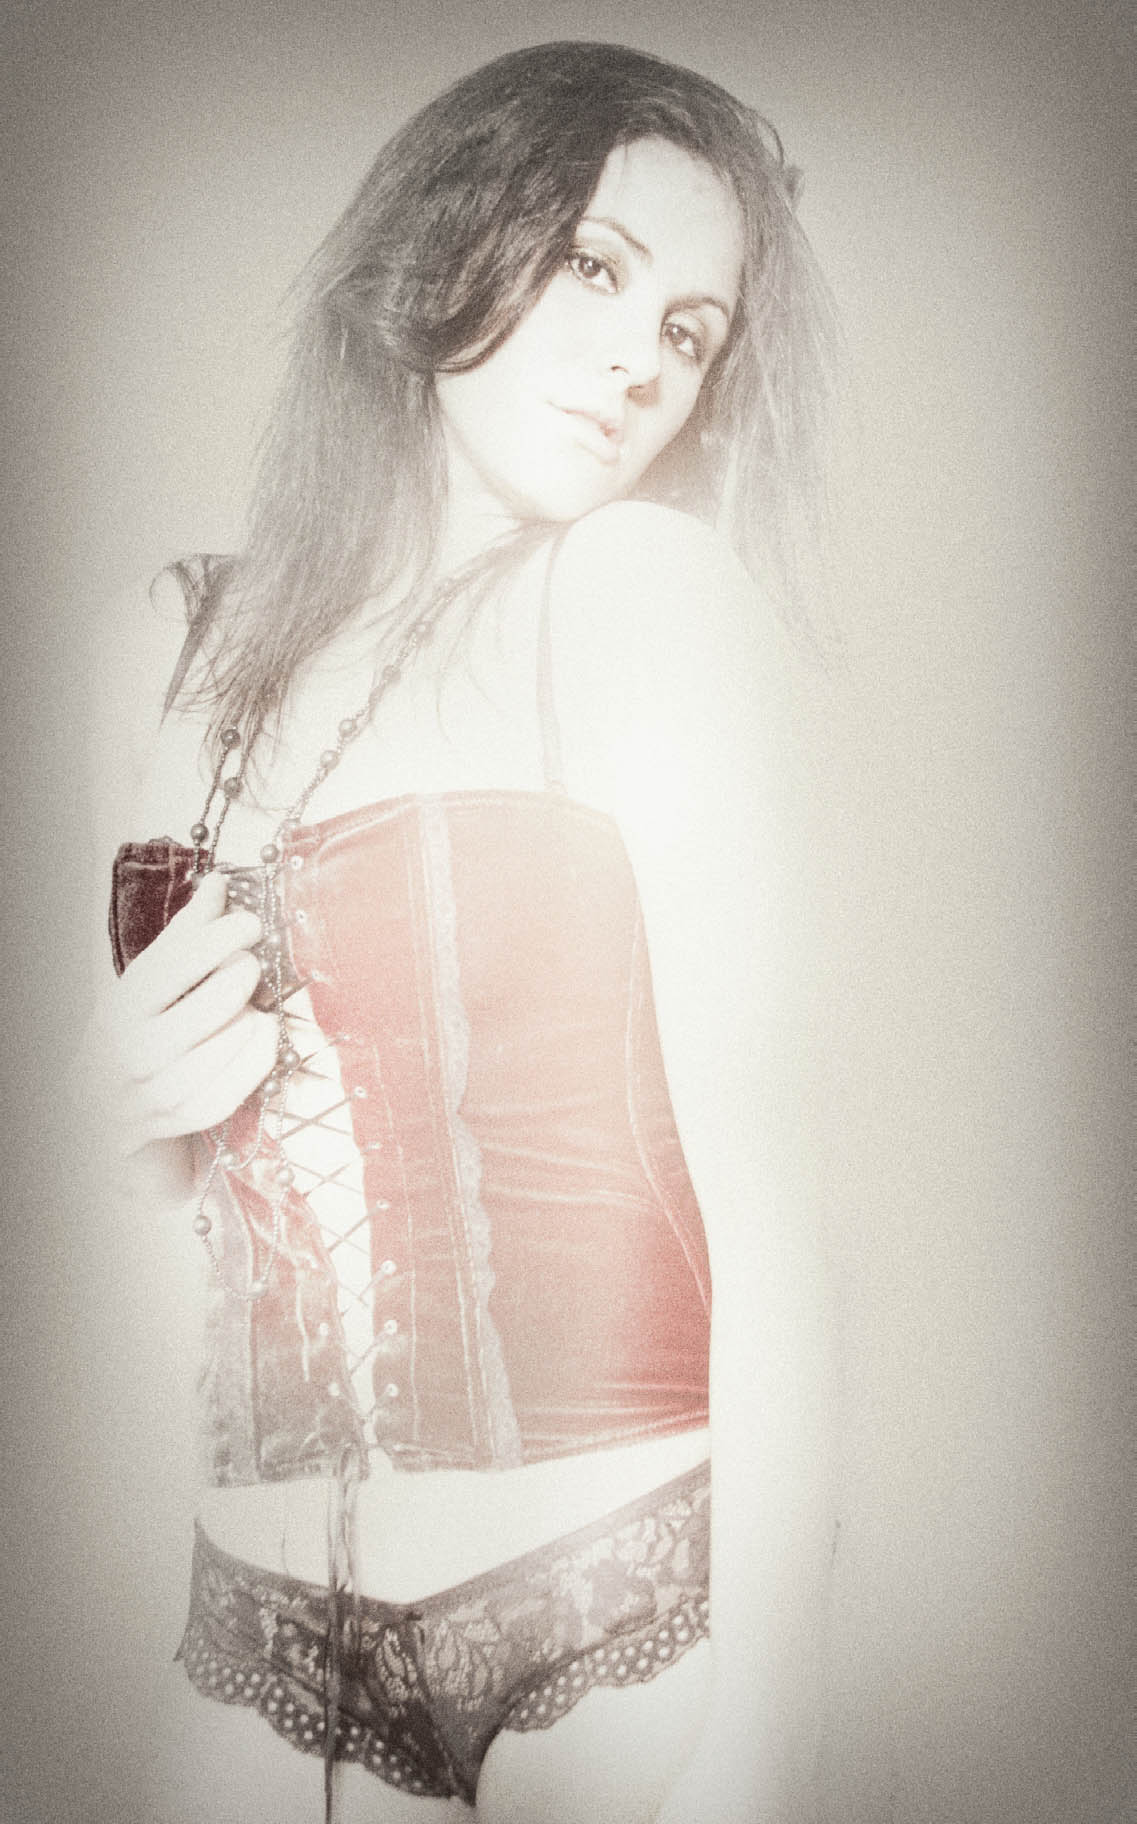
Christianna—Adding selective color back into the “tintype” photo of Christianna shown to the left creates an interesting effect that works well with the idea of a tintype, since tintypes historically were often painted on.
Nikon D300, 32mm, 1/160 of a second at f/6.3 and ISO 3200, hand held; processed and hand painted in Photoshop.

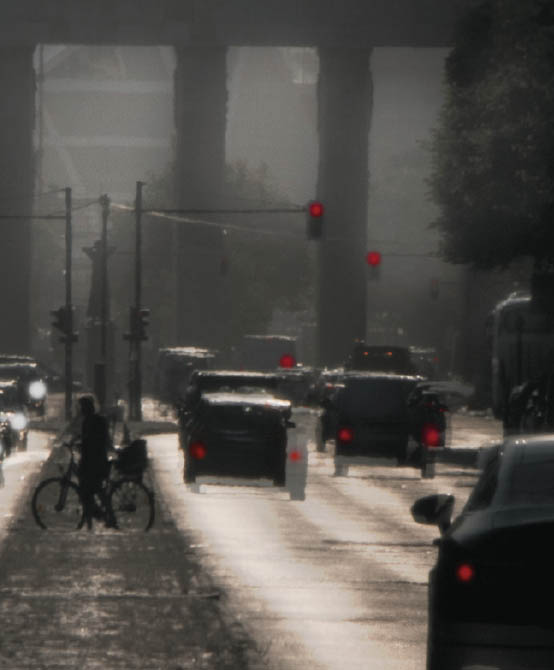
Approaching the Brandenburg Gate—One of the foremost historical markers of Berlin, Germany—formerly a demarcation of the cold war line between east and west—today the Brandenburg Gate is primarily a tourist attraction.
Wandering through Berlin’s central park, the Tiergarten, before sunrise my friend and I emerged on the arterial avenue leading to the Brandenburg Gate just as the sun was rising behind it. I placed my tripod precariously on the cobble stone central aisle amidst fast-moving rush hour traffic. I made two captures, one for the foreground that was still in predawn darkness, and one for the much brighter skyline.
After processing the images, I saw that to convey the early morning impression, I needed to “paint” headlights and taillights of the vehicles so that these were a significant portion of the image (see inset detail below).
Nikon D850, 300mm, two exposures at f/22 and ISO 64; foreground exposure at 1/200 of a second; background exposure at 1/800 of a second, tripod mounted; exposures processed and combined using a gradient in Photoshop, antique sepia tint applied using Silver Efex Pro, headlights and taillights hand painted using Photoshop.