
Black & White Adjustment Layers
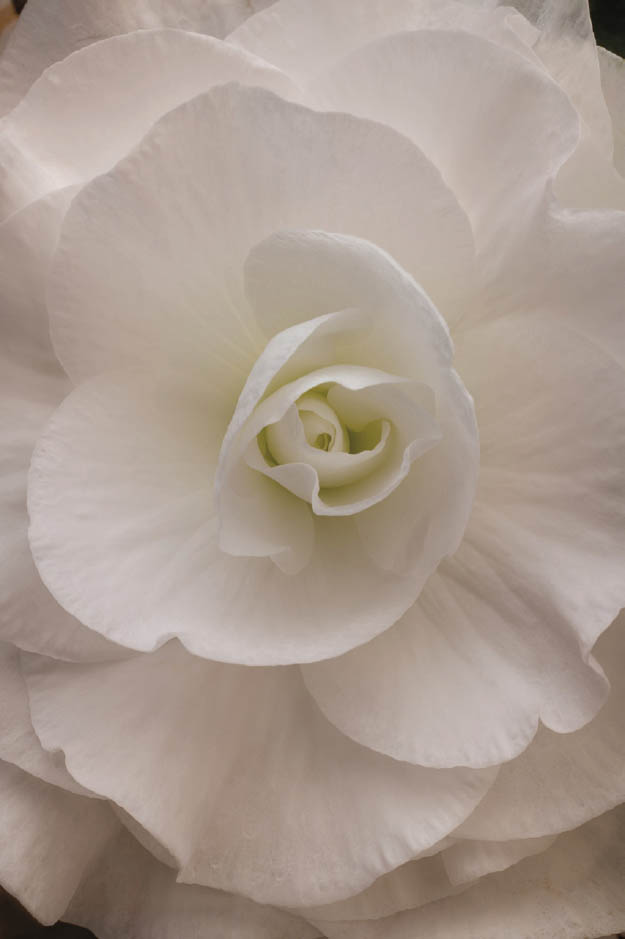
I shot this photo of a giant, beautiful begonia bloom with black and white in mind, because there was hardly any color in the image.
Black & White adjustment layers are one of the most effective and powerful ways to create great creative monochromatic imagery in Photoshop. They’re easy, flexible, and powerful—although in many cases a single Black & White adjustment layer isn’t optimal for all areas in a photo. To resolve this problem, multiple adjustment layers can be used with different settings, each setting applied on a different layer, with the layers masked and blended to create the final results. (For more about layer masks and blending layers see pages 120–129.)
Even just one Black & White adjustment layer can be a powerful conversion tool. Part of what makes Black & White adjustment layers easy to use are the Presets—conversions to black and white using settings chosen from a list. These Presets mostly use the metaphor of applying filters in an old-fashioned darkroom, and are named after these filters.
Don’t get too caught up in the metaphor to film that the presets provide. As with everything digital, the analogy to old-fashioned process doesn’t always hold up. The best way to see what one of the black and white adjustment presets does is to try it and find out. If you don’t like it, you can always go back and try again.
Note that I tend to merge down adjustment layers to form “just plain old regular” layers that can be masked normally. This process is discussed further on page 126.
Step 1: In the Layers panel, select the layer to which you want to add the adjustment layer.
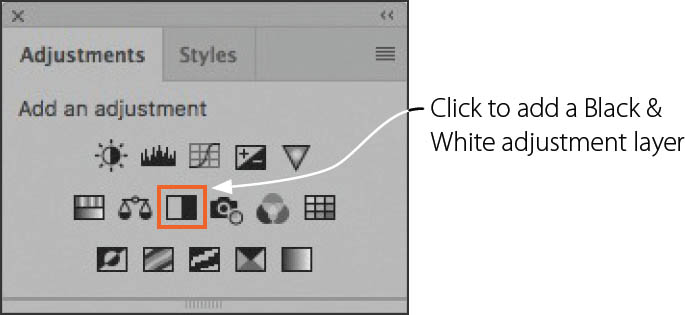
Step 2: In the Adjustments panel, click the Create Black & White adjustment layer button to apply a default black and white adjustment.
You can also add a Black & White adjustment layer by selecting Layer ![]() New Adjustment Layer
New Adjustment Layer ![]() Black & White.
Black & White.
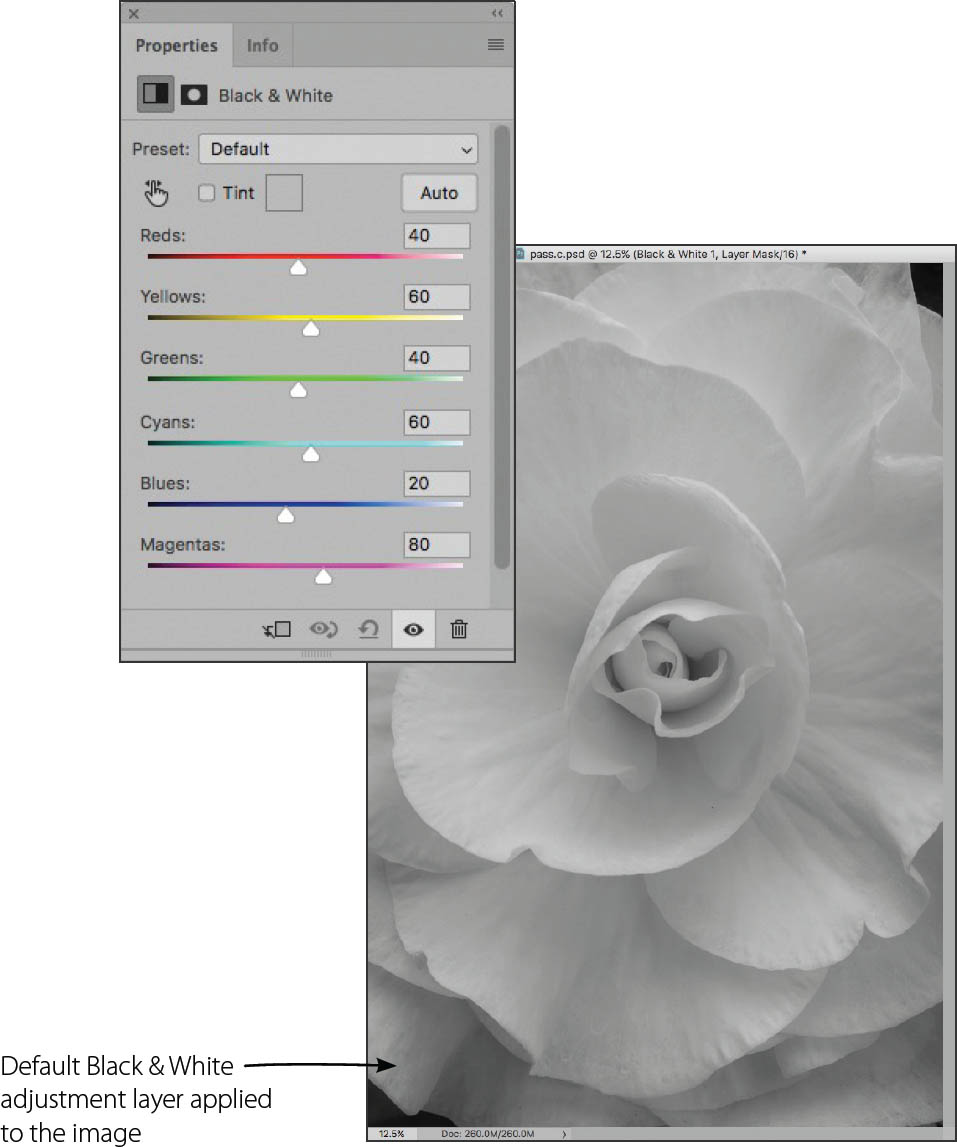
After adding the Black & White adjustment layer, the Default preset becomes active in the Adjustments panel as shown, converting the layer to a neutral monochromatic image.
If you move the sliders to change the color value they represent, you will immediately see the impact on the photo in the image window. The Default preset has neutral tonal values, so this is often a good starting place for conversions that require additional work.
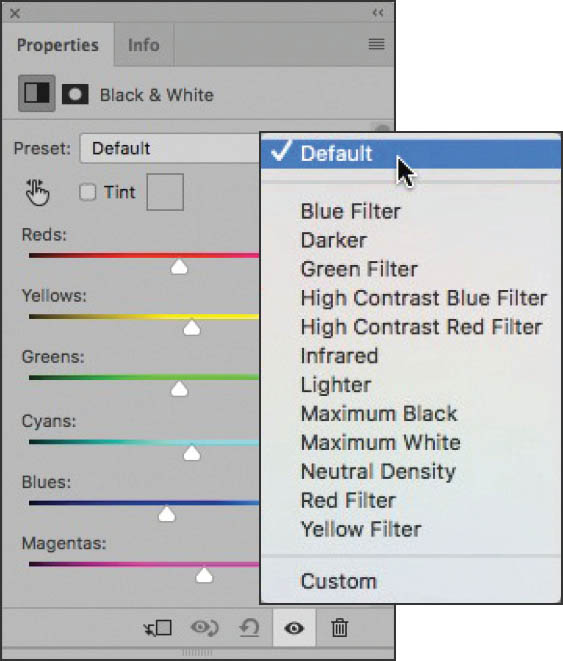
Step 3: Use the Black & White drop-down list to choose a preset. These presets are only a starting place—there’s nothing to stop you from making further tweaks using the sliders.

The High Contrast Red Filter preset is fairly neutral for this photo. This will work well as a background layer in combination with the Default preset for our monochromatic conversion.
Using Auto with Black & White adjustments
If you look carefully at the Black & White Adjustments panel you’ll notice an Auto button. Click this button for Photoshop’s best guess at what your monochromatic conversion should look like.
Often the Auto settings aren’t bad—or at least provide a pretty good background layer you can use as a starting place for a creative conversion.

The slider settings created by the High Contrast Blue Filter preset adds depth and contrast to this photo. The filter darkens the center of the image dramatically. It’s a striking effect, and one that I planned to partially incorporate in my finished image.

The Infrared preset produces an image that is generally toned to the light side across the entire image, and has an attractive glow around many of the petals which can be used in the final image.
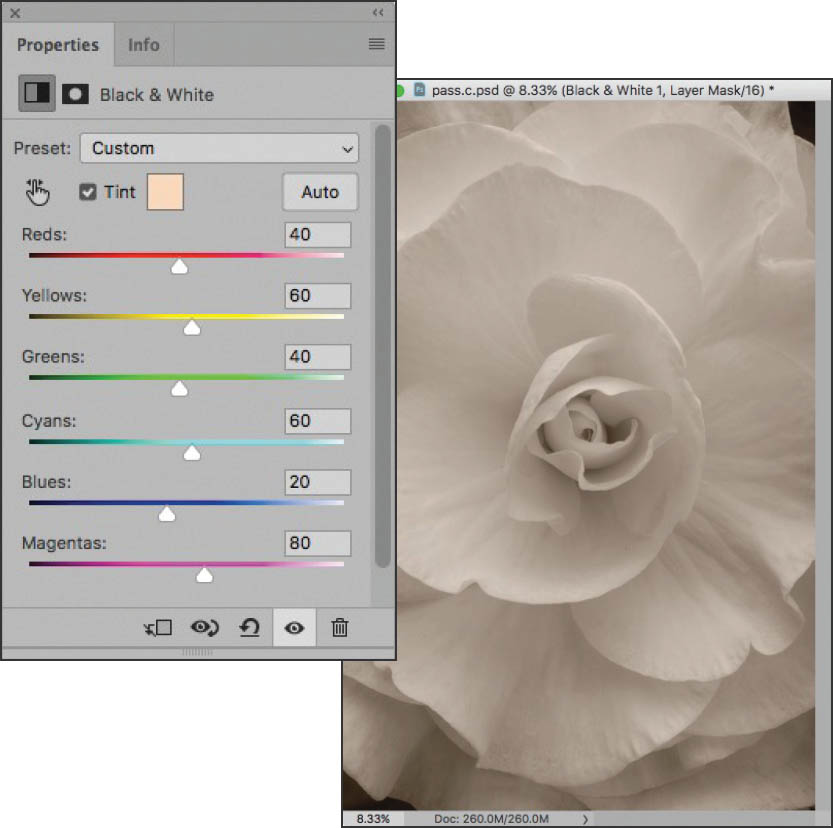
It might not work for this image, but to create a simple sepia tone for your black and white image, you can start with the Default preset, check the Tint box, and select a sepia color. When I want a tinted monochromatic effect for my images, I almost always take the layer Opacity for the Sepia Tint layer down to about 20%.

Coming back to the untinted version that we’re working on here, the final conversion uses four Black & White adjustment layers in a layer stack. On top of the conversion achieved using the Default preset the following layers were used:
- A layer using the High Contrast Red preset which was blended with the Default preset layer at 74% opacity.
- A layer using the High Contrast Blue preset with painting on a layer mask, making the image darker on the petals at the outer edge of the image.
- A layer using the Infrared preset with painting on a layer mask that adds a nice overall glow to the image.

Begonia—On an expedition up the northern coast of California, I made a side trip to visit the colorful Mendocino Coast Botanical Gardens. It was a windy morning, making the kind of precise photography using a tripod that I like most almost impossible. But within a sheltered area, I found an exhibition of exquisite begonias. This white begonia struck me as perfect for monochrome, but I wanted to make sure that monochrome didn’t mean monotonous. The photo that I pre-visualized required subtle tonal gradations to make the flower appear to glow. So I made sure to process the image using multiple Black & White adjustment layers.
Nikon D850, Zeiss 50mm Makro-Planar, 1/30 of a second at f/22 and ISO 64, tripod mounted; converted to monochrome using Photoshop Black & White adjustment layers.