
Combining Conversions in Photoshop
It’s certainly true that no one black and white conversion technique works well for all photos. In addition, I usually find that a single black and white conversion technique doesn’t work for all parts of a photo. My expectation is that my black and white conversions will require a number of different filters and effects—with each one on its own layer and with different effects applied to different parts of the image.
As I’ve mentioned, before I even get to the black and white conversion I like to process the color photo so it will convert into a dramatic black and white shot. This often means increasing the contrast and saturation, as well as using multiple RAW processing techniques to properly bring out the exposure for the different areas of the photo (see pages 120–135).
Here’s an example of how I might go about using multiple conversion techniques in a single black and white conversion.
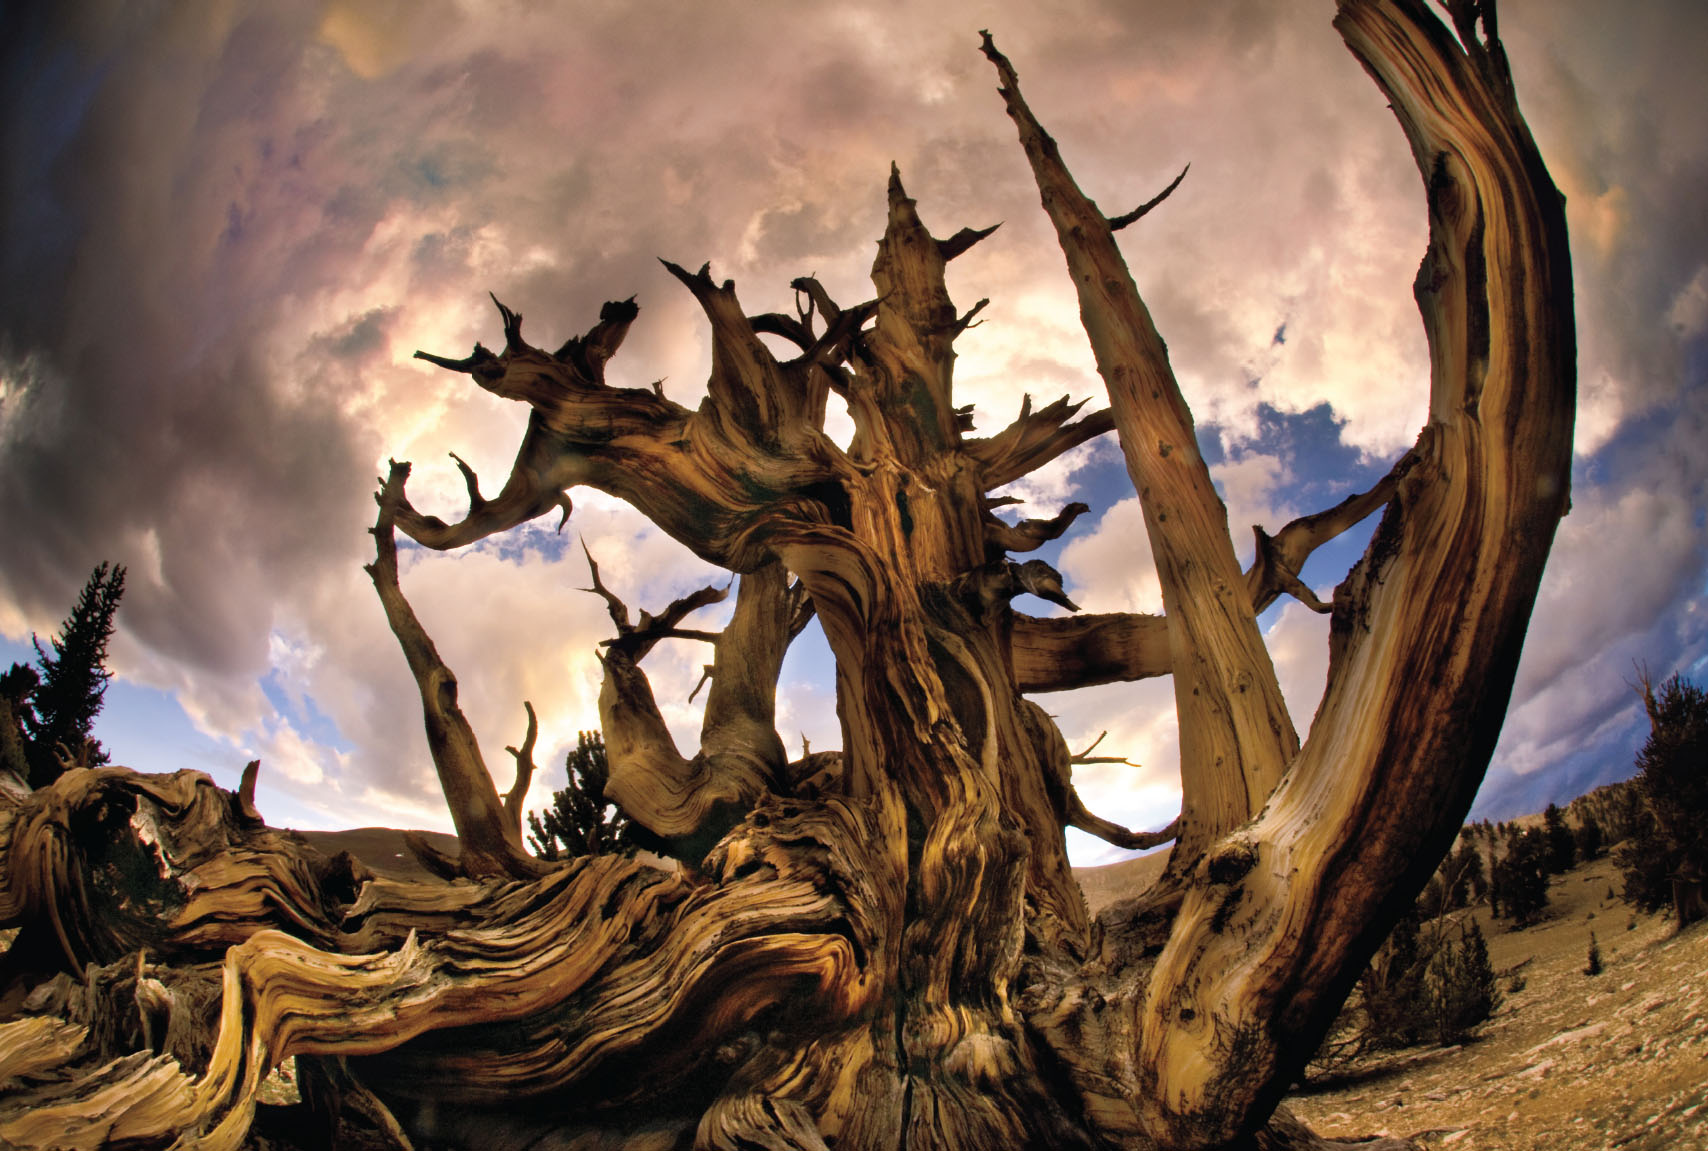
I started with a color version of a photo taken in the Patriarch Grove of the ancient Bristlecone Pine forest high in the desert mountains along the California-Nevada border. Bristlecone pines are known as one of the world’s oldest living things. The tree shown here is alive and has been around for thousands of years. It is situated dramatically above the distant landscape of the great basin and ranges of the American West.
To live up to the drama inherent in the color version with the spectacular late afternoon clouds in the background, I knew I would have to process the foreground portions of the image differently from the sky.
I processed the RAW file to increase saturation and contrast in the color image in preparation for conversion to black and white.
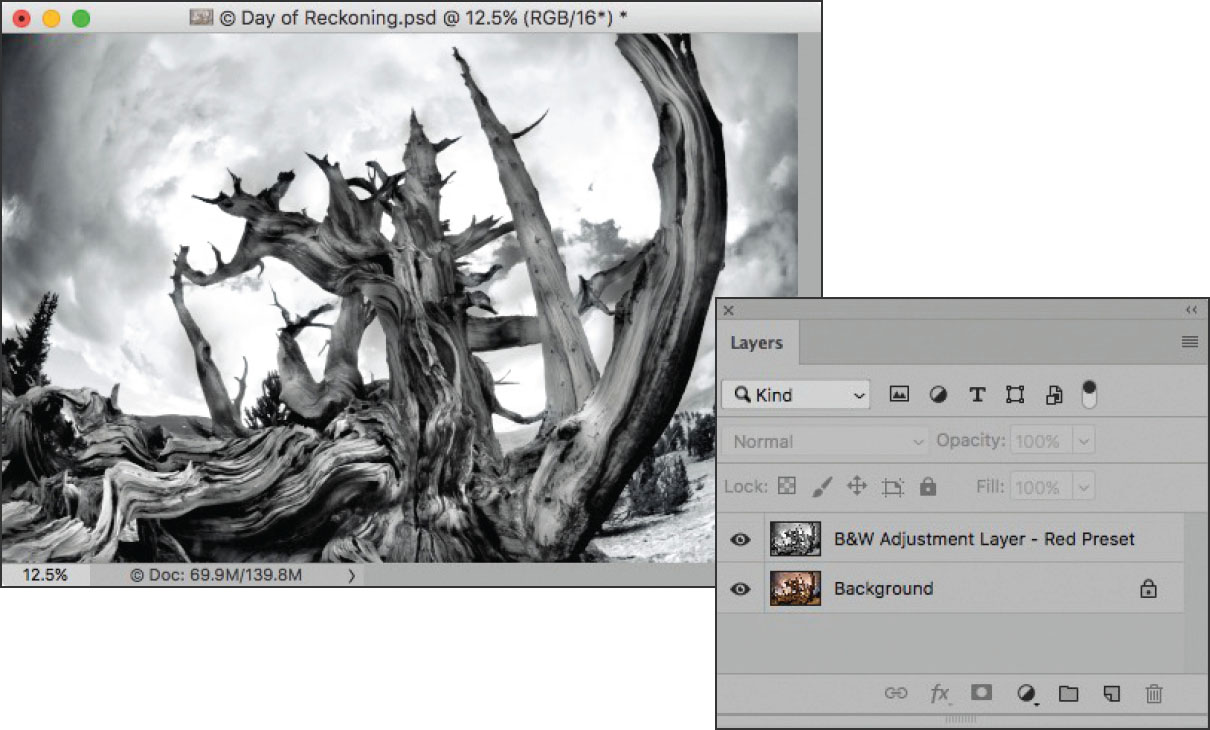
A Black & White adjustment layer using the Red Filter preset worked well for the trees. (See pages 144–149 for more about adjustment layers.)
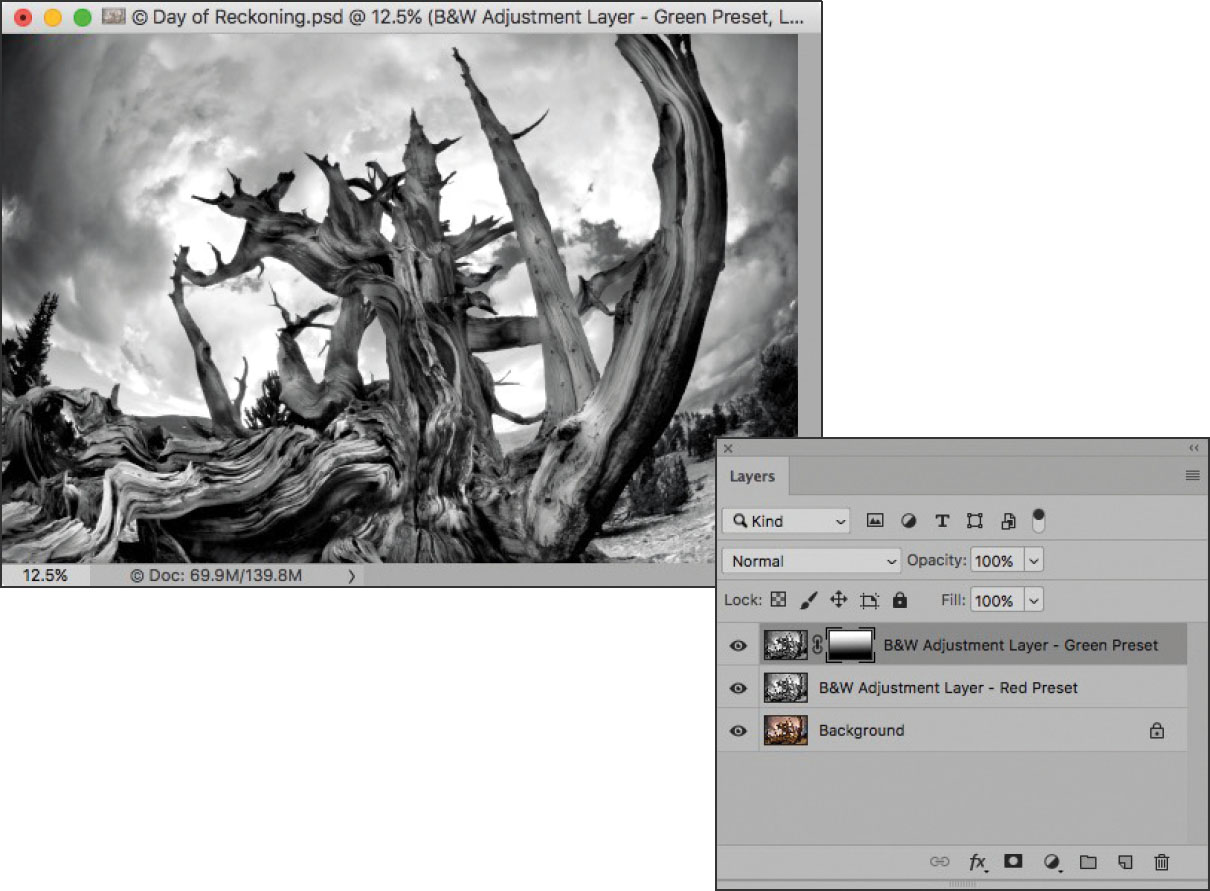
A Black & White adjustment layer using the Green Filter preset increased the contrast in the sky somewhat. I used a layer mask with a gradient so the Green Filter preset had no impact on the foreground. (See pages 120–129 for more about layer masks and gradients.)

I used the Silver Efex Pro High Structure filter to add some apparent depth to the old tree, “painting” in just the areas I wanted to enhance using the Brush Tool on a layer mask. (For more about Silver Efex Pro, turn to pages 150–154.)
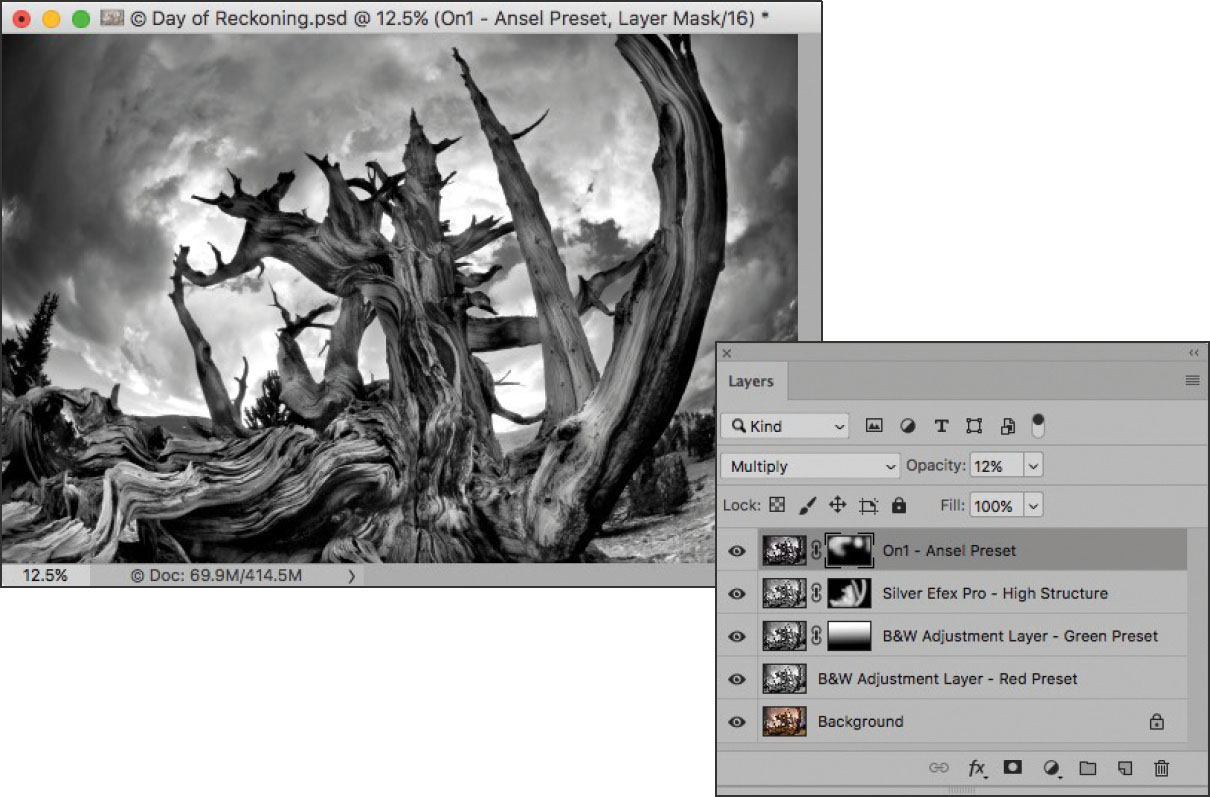
The On1 Ansel in the Valley Preset, combined with the layer beneath it in the stack using the Multiply blending mode at 12%, adds a little more drama to the sky.

Day of Reckoning—On a day of turbulent, dramatic clouds and weather I wandered in the high, desolate groves of Bristlecone Pines. These oldest of living things are a photographer’s dream—whether you work in color or black and white. I knew that to present the nuances and contrast in this subject I would need to use several conversion tools when I converted my capture to monochrome.
Nikon D300, 10.5mm digital fisheye, 1/60 of a second at f/22 and ISO 200, tripod mounted; processed in ACR and Photoshop, and then converted to black and white using Photoshop Black & White adjustment layers and Silver Efex Pro.