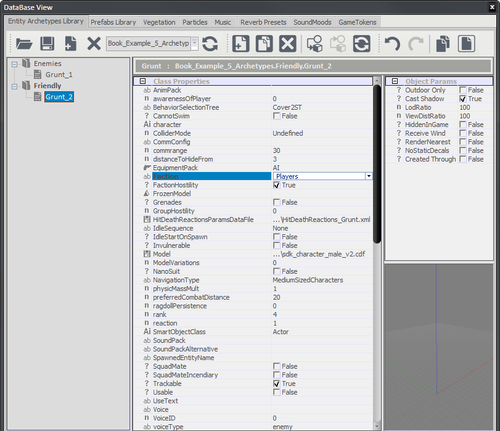
As we just discussed, archetypes are templates based on predefined script values. These parameters are exposed in the Archetype Library tab, which can be found in the DataBase View window.
In this example, we will create two opposing teams of Grunt objects using two archetypes:
- Open the DataBase View window by selecting the View menu and then opening View pane | DataBase View.
- In the DataBase View window, click on the create new library icon.
- Name this new
.xmllibrary Book_Example_5_Archetypes. - Add an item to the library with the add item icon.
- Name the group Enemies and the names of the enemy to Grunt_1.
- Do the same for a second group called Friendly, and name the friend Grunt_2.
- Set the Faction parameter of Grunt_2 to Players, as seen in the following screenshot:

- Drag Grunt_1 and Grunt_2 from the DataBase View and place them into your level.
- Copy a few Enemies and place them throughout your level, making sure that their attackrange is set to a suitable value.
- Copy a team of Grunt_2 characters.
- Once you switch to game mode, if the Grunt_2 characters are in range of Grunt_1 characters or vice versa, they will attack each other.
Using archetype entities is the best way to avoid the need to open every level across your game to change the settings of the AI. It is also highly useful when balancing and organizing your game entities.
- What is the main tool used within sandbox, for white boxing geometric design assets?
- Database view
- Solid tool
- Road tool
- Archetype entities
- What is the entity used at the start of a level that set's where the player will be standing when a level is started?
- Smart object
- Grunt entity
- Tag point
- Spawn point entity
- If you want to use multiple developer collaboration on a level, how would you accomplish this?
- Using external layers and version controlling them
- Ensuring that one designer works on the level at a time
- Dif-merging the
.cryfile
Now that we have some basic gameplay entities in place, we can proceed with saving and getting the level ready to be launched in the launcher.exe application.
Even though saving the level will create a .cry file, it is extremely important to know that the .cry cannot be accessed by the launcher.exe application. To export the level in a format that can be used by the launcher application, we will have to use the Export to Engine function, which even though we used in the first example, we will explore in a bit more detail.
