CSG or solids allow you to create a multitude of different shapes, all of which have their own physics properties tied to them; you can thus have your player collide into them, shoot them, or even walk on them. You can use these shapes to form complicated objects and merge them together, and later save and export these objects for use within other 3D art packages, such as 3D studio max or Maya.
On that note, let's get right into modeling some structures for us to use in our level. Before we begin, you must have Sandbox 3 open to any level:
- In the RollupBar, click on the Solid button.
- Ensure that the alignment tool is set to Follow Terrain and that the Grid snap value is set to the default 1 meter snapping.
- Click-and-drag anywhere on the terrain, in the level, and you will see a two-dimensional form starting to take shape. Once you release the mouse button, the width and length of the shape will be set.
- Next, note that when you drag your mouse up-and-down, you will see that this is adjusting the height of the Solid object. Clicking on the left mouse button a second time will finalize its placement.
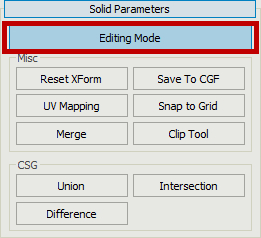
- Create a 20x20x20 meter cube by reading the size (in meters) displayed on each axis of the solid as you create it. You should end up with something like the following screenshot:
As you can see, the Solid tool is a very basic geometry creation tool within the editor, which is very easy to use.
Try experimenting with some of the different properties that are available. Create other shapes, such as cones, spheres, and cylinders.
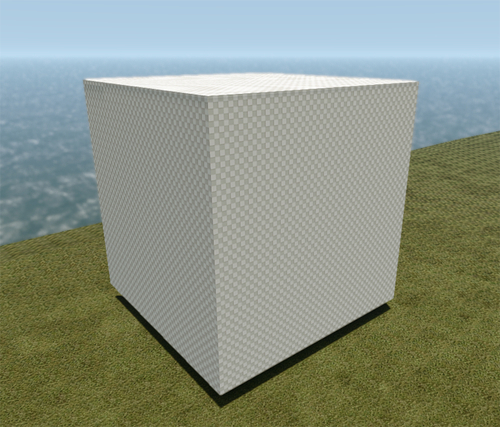
- Select the Solid object you just created, and click on the Editing Mode button in the Solid Parameters tab, as seen in the following screenshot:
- For those who are familiar with DCC tools such as 3DS Max or Maya, Editing Mode should look very familiar. It allows you to modify the shape of the solid by changing the location of the vertices, edges, faces, and polygons.
Let's now turn our cube into a very simplistic, house-like structure, keeping in mind that the goal is simply to make it suitable for the white boxed level art.
- Change Selection Type to Polygon as seen in the following screenshot:

- Select the top of the Polygon on the cube by clicking on the face; you will know it's selected when the face is highlighted in red, as seen in the following screenshot:

- Under the Sub Object Edit rollout, select Face | Split.
- Now change your Selection Type from Polygon to Vertex.
- Select the top center of Vertex, which will have been created when the face was split in the previous step.
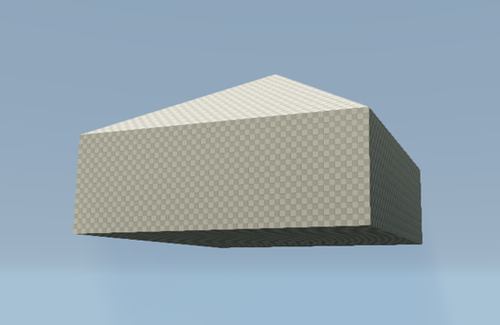
- Drag this Vertex slightly upwards, on the Z Axis, so that the total height of the Solid object is now around 30 meters; you will now have something akin to the following screenshot:
- Change your Sub Object | Selection Type back to Polygon.
- Now, select the bottom of the Polygon object and move it upwards to reduce the overall height of the body of the white boxed house. The final height should end up around 20 meters and look similar to the following screenshot:
- Exit the Editing Mode window by pressing the Esc key and then move the entire object itself down to the terrain.
When constructing objects with the Solid tool, we can stack multiple, primitive shapes together to form the groups of shapes required for an object or even to form quite elaborate structures over time.
Let's create one now by making a very basic chimney for the white box house we created, to make it a bit more recognizable as a house.
- Using the methods learned in the previous steps, create a new Solid shaped as a box, with the dimensions of
5x7x10meters. - With the new box selected, move it to the roof of the house and place it where a chimney would make sense. Again, refer to real life houses to get the positioning correct.
Once completed, you should have something similar to the following screenshot:

- Select both the Solid objects you have created by holding the Ctrl key and clicking on them both.
- In the Solid Parameters rollout, click on the Merge button.
You now have combined Solid objects that can be managed as a single object.
- To export the newly merged solid from the editor, click on File | Export Selected Geometry to .OBJ.
- Set the name that you wish to save the
.objfile as, and select the location in which to save it.
You can now either send this file to a 3D artist or open it yourself in a DCC tool, such as 3D Studio Max or Maya, to further polish and finalize the asset.
Congratulations! You have made your first white box model. This is just a simple example, and you can easily use the skills learned in it, to create just about any kind of creative mean to show you some of the tools. You have just learned the basic of white boxing and CSG modelling within the CryENGINE SDK. A very important fact about creating these box-modelled structures is that they are not automatically combined into a single mesh. They are dealt with, currently, as two distinct objects. It is desirable to merge these objects into a single mesh for a few reasons, the first being that once combined into a single object, it can be easily copied and pasted throughout the level. Additionally, should you want to export these objects from the level into a format readable by external 3D applications, you will need to merge them together.
Try to build a few different types of objects for your level:
- Create a skyscraper by using a single Solid object
- Create a bridge using merged objects
- Create a room using simple walls
- Try to build a dock coming from the beach to the water using various primitives shapes