
Let's follow a few simple steps:
- In order to call our ActionScript functions and manipulate our movieclips and variables, we have to announce them in the XML file. For this, we need to add some more tags into our
<UIElement>tag. Let's start with the<functions>tag:<functions> <function name="SetWeapon" desc="" funcname="setCurrentWeapon"><param name="WeaponName" desc="" type="string"/> <param name="AmmoName" desc="" type="string" /> </function> <function name="SetAmmo" desc="" funcname="setAmmo"> <param name="CurrAmmo" desc="" type="int"/> <param name="MaxAmmo" desc="" type="int" /> </function> </functions> - For each function, you have to define a human-readable name and the corresponding ActionScript function name. Optionally, you can give a description that will be displayed on the Flownode for this function.
- Within the function tag, you need to define the arguments that are passed to this function. The name must not match the argument name in your ActionScript code. Additionally, you can define a description and a type. As a type, you can use:
bool: True or false.int: Integer number.float: Floating point value.string: A string.any: Default if you don't define the type. It can be any input.
Note
The types will define the port type of the Flownode. If you use the
anytype, the value will be converted to the best matching type (bool|int|float|string).Defining a type will also increase performance, because no autoconversion is needed. Besides that, it is not possible to type in the value directly into the Flownode if you choose the
anytype. - Next, we want to have access to our health bar movieclip. In order to do so, we need to define the movieclip as well.
<MovieClips> <MovieClip name="HealthBar" desc=""instancename="healthMC" /> </MovieClips> - Each movieclip needs a human-readable name and an instance name. Optionally, you can also give a description.
- Similar to our movieclip definition, we can announce variables.
  <Variables>
    <Variable name="HealthValue" desc=""varname="healthMC.currHealth.text" />
  </Variables>
The final XML should look like this:
<UIElements name="HUD"> <UIElement name="NewHUD" render_lockless="1">render_lockless="1"> <GFx file="NewHUD.swf" layer="1"> <Constraints><Align mode="dynamic" valign="center" halign="center" scale="1" max="0" /></Constraints> </GFx> <functions> <function name="SetWeapon" desc="" funcname="setCurrentWeapon"><param name="WeaponName" desc="" type="string"/> <param name="AmmoName" desc="" type="string" /> </function> <function name="SetAmmo" desc="" funcname="setAmmo"> <param name="CurrAmmo" desc="" type="int"/> <param name="MaxAmmo" desc="" type="int" /> </function> </functions> <MovieClips> <MovieClip name="HealthBar" desc="" instancename="healthMC" /> </MovieClips> <Variables> <Variable name="HealthValue" desc="" varname="healthMC.currHealth.text" /> </Variables> </UIElement> </UIElements> - Save the XML file. Now copy the
NewHUD.swffile into<engine root>GameLibsUINewHUD.swf. - Because CryENGINE 3 Sandbox supports the reloading of SWF files, it is a good idea to also copy the
NewHUD.flafile into<engine root>GameLibsUINewHUD.fla. This allows you to publish your SWF file into the correct folder, and you can reload your changes in Sandbox without coping the SWF file because it was published in the correct folder. - Your game folder should look similar to the the following screenshot:
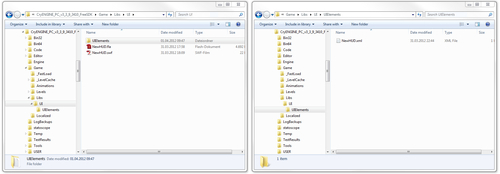
With your NewHUD.xml, the engine now knows your new UIElement. You will now be able to display the new HUD, call functions, and manipulate your movieclips/variables within Sandbox Flow Graph. First, we defined the UIElement and the associated SWF file. Then, we added the movieclips and textfields to the XML file to make them accessible in CryENGINE. Finally, we also added our ActionScript function in the XML file to be able to call this function easily from Flow Graph.
The next part will show you how to use the UI Emulator to test your asset. Then we will create a simple UI Action in the Flow Graph to feed the data, and call our ActionScript function of the new HUD.