
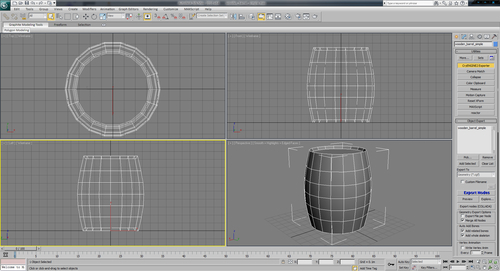
In this example, we begin with a simple, cylinder-type mesh that will become a wooden barrel. First, let's create some geometry for your first object:
- Create your own custom mesh; or for this example, open the example file wooden_barrel_simple.max as seen in the following screenshot:
The pivot of the object in 3ds Max will become the pivot of the object when used in the engine. This is important to know, because moving the pivot point of the object to different locations will make placing it easier later on in the engine.
- Align the pivot of the object to
0,0,0. This will make aligning the object to terrain or even other objects easier later on, when using from the editor.Let's create a material for our object now, which we can use to texture and modify some physical parameters.
- Open the Material Editor window in 3ds Max by pressing the keyboard shortcut M.
- Create a new Multi/Sub-Object material in the first material slot by clicking on the Standard button, as seen in the following screenshot:
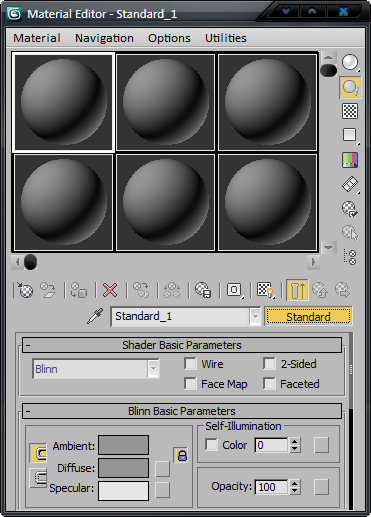
- Select Multi/Sub-Object from the dialog box that opens.
- Next, set the number of submaterials to two by clicking on the Set Number button in the newly created material.
Note
CryENGINE 3 supports up to 32 submaterials; however, every submaterial that is rendered will add to the overall draw call count of the asset. We will discuss the performance implications of too many draw calls later, but for now, understand that they should be kept as low as possible. For the best performance, keep the number of submaterials low to manage this.
We should give the material and all the submaterials appropriate names; as and when we create the
.mtlfile, these names will be exported and used by the engine.The name of the material that you assign to an object in 3ds Max must be the same as the name of the
.mtlfile created. - Name the parent material wooden_prop and the subsequent Sub-Material as texture and proxy, as seen in the following screenshot:

- This step is very important as you must open each submaterial and set the Shader Basic Parameters to the Crytek Shader type, as seen in the following screenshot:

Having selected the Crytek Shader option for both the submaterials, you will see a new parameter for these materials under the heading of Physicalization.
This setting controls the way the material acts in the engine, particularly with physics properties.
The default setting can be used for most materials because it has no additional physics capabilities.
- Select the Proxy submaterial and change its Physicalization type to Physical Proxy (NoDraw). This will cause any geometry assigned to this submaterial to be ignored by the renderer, making it invisible to the user.
- Next, to actually physicalize the material in the engine, select the Physicalize checkbox as seen in the following screenshot:

If Physicalize is disabled, the object will not physically interact with anything in the game world.
Now that our material is set up, we can create the
.mtlfile.The
.mtlfile must be created in the directory in which you plan to save your assets. - Open the CryENGINE Exporter and locate the Material rollout, as seen in the following screenshot:
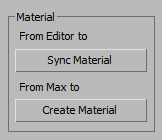
Ensure that the topmost material is active; you should see all the submaterial in their list. If a submaterial is active while creating the
.mtlfile, the file will contain only that submaterial. - Create the
.mtlfile by clicking on Create Material.The Sandbox Material Editor window will open.
- Click on Create Material in 3ds Max a second time. You will then, finally, be asked to enter a filename for the new MTL file.
Again, ensure that this name is same as the material in 3ds Max.
- For this example, save this material as
wooden_prop.mtlto a directory namedobjects/wooden_props/.Let's assign the wooden_prop material to the wooden_barrel_simple object in 3ds Max now.
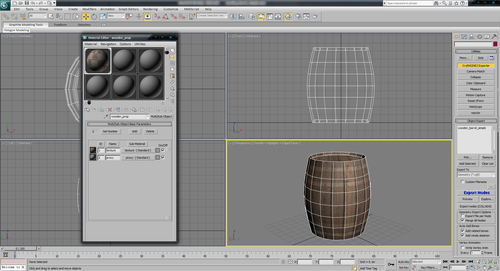
- Click on the Assign Material to Selection icon in the 3ds Max's Material Editor, ensuring you have the object selected.

Now that we have our material applied, we can assign a texture to it.
Before assigning textures to your mesh, we must first make sure we have UV mapped our object. UV mapping is a technique where the 3D object is laid out flat onto a 2D texture map. UV mapping of an object also determines how the faces of a particular mesh will display texture.
For this object, a simple automatic cylindrical unwrap makes the most sense, as shown in the following screenshot:

We can now assign a texture to the first submaterial.
Ensure that all the polygons in your object are set to
material ID 1. - Assign an appropriate, wooden-type texture to the texture submaterial.
- When exporting, it is important that your mesh be an editable poly or editable mesh, and the modifier stack be collapsed to avoid any unsupported modifiers on export.
- Save your
.maxscene in the same location as where you want to store the asset. In this case, save the.maxscene toGameobjectswooden_propswooden_barrel_simple.max. - To export the object, open the 3ds exporter and locate the Object Export section at the top of the interface, then select your prop, and click on the Add Selected button. You will notice that its name is added to the export list, as seen in the following screenshot:
- Next, select the type of file you'd like to create from the Export To pull-down menu; in this case it is a Geometry (*.CGF) file.
- Next, click the Export Nodes button. This will export the object to the same folder as the 3ds Max file. By default, the exported object will be given the same name as the 3ds Max filename, which in our case is
wooden_barrel_simple.cgf.One thing should be noted about smoothing groups. Smoothing groups should be assigned during export. If they are not found on the mesh, the exporter will generate and apply a single unified group automatically, which can cause rendering errors on the mesh. Smoothing defines the way the faces of a 3D model interact with light and shading to give the illusion of a rounder or smoother mesh.
The final step of this example is to preview the asset in the engine!
- Open up the CryENGINE Sandbox Editor and load any level.
- On the RollupBar, select Brush and browse to wooden_props/wooden_barrel_simple.cgf. Click-and-drag it into the perspective viewport in the level.
You will notice that the geometry is there, but the texture is red and reads Replace me.
This is simply telling us that our
.mtlfile does not have a valid texture in the Diffuse slot. - To rectify this, select the prop and open the Sandbox Material Editor by using the keyboard shortcut M.
- Click on the Get material from selection tool.
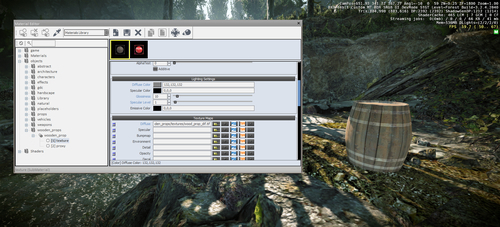
- Go to the Diffuse slot of the first submaterial of your object, using the browse button. Locate the texture you want to use for the object. For this example, use the texture objects/wooden_props/textures/wood_prop_dif.tif (see the following screenshot for reference).
Congratulations! You have created your own custom object with material and texture.
We've just broken the biggest barrier to the entry when working with our own custom assets and a game engine; we've successfully created and exported our own creation to the CryENGINE. We created a basic mesh and material within 3ds Max, and then exported it in a CryENGINE compatible format. Finally, we placed the object within a level and adjusted basic material parameters. As all material parameters can be changed and previewed in real time, it is easy and fun to experiment with different colors, textures, shader settings, and other parameters. Happily, this is only the beginning; there are many more things to consider when working with static objects. Physical dynamics is one such consideration.
The physics proxy is the geometry that is used for collision detection by the physics system. It can be part of the visible geometry as seen in the preceding example, or linked to it as a separate node completely and made invisible. Usually, the physics proxy geometry is a simplified version of the render geometry, but it is also possible to use the render geometry directly for physics. For performance reasons, the collision geometry should be kept as simple as possible, because checking for intersections on complex geometry is very expensive, especially if it happens often. A physics proxy is set up in the DCC tool exclusively. The only setup needed in Sandbox is assigning the surface type.
It may be required that some objects have specific physics or dynamic properties applied. These properties can be added using the User Defined Properties option within 3ds Max. Select an object and, on the Edit menu, click Object Properties to access the User Defined Properties list of that object, as seen in the following screenshot:

Some common parameters that can be used are:
- box: Force this proxy to be a box primitive in the engine.
- cylinder: Force this proxy to be a cylinder primitive in the engine.
- capsule: Force this proxy to be a capsule primitive in the engine.
- sphere: Force this proxy to be a sphere primitive in the engine.
- Mass: This value defines the weight of an object. If the value is set to zero, it sets the object to unmovable mode, which is perfect for static meshes.
- no_explosion_occlusion: It will allow the physical forces and the damage from explosions to penetrate through the geometry. A good example of this could be a chain-link fence, where explosions should not be blocked.
There are several methods of setting up breakable assets, which the player can destroy in CryENGINE. In this example, we will be going through the process of creating a destroyable object entity.
Destroyable objects are assets that contain the original object and some precreated pieces, which spawn when this original object is destroyed. It destroys into the precreated pieces when taking more damage than the specified health property of the entity.
Good candidates for destroyable objects are glass bottles, explosive barrels, computer monitors, and, consequently, wooden barrels. Larger objects can also be destroyable, but it will depend mostly on what the gameplay requires, such as a destroyable vehicle or wall.
All of these assets normally consist of precreated pieces, which emit when the object is destroyed.