
The first step in creating a file server is to install the necessary features to the server, then harden it. You use the Add-WindowsFeature cmdlet to add the features necessary for a file server. You can then use the Set-SmbServerConfiguration cmdlet to improve the configuration.
Since your file server can contain sensitive information, you must take reasonable steps to avoid some of the common attack mechanisms and adopt best security practices. Security is a good thing but, as always, be careful! By locking down your SMB file server too hard, you can lock some users out of the server. SMB 1.0 has a number of weaknesses and, in general, should be removed. But, if you disable SMB 1.0, you may find that older computers (for example, those running Windows XP) lose the ability to access shared data. Before you lock down any of the server configurations, be sure to test your changes carefully.
- Add the
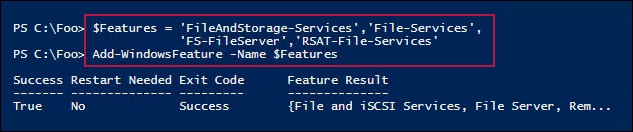
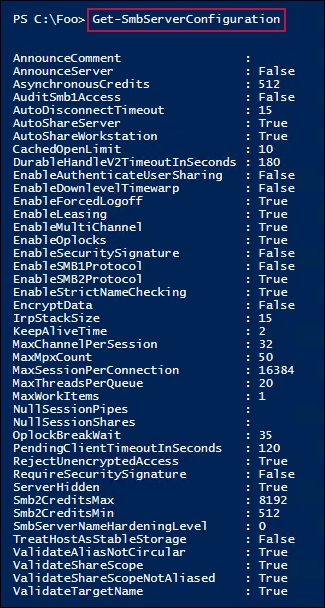
FileServerfeatures and RSAT tools toFS1:$Features = 'FileAndStorage-Services','File-Services', 'FS-FileServer','RSAT-File-Services' Add-WindowsFeature -Name $Features - Retrieve the SMB Server settings:
Get-SmbServerConfiguration
- Turn off SMB1:
$CHT = @{ EnableSMB1Protocol = $false Confirm = $false } Set-SmbServerConfiguration @CHT - Turn on SMB signing and encryption:
$SHT1 = @{ RequireSecuritySignature = $true EnableSecuritySignature = $true EncryptData = $true Confirm = $false } Set-SmbServerConfiguration @SHT1 - Turn off the default server and workstations shares:
$SHT2 = @{ AutoShareServer = $false AutoShareWorkstation = $false Confirm = $false } Set-SmbServerConfiguration @SHT2 - Turn off server announcements:
$SHT3 = @{ ServerHidden = $true AnnounceServer = $false Confirm = $false } Set-SmbServerConfiguration @SHT3 - Restart the service with the new configuration:
Restart-Service lanmanserver
In step 1, you add four features to the FS1 server (FileAndStorage-Services,File-Services,FS-FileServer,RSAT-File-Services), which looks like this:
In step 2, after adding the necessary features to FS1, you get the SMB server configuration using the Get-SMBServerConfiguration cmdlet. This returns 43 separate configuration properties. You can change some of these to harden your SMB server or to accommodate unique aspects of your infrastructure. Some of these properties, however, are relatively obscure—if you don't know what they do, consider leaving them at their default values.
The output of this step looks like this:
In step 3, you turn off SMB1. In step 4, you configure the server to sign all SMB packets and to encrypt data transferred via SMB. SMB signing is particularly useful to reduce the risk of a man-in-the-middle attack. Requiring data encryption increases the security of your organization's data as it travels between server and client computers. Another benefit of using SMB encryption versus something such as IPSec is that deployment is just a matter of adjusting SMB server configuration.
Windows has a set of administrative shares it creates by default. In most cases, you can disable these. In step 5, you turn off the default server/workstation shares. It's important to note that when setting up DFS Replication, the DFS Replication cmdlets require access to these administrative shares.
With step 6, you also turn off server announcements, which reduces the visibility of your file server to hackers.
With those configuration items updated, in step 7, you restart the file server service lanmanserver. Note that restarting the service closes any active connections. Ensure you restart during a scheduled maintenance outage or when you're certain the server is inactive.
These final five steps created no output. After you update these configuration settings, you can use Get-SMBServerConfiguration to confirm the correct server settings are in place.
In this recipe, you hardened a full installation of Windows Server 2019. To further harden your file server, consider using Server Core for your hosts.
In step 3, you disabled SMB1. SMB1 is an older and less secure version of the SMB protocol and could represent an attack vector. The downside of disabling it is that older client computers only support SMB1 and could cease to access shared data if you disable SMB1. Older clients include Windows XP and Windows Server 2003. Windows Vista/Server 2008 and later versions of Windows have built-in support for SMB2. So, as long as you're running fully-supported clients and server systems, you should be able to turn off SMB1.
For large organizations, you should consider using the AuditSmb1Access configuration setting. This setting logs access your server via SMB1. To discover any older SMB clients that would be affected by disabling SMB1, you can search the SMB event log.